You’ve probably seen those little black tubes snaking through garden beds and wondered how they work. That’s drip irrigation, a highly efficient method that acts like a personal hydration system for your plants. Instead of spraying water into the air like a traditional sprinkler, it delivers a slow, steady drip right at the soil level. For us in the Denver area, this is a game-changer for conserving water and growing healthier plants. This comprehensive guide will walk you through every stage of a drip system irrigation installation, from choosing the right parts to mapping your layout, ensuring you have the knowledge to build a system that works.
Key Takeaways
- Plan Your Layout First: Before buying anything, sketch your garden and group plants by their watering needs. This simple step ensures you buy only what you need and design a system that works efficiently for your specific yard.
- Get the Spigot Assembly Right: The components at your water source are non-negotiable for a successful system. Always install a timer, backflow preventer, filter, and pressure regulator—in that order—to protect your home’s water supply and prevent clogs.
- Perform Simple, Regular Check-ups: A monthly walk-through while the system is running is the best way to spot and fix minor issues like leaks or clogs. Properly winterizing your system before the first freeze is also essential to prevent damage.
What is Drip Irrigation?
If you’ve ever felt like you spend more time dragging a hose around your yard than actually enjoying your garden, drip irrigation might be the game-changer you need. Think of it as a personal hydration system for your plants. Instead of casting a wide, often wasteful, spray with a traditional sprinkler, a drip system uses a network of tubes to deliver water slowly and precisely to the base of each plant, right where it’s needed most. This method is incredibly efficient for garden beds, rows of vegetables, and even potted plants on your patio.
The biggest win here is water conservation. Traditional sprinklers can lose a significant amount of water to wind and evaporation before it ever reaches the soil. Drip systems, on the other hand, minimize that loss by applying water directly to the root zone. For us in the Denver metro area, where every drop counts, this is a huge advantage. Your plants get a consistent, steady supply of moisture, which helps them develop deeper roots and become more resilient to dry spells. It’s a simple, effective way to maintain a vibrant garden, and a well-planned system is a key feature in any professional hardscape and landscape contractor project, ensuring your new plants thrive from day one.
The Parts of a Drip System
A drip irrigation system might sound complex, but it’s made up of a few key components that work together seamlessly. It all starts at your water source, where a head assembly connects to your spigot. This includes a timer for automation, a backflow preventer to protect your drinking water, a filter to catch debris, and a pressure regulator to ensure a gentle flow. From there, the main 1/2″ tubing acts as the primary artery, carrying water to your garden areas. Smaller 1/4″ emitter tubing branches off this main line to reach individual plants. Finally, emitters or drippers are attached to release water at a slow, controlled rate.
Why It’s Perfect for Denver Gardens
For homeowners in the Denver area, water is a precious resource. Drip irrigation is a perfect fit for our climate because it can reduce your garden’s water use by up to 80% compared to traditional sprinklers. That translates directly into lower water bills and a more sustainable yard. By delivering water directly to the soil, you also discourage weed growth between plants and prevent common fungal diseases caused by wet leaves. Ultimately, a drip system is a smart investment that makes plant care easier and helps you create lush, beautiful outdoor living spaces that flourish all season long, even when conditions are dry.
Gather Your Drip Irrigation Supplies
Alright, with a good understanding of what a drip system is and why it’s great for Denver, it’s time for the fun part: gathering your materials. Think of it as a treasure hunt for your garden. Having all your supplies ready before you start will make the installation process a whole lot smoother. A well-planned shopping list prevents those annoying mid-project trips to the store. This is a crucial step for any successful landscape project, ensuring you have exactly what you need to get the job done right the first time. Let’s break down what you’ll need to grab.
Your Materials Checklist
Walking into a hardware store’s irrigation aisle can feel a little overwhelming, but don’t worry. Here’s a straightforward list of the essential components for your drip system.
- Main line tubing (1/2″): This is the backbone of your system, carrying water from the source to different parts of your garden.
- Emitter tubing (1/4″): Also called micro-tubing, this smaller line branches off the main line to deliver water directly to your plants.
- Emitters: These are the small but mighty workhorses that drip water slowly and steadily onto the soil.
- Connectors, tees, and elbows: These fittings help you direct the tubing around corners and split the water flow.
- Stakes: Simple stakes hold the emitter tubing in place, ensuring water gets delivered right where you want it.
- Punch tool: A handy gadget for making clean holes in the main line tubing where you’ll insert emitters or smaller tubing.
- End caps: These seal the ends of your tubing lines to maintain water pressure.
- Backflow preventer, filter, and pressure regulator: This trio connects to your spigot to protect your drinking water, keep debris out of the lines, and ensure the water pressure is just right for your system.
- Timer: An automatic timer is your best friend for consistent, hands-off watering.
Tools You’ll Need
You don’t need a massive toolbox for this project, but a few key items will make your life much easier. Besides your punch tool, you’ll want a sturdy pair of garden shears or a utility knife for cutting the tubing to the right lengths. Here’s a pro tip: have a thermos of hot water handy. Dipping the end of the 1/2-inch tubing in hot water for a few seconds softens the plastic, making it much easier to slide onto the connectors. This simple trick will save your hands and a lot of frustration.
Where to Find the Best Parts
You can find drip irrigation supplies at most local garden centers and big-box home improvement stores throughout the Denver metro area. Online retailers specializing in irrigation are also a great option, often offering kits that bundle the basics together. While it might be tempting to go for the cheapest option, investing in quality parts from the start pays off. A durable system will last longer, perform better, and ultimately save you more money on water bills. It’s a smart investment in creating a beautiful and sustainable outdoor living space that you can enjoy for years to come.
Plan Your Drip Irrigation Layout
Before you cut a single piece of tubing, taking the time to create a solid plan will save you countless headaches down the road. Think of this as the blueprint for your garden’s success. A well-designed layout ensures every plant gets the right amount of water without waste, which is especially important in the Denver metro area’s dry climate. A thoughtful plan prevents common issues like uneven watering, stressed plants, and leaks.
Sketching out your garden beds, noting where different plants are located, and mapping the path of your tubing doesn’t have to be complicated. A simple drawing on a piece of paper is all you need. This visual guide will help you figure out exactly what parts you need to buy and where everything should go, making the installation process much smoother. It’s the most critical step toward creating an efficient, water-wise system that keeps your landscape looking its best.
Check Your Garden’s Needs
First, take a walk through your garden and get to know your plants’ specific water requirements. A thirsty tomato plant in full sun requires much more water than a patch of drought-tolerant lavender. As irrigation experts point out, “The most common mistake people make when designing their system is not including enough drip emitters into the plan.” This oversight can lead to underwatered, unhappy plants.
Make a list of your different plant types and their locations. A good rule of thumb is to place at least one emitter at the base of each small plant and two or more for larger shrubs and trees. By assessing what each plant requires, you can ensure your system delivers water precisely where it’s needed, promoting deep root growth and a healthier garden.
Map Your Watering Zones
Next, group plants with similar needs into “watering zones.” Think of it like seating guests at a dinner party—you put those with common interests together. In the garden, you should group plants that have similar sun exposure and water requirements. For example, your vegetable garden would be one zone, while a bed of native perennials could be another. This allows you to run each zone for a specific amount of time, delivering the perfect amount of moisture.
If you have a zone with mixed needs, you can still customize it. As the experts at Drip Depot note, “If you have two plants on a zone, and one plant needs twice as much water as the other, you can put a dripper with double the flow rate at the plant that needs more water.” This level of control is a key part of professional landscape design and is easy to achieve at home.
Calculate Water Pressure and Flow
Finally, let’s talk about your water source. Your drip system’s performance depends on two things: water pressure, measured in pounds per square inch (psi), and flow rate, measured in gallons per hour (GPH). Don’t worry, this is easier than it sounds. Most drip systems work best with pressure between 15 and 25 psi, so you’ll likely need a pressure regulator to bring your home’s pressure down to that level.
Your water source’s flow rate must be greater than the total GPH of all the emitters in a single zone. To find your flow rate, you can do a simple bucket test. Add up the GPH ratings of all the emitters you plan to use in one zone. If that total is higher than what your spigot can supply, you’ll need to split it into smaller zones.
Install Your Drip Irrigation System: A Step-by-Step Guide
Alright, you’ve got your plan and your parts. Now for the fun part: putting it all together. Installing a drip irrigation system is a lot like a grown-up LEGO project—it’s all about connecting the right pieces in the right order. Don’t feel intimidated; we’re going to walk through this one step at a time. The process is straightforward, and the payoff of a healthy, efficiently watered garden is well worth the effort.
Before you start, it helps to unroll your tubing and let it sit in the sun for an hour or so. This makes it much more flexible and easier to work with. Once your tubing is ready, you can follow these four main steps to get your system up and running.
Step 1: Connect to Your Water Source
Everything starts at the spigot. This is the control center for your entire system, and getting it right is key to protecting your plants and your plumbing. Start at the faucet and attach your components in this order: first, a timer to automate your watering schedule. Next, add a backflow preventer, which is a non-negotiable device that stops garden water from contaminating your home’s drinking water. After that, attach a filter to catch any debris that could clog your emitters. Finally, screw on a pressure regulator to bring your home’s water pressure down to a level the drip system can handle. Once those are all connected, you can attach your main 1/2″ supply tubing.
Step 2: Lay the Main and Distribution Lines
Think of your 1/2″ tubing as the main highway for your water. Run this main line from your water source around the perimeter of your garden or along the main rows of your plants. Use landscape stakes every few feet to secure the tubing to the ground and keep it from shifting. This keeps things tidy and prevents tripping hazards. Wherever you need to branch off to a different garden bed or a row of shrubs, you can cut the tubing and insert a “T” or “elbow” connector. This allows you to create smaller distribution lines that deliver water exactly where it’s needed, giving you a customized layout for your unique garden.
Step 3: Place Emitters and Drippers
Now it’s time to tell the water where to go. You have two main options here. The first is to use a special hole-punch tool to make small holes in your 1/2″ tubing exactly where you want to water a plant. Then, you simply pop an emitter directly into each hole. The second option is to attach smaller 1/4″ tubing (sometimes called spaghetti tubing) to the main line, which can then be run directly to individual plants. You can buy this smaller tubing with emitters already installed every 6 or 12 inches, which is great for vegetable rows or flower beds. Choose the right type of emitter based on your plants’ needs.
Step 4: Test and Adjust Your System
You’re almost there! Before you cap the ends of your lines, you need to flush the system. Turn on the water for a minute or two to wash out any dirt or plastic bits left over from the installation process. Once the water runs clear, you can install end caps or clamps on all your lines. Now, turn the water on again and take a walk through your garden. Check every connection for leaks and watch each emitter to make sure it’s dripping properly. This is your chance to make adjustments. Is an emitter too far from a plant’s base? Move it. Does a section look too dry? Add another emitter. Fine-tuning now will ensure your garden gets the perfect amount of water all season long.
Troubleshoot Common Drip System Issues
Even with a great installation, your drip system might hit a snag. Don’t worry—most issues are simple to fix yourself. A quick walk-through of your garden is often all it takes to spot the problem. Let’s look at the most common hiccups and the straightforward steps to get your system running smoothly again. Think of it as a quick health check-up for your garden’s watering system.
Low Pressure or Clogged Emitters?
If your plants look thirsty when the system is on, you might have low water pressure or clogged emitters. This is a frequent issue, especially with the mineral content in our Denver area water, which can cause sediment and algae buildup. First, check the filter near your water source; a dirty filter is the most common culprit. If that’s clean, inspect the emitters themselves. You can often clear a clog with a small pin or by soaking the emitter in vinegar. Regular system flushing is your best long-term strategy to prevent future clogs.
Leaky Connectors or Kinked Tubes?
Seeing puddles near your tubing or dry plants at the end of a line? You likely have a leak or a kink. Leaks often happen at the connectors, while kinks can stop water flow entirely. Walk your irrigation lines and look for any drips or sharp bends. If you find a leaky connection, push the tube and fitting together more securely; you may need to replace the fitting if it still drips. For a kinked tube, simply straighten it. If it’s permanently creased, cut out the damaged section and join the ends with a coupling. These quick fixes save water and ensure every plant gets what it needs.
Uneven Watering? Here’s What to Do
When some plants are drenched while others are dry, the problem is usually the system’s layout. This happens if emitters are placed too far from a plant’s roots or have the wrong flow rate for that plant’s needs. A thirsty tomato plant needs more water than a drought-tolerant succulent, for example. Check your layout: are plants with similar needs grouped together? Are the emitters delivering the right amount of water? You may need to swap some emitters for a different flow rate or add more to cover the root area. If the issue persists, it might be a design problem in your outdoor living space that a professional can help solve.
Maintain Your Drip Irrigation System
Once your drip irrigation system is up and running, a little regular maintenance will keep it working efficiently for years to come. Think of it like a quick health check-up for your garden’s watering system. Staying on top of upkeep helps you catch small issues before they become big headaches, ensuring your plants get the consistent hydration they need to thrive. It also protects your investment by preventing damage and saving water. With just a few simple steps each month and at the change of seasons, you can ensure your system performs perfectly.
Your Regular Maintenance Checklist
About once a month during the growing season, take a few minutes to walk through your garden while the drip system is on. This is the best way to spot problems. Look for emitters that are clogged and not dripping, or for any visible leaks in the tubing. It’s a good idea to mark any problem spots with a small flag so you can easily find them again. While you’re at it, check and clean the filter to remove any sediment that could clog your emitters. Also, flush the ends of your main lines by removing the end caps and letting the water run for a minute to clear out any debris.
Seasonal Care and Winterizing
Here in the Denver metro area, getting your drip system ready for winter is a must. Before the first freeze, you need to winterize it to prevent pipes from cracking. Start by shutting off the water supply to the system. Then, drain all the water from the tubing. You can do this by opening the end caps and letting gravity do the work, or by using an air compressor to blow the lines out. It’s also a good idea to remove and store sensitive parts like the pressure regulator and filter indoors for the winter. In the spring, simply reverse the process and check for any damage before turning the system back on for the season.
How to Monitor System Performance
Keeping an eye on your plants is one of the best ways to monitor your system’s performance. Are there areas that look wilted or dry? This could signal a clogged emitter or a kink in the line. On the flip side, puddles or overly saturated soil point to a leak or a broken emitter. Most issues with drip irrigation come from small installation mistakes or parts that aren’t quite right for the job. A well-planned system is the foundation of a healthy garden, which is why our hardscape and landscape contracting services always focus on getting the design right from the start. Regular monitoring helps you save water and keeps your garden looking its best.
Know When to Call a Pro
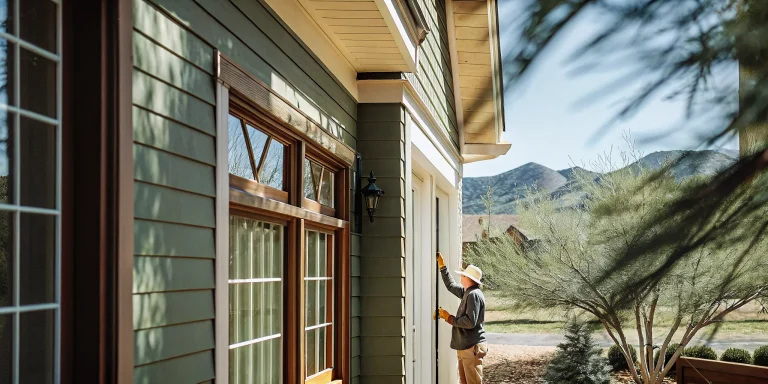
While installing a drip irrigation system can be a rewarding DIY project, there are times when handing the job over to a professional is the smartest move. It’s not about admitting defeat; it’s about valuing your time, your money, and the health of your landscape. A poorly installed system can lead to wasted water, damaged plants, and endless frustration. If you find yourself facing a complex yard, a tight schedule, or simply want the peace of mind that comes with expert installation, calling a pro is a wise investment.
A professional landscape contractor can design and install a system perfectly tailored to your garden’s unique needs, ensuring every drop of water is used effectively. This not only saves you from potential headaches but also guarantees a more efficient and durable system in the long run. Let’s look at a few scenarios where bringing in an expert makes the most sense.
Your Landscape is Complex
If your yard has steep slopes, different soil types, or a wide variety of plants with different watering needs, a one-size-fits-all approach won’t work. Most issues with drip irrigation stem from improper installation or using the wrong components for the site. A professional can accurately assess your property’s unique challenges, from calculating pressure loss over a hilly terrain to zoning areas for drought-tolerant natives versus thirsty vegetable gardens. They have the experience to select the right emitters and layout to ensure every plant gets the precise amount of water it needs to thrive, preventing the costly mistake of over or under-watering.
You’re Short on Time or Tools
Let’s be honest—weekend projects have a way of turning into month-long ordeals. Installing a drip system can be surprisingly time-consuming, especially if you’re learning as you go. If your schedule is already packed, dedicating hours to trenching, laying tubing, and punching emitters might feel overwhelming. Plus, while basic kits are available, a proper installation often requires specialized tools like pressure regulators, filter systems, and specific pipe cutters that you may not own. Hiring a professional team means the job gets done efficiently and correctly in a fraction of the time, letting you get back to actually enjoying your beautiful outdoor living space.
Weighing the Cost vs. Your Time
While the DIY route might seem cheaper upfront, the costs can add up quickly. The initial investment for pipes, emitters, filters, and timers can be significant, especially for larger gardens. Mistakes like buying the wrong parts or miscalculating your needs can lead to wasted money and materials. It’s also important to factor in the value of your own time. A professional installation is an investment in efficiency and longevity. An expert ensures the system is designed to conserve water, which saves you money on your utility bills for years to come. When you weigh the cost against the guarantee of a flawless, water-wise system, you’ll often find that professional installation pays for itself.
Related Articles
- Proper Steps to Take to Maintain Your Sod, Plants, Trees and Irrigation for the Winter – Faros Construction Services
- Paver Base 101: Your Complete Guide for 2026
- The Ultimate DIY Trex Deck Installation Guide
Frequently Asked Questions
How much water can I actually save with a drip system? The savings are significant, especially here in the Denver area. While traditional sprinklers lose a lot of water to wind and evaporation, drip systems deliver water right to the soil, making them over 90% efficient. For most gardens, this translates to using 30-50% less water compared to conventional methods. Over a season, that adds up to real savings on your water bill and a much more sustainable yard.
How long should I run my drip system each time? There isn’t a single magic number, as it depends on your soil type, plants, and the time of year. A good starting point is to run the system for 30 to 90 minutes, two to three times a week. The goal is to water deeply and less frequently to encourage strong root growth. Check the soil a few hours after watering; it should be moist several inches down, but not waterlogged. You can adjust the timing from there based on how your plants respond.
Can I use a drip system for my lawn too? While drip irrigation is fantastic for garden beds, trees, and container plants, it’s generally not the best choice for established lawns. Traditional turfgrass requires broad, even coverage that’s difficult to achieve with a drip system. For lawns, a well-designed sprinkler system is usually more effective. Drip irrigation excels at targeting specific root zones, which is why it’s perfect for almost everything else in your landscape.
What’s the most common mistake to avoid with a DIY installation? The biggest pitfall is skipping the planning phase. It’s easy to get excited and start laying tubing, but without a solid plan, you can end up with uneven watering. This often means placing emitters too far apart, not matching the emitter’s flow rate to the plant’s needs, or overloading a zone with too many drippers for your home’s water pressure. Taking the time to sketch your layout and understand your plants’ needs is the single most important step.
Do I really need to winterize my system in Denver? Absolutely. Winterizing your drip system is non-negotiable in our climate. If water is left in the tubing, filters, or backflow preventer, it will freeze, expand, and crack the components. This can lead to costly repairs and leaks come springtime. Draining the lines and bringing the main components indoors for the winter is a simple but crucial step to protect your investment and ensure it’s ready to go when the growing season starts again.