A poorly built fire pit can be more than just an eyesore; it can be a wobbly, smoky, and unsafe hazard. Common mistakes, like using the wrong materials or skipping a proper foundation, can lead to cracking, shifting, or even dangerous explosions. This guide is your roadmap to getting it right the first time. We’ll break down the essentials of proper stone fire pit construction, showing you how to avoid the pitfalls that trip up many DIY projects. From selecting fire-rated stone to building a stable base that can handle Denver’s weather, we’ll provide the clear, actionable steps you need to create a beautiful and secure fire pit you can enjoy for years.
Key Takeaways
- Choose the right materials and location for safety: Always use fire-rated materials like firebrick and dense natural stone to prevent cracking. Place your fire pit at least 10 feet away from your house, fences, and any overhead branches to create a safe zone.
- Build a stable and well-drained foundation: A successful fire pit requires a solid base. Dig out the grass and create a level foundation with compacted gravel and paver base to ensure stability and prevent water damage.
- Incorporate key features for longevity and performance: A metal fire ring is essential for protecting your stonework from direct heat. You should also leave small gaps in the bottom layer of stones to create proper airflow for a cleaner, less smoky fire.
What Are the Best Materials for a Stone Fire Pit?
Choosing the right materials for your fire pit is about more than just looks; it’s the most important decision you’ll make for safety and durability. The intense heat from a fire can cause the wrong materials to crack, splinter, or even explode. To build a fire pit that you can enjoy for years, you need to start with a solid foundation of heat-resistant materials designed for the job. Let’s walk through the best options for your project and, just as importantly, which ones to avoid.
Choose Fire-Rated Stones and Bricks
When you’re building the structure of your fire pit, your first priority should be using materials specifically rated for high heat. Standard landscaping pavers or bricks aren’t designed to handle direct flames. Instead, look for fire-rated bricks (also called firebrick or refractory brick) for the inner walls. For the exterior, dense, non-porous natural stones are an excellent choice. Using the right materials ensures your fire pit can withstand temperature changes without compromising its structure. This is a non-negotiable step for creating a safe and lasting addition to your hardscape and landscape design.
Explore Heat-Resistant Natural Stone
For a beautiful and durable fire pit, you can’t go wrong with heat-resistant natural stone. Granite is a fantastic option because it’s an igneous rock formed under intense heat and pressure, making it extremely tough. It also offers a polished, speckled appearance that adds a touch of elegance to any backyard. Other great choices include lava rock, soapstone, and slate. These stones not only handle high temperatures well but also bring unique colors and textures to your design. Selecting the right stone allows you to create a stunning focal point for your outdoor living space that reflects your personal style.
Don’t Forget the Fire Ring and Steel Liner
One of the most crucial components of a durable stone fire pit is a metal insert. A heavy-gauge stainless steel liner or fire ring sits inside your stone structure, creating a protective barrier between the flames and the masonry. This is key for two reasons: it prevents the stones from getting too hot, which reduces the risk of cracking, and it helps contain the fire. For the best results, leave a small air gap between the liner and the first course of stone. This space allows for air circulation, further insulating your stonework from the intense heat and making the entire structure safer.
Know Which Materials to Avoid
Just as important as knowing what to use is knowing what to avoid. Never use regular concrete blocks, pea gravel, or river rocks inside your fire pit. Porous rocks and concrete can trap moisture, and when heated, that moisture turns to steam and can cause the material to crack or even explode. Similarly, random stones from your yard are a gamble, as you don’t know their composition or whether they contain trapped water. Always source your materials from a reputable supplier and stick to fire-rated options to ensure your fire pit is a safe and relaxing spot, not a hazard.
How Do You Pick the Right Size?
Figuring out the right size for your stone fire pit is about more than just aesthetics; it’s a crucial step for safety, comfort, and function. A fire pit that’s too large for your yard can feel overwhelming and pose a safety risk, while one that’s too small won’t accommodate your guests or produce enough warmth. The perfect dimensions depend on your available space, how many people you want to gather around, and the kind of ambiance you’re hoping to create.
Before you start digging, think about the three key measurements: depth, diameter, and height. Each one plays a specific role in how your fire pit performs and how you and your guests will enjoy it. Getting these proportions right ensures your fire pit is a safe, inviting, and functional centerpiece for your outdoor living space. By balancing these elements, you can build a structure that not only looks great but also provides the perfect setting for cozy evenings under the stars.
Match the Depth to Your Fire Pit’s Size
The depth of your fire pit is essential for containing the fire and keeping embers safely inside. A pit that’s too shallow can allow hot embers to escape, while one that’s too deep can smother the fire and block heat from radiating outward. The ideal depth is directly related to the fire pit’s width.
A good rule of thumb is to scale the depth with the diameter. For smaller fire pits around 30 to 40 inches wide, a depth of 6 to 8 inches is usually sufficient. If you’re building a medium-sized pit between 40 and 50 inches wide, aim for a depth of 8 to 12 inches. For larger fire pits over 50 inches wide, a depth of 10 to 14 inches will help keep a bigger fire safely contained.
Find the Ideal Diameter for Safety
When planning the diameter, you need to think beyond the fire pit itself and consider the entire seating area. You want enough room for chairs, foot traffic, and a safe buffer from the flames. A common mistake is building a large fire pit that leaves little room for people to comfortably gather around it.
For a standard fire pit with a diameter of 36 to 48 inches, you should plan for a total surrounding area of about eight to 12 feet in diameter. This provides enough space to comfortably seat four to six people and allows everyone to move around without getting too close to the fire. Proper planning ensures your fire pit area is a social hub, not a cramped hazard. A well-designed hardscape can help define this space beautifully.
Determine the Safest Height
The height of your fire pit’s walls is important for both safety and comfort. If the walls are too low, they won’t effectively contain the fire, and they can become a tripping hazard. If they’re too high, they can block the heat and force people to lean over the edge to warm up, which is especially risky for children.
Generally, the outside edge of your fire pit should be between 6 and 12 inches tall. This height is low enough to let heat radiate out to everyone sitting around it but high enough to keep the fire contained. A height of around 12 inches is also often perfect for resting your feet on the edge, adding an extra layer of comfort to your backyard retreat.
What Tools and Supplies Do You Need?
Before you start digging, let’s make sure you have everything you need for the job. Gathering your tools and supplies first will make the entire process smoother and safer. Think of it as your project’s prep work; get this part right, and the rest of the build will fall into place much more easily. A well-prepared project is the first step toward a beautiful and lasting fire pit that you can enjoy for years.
If you find yourself missing a few key items or feel the list is a bit much, remember that our team is always ready to help. We handle every aspect of creating stunning outdoor living spaces, from planning to the final stone placement.
Your Construction Toolkit
Building a sturdy, beautiful fire pit requires more than just stones. Here’s a rundown of the essential tools that will help you create a solid foundation and a professional-looking finish. Having these on hand will prevent you from having to stop mid-project to run to the store.
- Tamper: This is for compacting the soil and gravel base. A solid, compacted foundation is non-negotiable for a fire pit that won’t shift or settle over time.
- 4-foot Level: Use this to ensure your base is perfectly flat and that each course of stone is even all the way around.
- Deadblow Hammer: This specialized hammer is perfect for tapping stones into place without chipping or cracking them.
- Shovel: You’ll need a sturdy shovel for digging out the initial circle for your fire pit and clearing the area.
- Wheelbarrow or Cart: This will save your back when moving heavy materials like gravel, paver base, and the stones themselves.
- Paver Base and Gravel: These are your key foundational materials. Gravel helps with drainage, while the paver base creates a stable surface to build on.
- 12-inch Square Stepping Stone: Here’s a pro tip: place this in the center of the pit floor. It creates a flat, solid surface that makes scooping out ash much easier.
- River Rocks: These are great for adding a decorative touch around the finished fire pit, tying it into your landscape.
Your Safety Gear Checklist
This checklist is just as important as your tool list. Working with heavy stones and digging in the dirt comes with a few risks, so protecting yourself is key. Please don’t skip these items; they’re essential for keeping you safe throughout the build.
- Gloves: A pair of heavy-duty work gloves will protect your hands from scrapes, blisters, and rough stone edges.
- Safety Glasses: These will shield your eyes from flying dirt, dust, and any small rock chips that can occur when setting stones.
- Dust Mask: This is a good idea, especially if you are cutting or grinding any materials, to avoid inhaling fine particles.
- Sturdy Boots: Good work boots, preferably with a reinforced toe, will protect your feet from dropped stones and provide stability.
- Knee Pads: You’ll likely be spending a lot of time kneeling on the ground, and knee pads will make the work much more comfortable.
If gathering these tools and tackling the project feels overwhelming, don’t hesitate to contact our team. We can help you plan and build the perfect fire pit for your Denver metro area home.
How to Prep the Perfect Spot
Before you can lay the first stone, you need to prepare the ground. This is arguably the most important part of the entire project. A poorly prepped spot can lead to a wobbly, unsafe fire pit that shifts, cracks, or collects water over time. Taking the time to create a solid, level, and well-drained foundation ensures your fire pit will be a stable and lasting feature in your backyard. Think of it as setting the stage for years of cozy evenings and memorable gatherings. Proper preparation is the key to a successful build, whether you’re tackling it yourself or working with a professional.
Pick a Safe Location
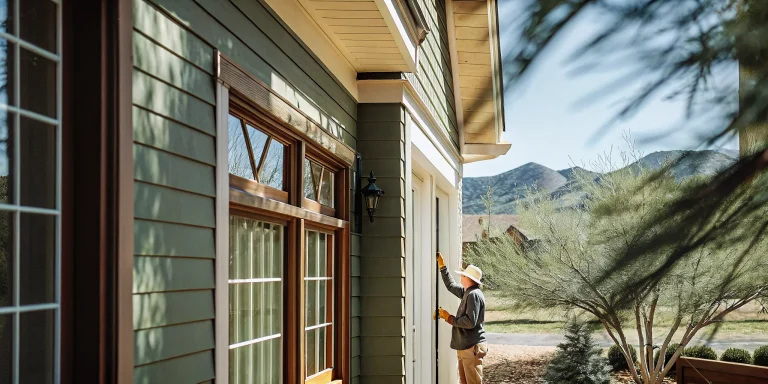
First things first, let’s talk about safety. Your fire pit needs to be in a spot that’s far away from anything flammable. As a general rule, place it at least 10 to 20 feet away from your house, deck, shed, or any fences. You should also look up and check for low-hanging tree branches. Once you have a potential spot, think about the prevailing wind direction in your yard. You don’t want smoke constantly blowing into your home or toward your neighbor’s property. Planning the layout of your outdoor living spaces with these factors in mind will make your fire pit much more enjoyable.
Level the Ground
A stable fire pit must be built on a perfectly level surface. Start by clearing your chosen spot of all grass, weeds, and large rocks. Once the area is clear, use a shovel to dig down a few inches and remove the topsoil until you reach firm ground. Then, grab a carpenter’s level and a straight board to check that the entire area is flat. Scrape away high spots and fill in low ones, tamping the soil down firmly as you go. This step is non-negotiable for ensuring the stone structure doesn’t lean or become unstable over time. As a hardscape and landscape contractor, we know that a level base is the foundation of any great project.
Create Proper Drainage
Water is the enemy of a long-lasting fire pit. If water pools inside, it can damage the materials, especially during Colorado’s freeze-thaw cycles. To prevent this, you need to create a path for water to escape. After leveling the ground, dig a small hole in the center of the pit, about a foot deep, and fill it with gravel. This acts as a simple drain. Then, spread a 2 to 3-inch layer of gravel across the entire base of the fire pit area. This allows rainwater to seep into the ground instead of sitting in the bottom of your pit, protecting your investment and ensuring it looks great for years, just like our other completed projects.
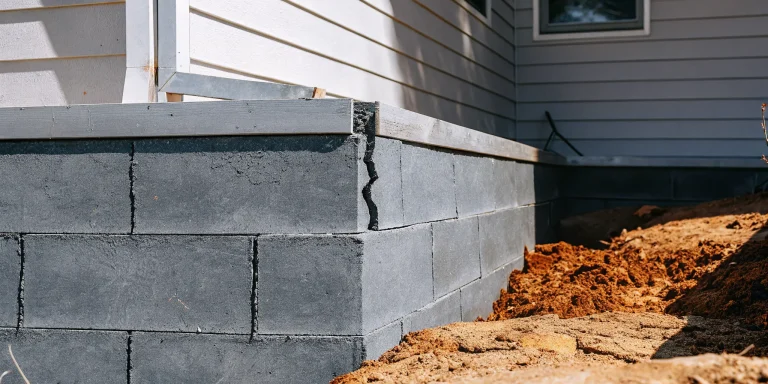
Build a Stable Foundation
With the ground level and drainage in place, the final prep step is building the foundation itself. This is typically done with a layer of paver base or a mix of sand and gravel spread over the area you just cleared. This base should be about 2 to 3 inches deep. Once you’ve spread the material evenly, use a hand tamper to compact it until it’s firm and solid. A strong foundation prevents the stones from shifting and settling over time. Skipping this step is a common mistake that can lead to expensive repairs down the road. A solid base is essential for all construction services, and your fire pit is no exception.
Your Step-by-Step Guide to Building a Stone Fire Pit
With your spot prepped and materials ready, it’s time for the fun part: construction. Building a stone fire pit is a rewarding project that comes together one layer at a time. Following these steps carefully will help you create a stable, safe, and beautiful feature for your backyard. Let’s get building.
Mark Your Layout
First, you need to create a clear guide for your build. After choosing your location and deciding on the size, mark the circle for your fire pit. You can do this by placing your fire ring in the center and tracing a circle around it with spray paint, or by using a shovel to score the ground. This outline is your blueprint. Before you dig, double-check that the circle is the right size for your patio and that you’ve left enough clearance on all sides. This initial step is your foundation for the entire project, so take a moment to get it just right.
Install the Fire Ring or Liner
A metal fire ring or liner is a non-negotiable part of a safe and durable stone fire pit. This simple insert protects your stone or block from direct, intense heat, preventing them from cracking and breaking down over time. A stainless steel liner with an air space around it keeps the outer materials from getting too hot, making the fire pit much safer. Place your liner in the center of your marked layout. The gap between the liner and the stone wall will act as insulation. This small but crucial detail is what gives your fire pit its longevity and makes it much safer to enjoy.
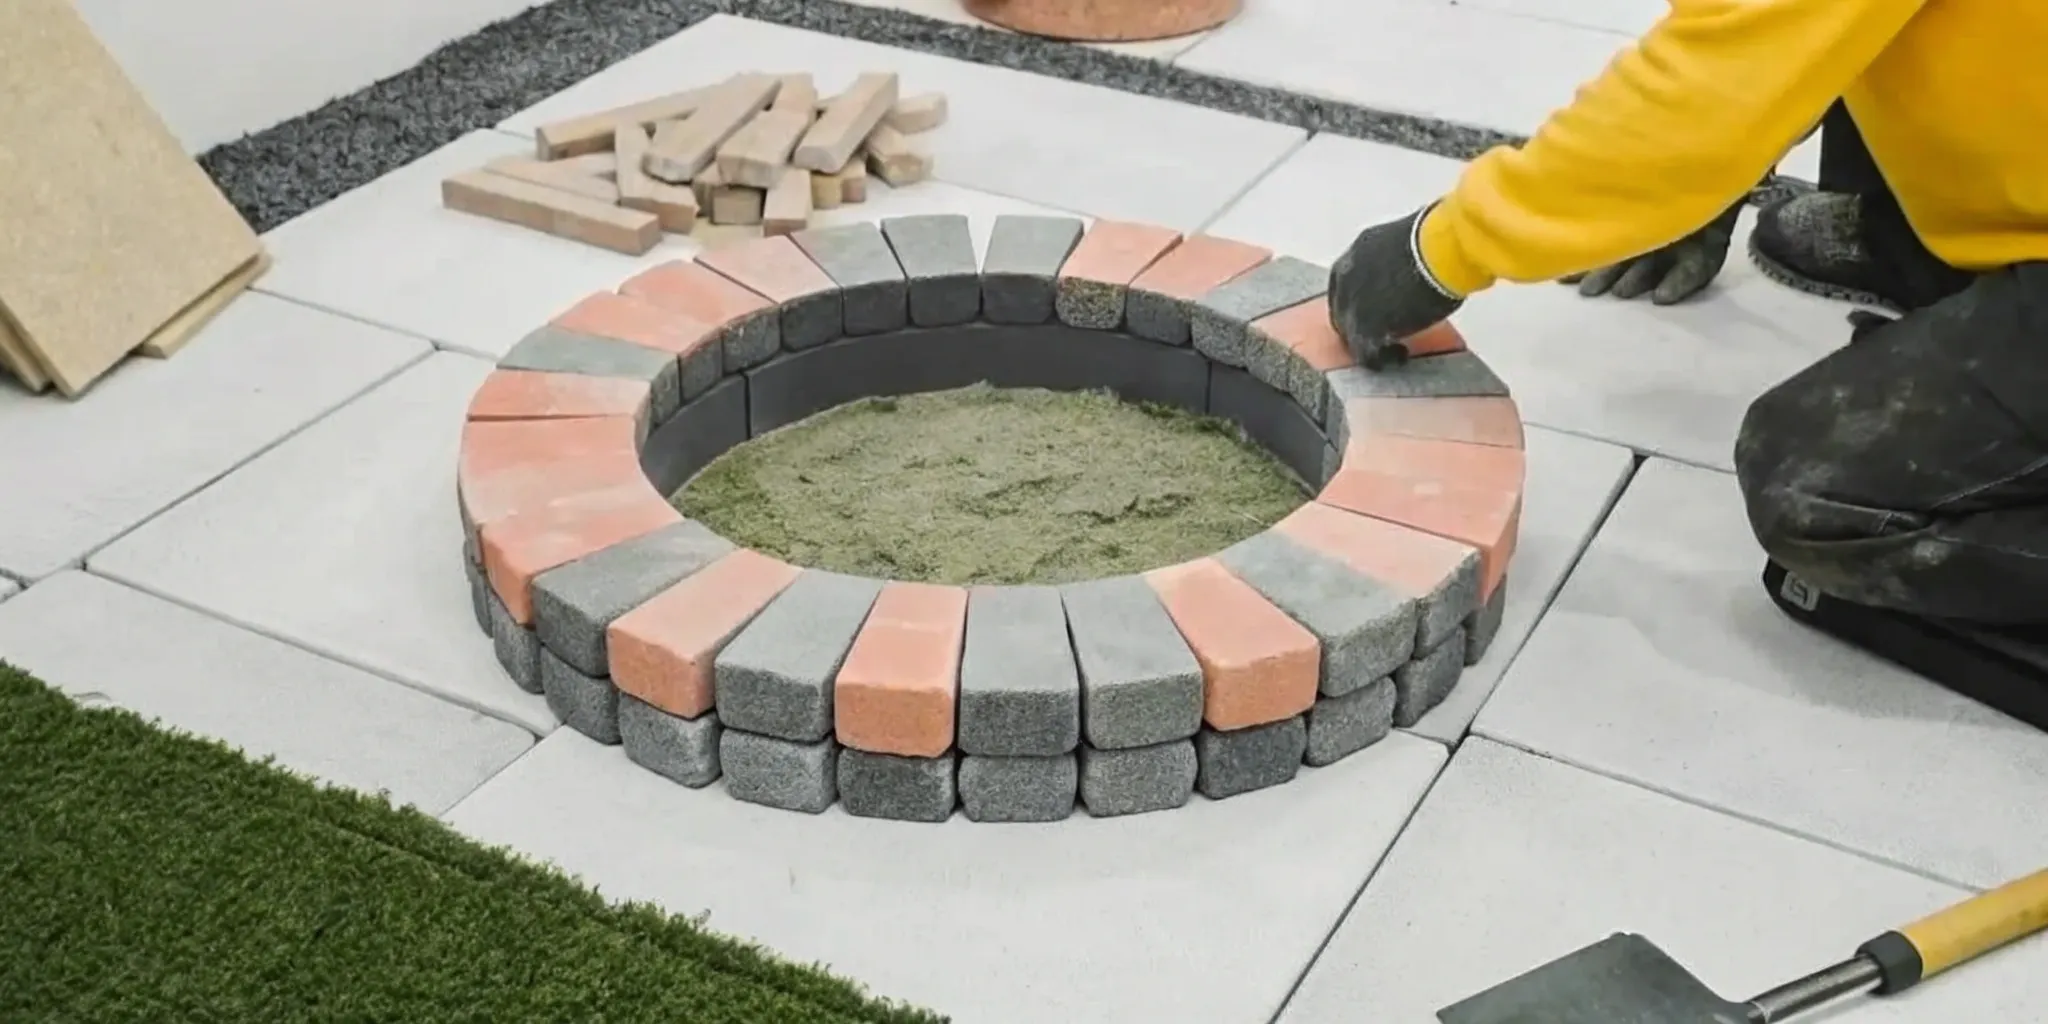
Lay the First Course of Stone
The first layer of stone is the most important, as it supports everything above it. Before you start stacking, it’s a good idea to do a “dry run” by placing the stones around the fire ring to see how they fit. Once you’re happy with the arrangement, you can begin setting them. Use a level across the stones as you place them to ensure the entire ring is perfectly flat. If you find a low spot, add a little paver base or sand underneath the stone to bring it up. A level first course prevents your fire pit from becoming wobbly and unstable later on.
Stack the Remaining Courses
Once your base is solid and level, you can start stacking the next layers. For the strongest structure, you’ll want to stagger the joints of the stones, just like a brick wall. This means the stone on top should sit across the seam of the two stones below it. For a typical three-foot-wide fire pit, you can expect to use about 12 stones per layer. As you add each course, continue to check that the walls are level across the top and vertically straight (plumb). Most fire pits are three to four courses high, which is a comfortable height for sitting around the fire.
Ensure Proper Airflow and Ventilation
A fire needs oxygen to burn brightly and produce heat instead of smoke. Without good airflow, you’ll have a smoky, smoldering fire that’s difficult to enjoy. To ensure proper ventilation, you need to build air holes into your design. An easy way to do this is by leaving a few half-inch gaps between some of the stones on the first course. Place these gaps on opposite sides of the pit to allow air to flow through. This will feed the base of the fire with fresh oxygen, resulting in a cleaner, warmer, and more efficient burn.
What Safety Precautions Should You Follow?
Building a fire pit is an exciting project, but safety should always be your top priority. A beautiful fire feature is only enjoyable if it’s used responsibly and built correctly from the start. Taking the time to plan for safety means you can relax and make memories around the fire without any worries. From understanding local regulations to choosing the right spot in your yard, these precautions are non-negotiable. They protect your home, your property, and most importantly, your loved ones. Before you even think about laying the first stone, let’s walk through the essential safety checks that will ensure your fire pit is a safe and lasting addition to your home.
Check Denver Metro Area Permits and Codes
Before you do anything else, your first step is to check with your local fire department and building office. Every municipality in the Denver metro area has its own rules for fire pits, covering everything from size and depth to how far they must be from any structure. These local codes are the most important guidelines you need to follow, taking precedence over any general advice you find online. A quick call or visit to their website can save you a lot of headaches down the road. Getting this information upfront ensures your project is compliant from day one, preventing potential fines or the need to rebuild your fire pit later.
Maintain Safe Fire Clearances
Creating a safe zone around your fire pit is critical. Most safety guidelines recommend placing your fire pit at least 10 to 30 feet away from your house, shed, fences, or any other combustible structures. This distance helps prevent sparks from igniting a fire. You also need to think about nearby trees with low-hanging branches. For comfortable and safe seating, plan for at least six to seven feet of clearance on all sides of the fire pit. This gives everyone enough room to move around without getting too close to the flames. Proper clearance is a key part of designing beautiful and functional outdoor living spaces.
Consider Wind and Overhead Hazards
Think about the typical wind patterns in your yard. You don’t want to position your fire pit where smoke will constantly blow into your seating area or towards your home’s windows and doors. Spend some time observing the wind before you decide on a final location. It’s also important to look up. Make sure there are no low-hanging tree branches, power lines, or roof overhangs directly above your chosen spot. Keeping the area clear of overhead hazards is just as important as maintaining ground clearance. A professional hardscape and landscape contractor can help you assess your property to find the safest and most enjoyable location.
How Can You Make Your Fire Pit Last?
Building a beautiful stone fire pit is a fantastic accomplishment. Now, let’s make sure it stands the test of time. With the right assembly techniques and a little seasonal care, your fire pit can be a backyard centerpiece for years, not just a season. Proper construction and maintenance are especially important in the Denver metro area, where our weather can be tough on outdoor structures. Protecting your investment from the elements starts with a few key practices that prevent common issues like cracking and shifting. By focusing on smart assembly and proactive protection, you can ensure countless cozy evenings around the fire.
Assemble It Correctly Without Mortar
While mortar might seem like the obvious choice for holding stones together, a dry-stacked fire pit offers surprising durability and flexibility. When you stack the stones without mortar, their weight and interlocking placement create a very stable structure, especially on a solid, level foundation. For a little extra stability, you can apply a concrete landscape adhesive between the layers. However, skipping mortar altogether means you can easily make changes or repairs down the road. If you ever decide to move the pit or upgrade to a smokeless insert, a dry-stacked design is much simpler to deconstruct and reassemble. This method gives you a strong, long-lasting fire pit with the freedom to adapt your space later.
Protect It From Colorado’s Weather
Our Colorado climate, with its intense sun and heavy snow, demands that our outdoor living spaces are built to last. The first step is choosing materials specifically suited for our unique conditions, like dense, non-porous stones that resist moisture and UV damage. Once your fire pit is built, the easiest way to protect it is with a heavy-duty, waterproof cover. A good cover shields the stone from rain and snow, preventing moisture from seeping in and causing damage. It also protects the structure from the harsh sun, which can cause materials to fade or become brittle over time. Covering your fire pit when it’s not in use is a simple habit that will significantly extend its life.
Prevent Water and Freeze-Thaw Damage
Water is the biggest threat to a stone fire pit in Colorado, mainly because of the freeze-thaw cycle. When water gets into porous stones or cracks, it freezes, expands, and can break the material apart. This is why a solid foundation with excellent drainage is non-negotiable; it prevents water from pooling at the base. You should also keep the interior clean and dry. Avoid fillers like lava rock, which can trap ash and moisture, making cleanup difficult and holding water against the stone. Before winter arrives, give your fire pit a thorough cleaning and make sure it’s completely dry before putting on its waterproof cover for the season. These steps help you avoid costly hardscape repairs down the line.
What Common Building Mistakes Should You Avoid?
Building a stone fire pit is a rewarding project, but a few common missteps can turn your dream backyard feature into a frustrating problem. Even small errors during construction can lead to an unstable, unsafe, or short-lived fire pit. By understanding what can go wrong, you can make sure you get it right the first time. The three biggest mistakes we see involve a poor foundation, incorrect materials, and bad airflow. Getting these details right is the key to creating a beautiful and functional fire pit that you and your family can enjoy for years to come.
Poor Foundation and Drainage
Everything starts from the ground up, and your fire pit is no exception. One of the most critical errors is building directly on top of the grass without preparing a solid base. A proper foundation ensures your fire pit is level, stable, and can handle the shifting ground common in the Denver metro area. You should always dig out the grass, add a few inches of paver base, and tamp it down until it’s completely level. This step also helps with drainage, preventing water from pooling at the base, which can cause damage during freeze-thaw cycles. A well-built foundation is the best way to ensure your hardscape feature remains stable and secure.
Incorrect Material Choices
Choosing the right materials is about more than just looks; it’s a crucial safety measure. You can’t use just any stone or concrete block for your fire pit. Many common materials, like river rocks or certain types of concrete, can trap moisture. When heated, that moisture turns to steam and can cause the material to crack, splinter, or even explode. Always use fire-rated materials designed to withstand high temperatures, such as fire brick for the inner wall and dense, non-porous natural stone for the exterior. Selecting the right materials is a non-negotiable step for creating safe and inviting outdoor living spaces.
Bad Ventilation and Airflow
A fire needs oxygen to burn cleanly and efficiently. Without proper airflow, you’ll end up with a smoky, smoldering fire that’s difficult to keep lit and doesn’t give off much heat. A common mistake is building a solid, airtight ring of stone without leaving any gaps for air to enter. To avoid this, you can leave small, half-inch gaps between a few of the stones in the first course or install dedicated vent blocks. This allows air to feed the base of the fire, resulting in better combustion, less smoke, and a much more enjoyable experience for everyone gathered around.
Should You DIY or Hire a Professional?
Deciding whether to build your stone fire pit yourself or hire a professional is a big question. The right answer depends on your budget, timeline, and how comfortable you are with hands-on construction projects. A DIY build can be a satisfying weekend project that saves you money on labor, giving you bragging rights every time you gather around the fire. It’s a great option for a simple, rustic design where perfection isn’t the primary goal.
On the other hand, bringing in a professional ensures the job is done correctly, safely, and to a high standard, which can save you from costly mistakes down the road. A pro handles the heavy lifting, sourcing materials, and navigating local regulations, giving you complete peace of mind. This is especially important for more complex designs involving gas lines, built-in seating, or integration with an existing patio. A professionally built fire pit becomes a seamless, high-quality extension of your home. You can see the difference in the finished quality by looking at professional project portfolios.
Before you start digging up your backyard, it’s helpful to honestly evaluate your skills, the complexity of your vision, and what you hope to achieve. Are you aiming for a simple stone ring for occasional campfires, or a sophisticated centerpiece for entertaining? Thinking through these factors will help you choose the path that best fits your home and lifestyle, ensuring your new fire pit is a source of enjoyment for years to come.
Assess Your DIY Skills
If you have some home improvement experience, building a basic stone fire pit can be a great weekend project. For a simple, wood-burning design, the process involves leveling the ground, creating a stable base, and dry-stacking the stones. As one DIY guide notes, “Building your own stone fire pit is an easy project you can finish in less than a day.” If you’re confident in your ability to handle heavy materials, ensure the structure is level, and follow instructions carefully, you can definitely achieve a great result. Just be sure you have the right tools and a solid plan before you begin.
Know When to Call a Pro
While a basic fire pit is manageable, it’s important to recognize when a project’s complexity calls for an expert. As landscape professionals point out, “Building a fire pit is more complex than it seems. To ensure it’s safe, looks good, and works well, it’s best to hire a landscape company.” If your design involves mortar, gas lines, intricate stonework, or integration with an existing patio, hiring a professional is the safest choice. A contractor handles everything from navigating local building codes to ensuring proper drainage and ventilation, creating beautiful and functional outdoor living spaces that are built to last.
The Benefits of Hiring a Denver Metro Area Contractor
For homeowners in the Denver metro area, working with a local contractor offers unique advantages. An experienced local builder understands how to work with Colorado’s specific climate and soil conditions, ensuring your fire pit can withstand freeze-thaw cycles without shifting or cracking. Professionals can help you “transform your Denver property with strategic outdoor living improvements that maximize both your enjoyment and your home’s value.” In fact, local data shows that “Denver’s outdoor projects consistently outperform national averages… for return on investment.” A local expert from a company like Faros can design a fire pit that not only complements your home but also adds significant, lasting value.
Related Articles
- How to Install Pavers for Beginners: Step-by-Step
- 7 Tips to Find the Best Paver Patio Contractors
- Paver Base 101: Your Complete Guide for 2026
Frequently Asked Questions
Do I really need a metal fire ring inside my stone pit? Yes, absolutely. A heavy-gauge steel fire ring or liner is one of the most important parts of a long-lasting stone fire pit. It acts as a protective barrier, shielding your stones from the direct, intense heat of the flames. This simple insert prevents the stone from cracking or breaking down over time, which is a common issue. Think of it as essential insurance for your project’s safety and durability.
Can I build a fire pit on my existing concrete or paver patio? You can, but you need to take extra steps to protect the patio surface. The intense heat from a fire pit can easily crack, scorch, or discolor the concrete or pavers underneath. To prevent this, you should place a protective, heat-resistant barrier between the fire pit and the patio. Alternatively, you can build a raised fire pit on a solid foundation that insulates the patio from the heat.
What’s the single most important step in the whole building process? Without a doubt, it’s preparing the foundation. A fire pit built on uneven or soft ground will eventually shift, lean, and become unstable. Taking the time to dig out the area, create a level surface, and compact a solid base of gravel and paver base is what ensures your structure will last. A strong foundation is the key to a safe and durable fire pit that won’t cause problems down the road.
How do I know if my project is too complex for a DIY build? A simple, dry-stacked wood-burning fire pit is a great DIY project if you’re comfortable with the work. However, you should call a professional if your vision involves anything more complex. This includes installing a gas line, building on a significant slope, integrating the fire pit with an existing patio wall, or planning intricate stonework. These features require specific expertise to ensure they are safe, functional, and compliant with local codes.
Is it better to use mortar or a special adhesive to hold the stones together? For our climate in the Denver metro area, building without traditional mortar is often the better choice. A dry-stacked fire pit, where the stones are held in place by weight and friction, allows for tiny movements during freeze-thaw cycles, preventing cracks. If you want extra security, a flexible concrete landscape adhesive is a great option. It provides stability while still allowing for slight expansion and contraction with the changing temperatures.