
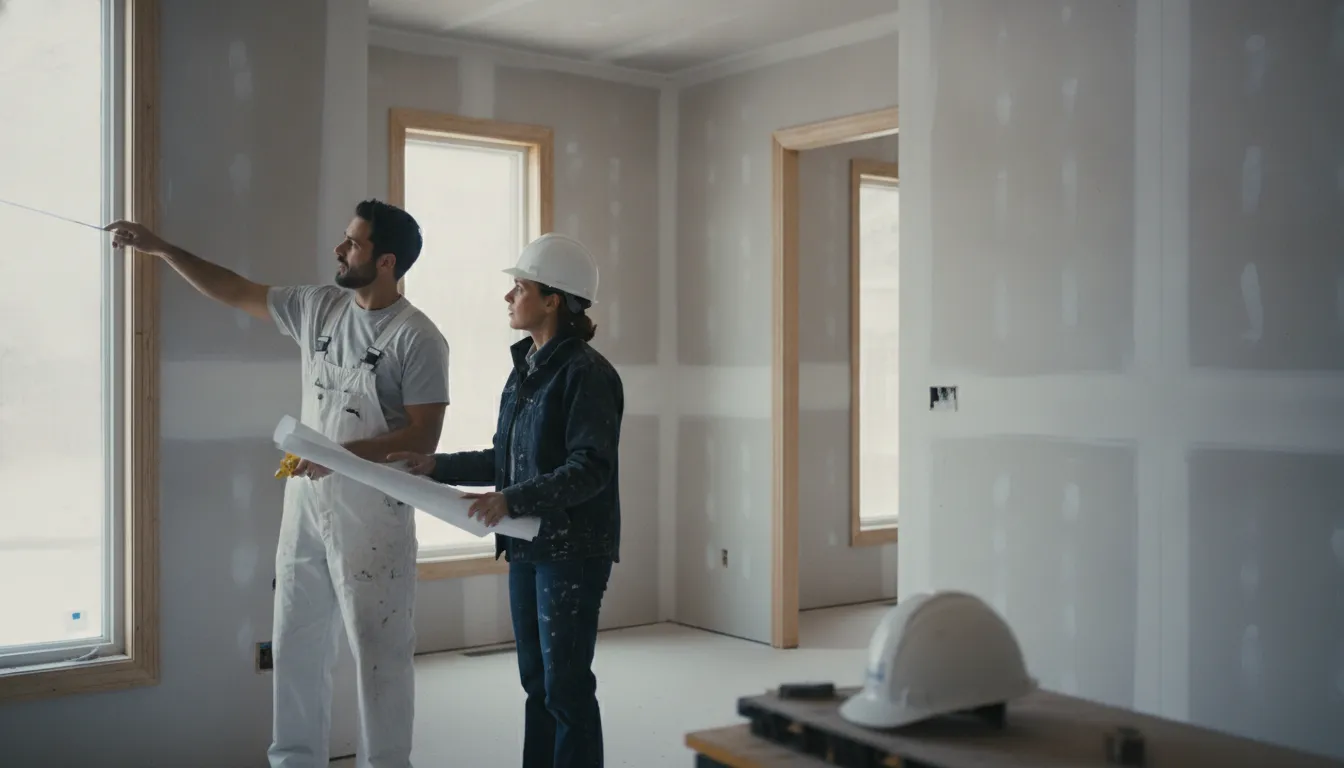
Painting a new home is not an isolated finish step. It depends on drywall readiness, protected surfaces, material delivery, trim installation, and the movement of other trades through the site. When those handoffs are unclear, even a well-planned build can lose time to avoidable repairs and touch-ups.
For homeowners and builders in the Denver Metro Area, residential painters for new construction homes should be coordinated as part of the build sequence. Clear expectations for surface readiness, product selection, access, protection, inspections, and final punch-list work keep the finish phase organized.
Contact Faros about your new-home construction project.
The most reliable approach starts before the first coat. Design decisions, material timing, subcontractor scheduling, and site communication all shape when painting can begin and how the finished work will be reviewed. A defined process also gives homeowners and builders a shared way to identify incomplete preparation or detail work before closeout. The sections ahead explain how painting fits into the construction schedule, from pre-paint readiness through final walkthrough and documented touch-ups.
How Residential Painters for New Construction Homes Fit the Build Schedule
Painting works best when it is treated as a coordinated construction phase, not an isolated task at the end of the project. The schedule should define the painting scope, surface-readiness requirements, trade handoffs, inspection points, and communication process before the first coat is applied.
For a new home in the Denver Metro Area, the first handoff is usually the approved plan set and finish scope. The builder, homeowner, and painting team should confirm which rooms, ceilings, trim, doors, built-ins, and exterior surfaces are included. They should also identify who is responsible for drywall repairs, protection of completed work, material approvals, and documenting changes. Clear responsibilities reduce last-minute assumptions when several trades are working in the same space.
Pre-construction coordination can include design approvals, permit and HOA coordination, mechanical, electrical, and plumbing coordination, material delivery scheduling, and subcontractor scheduling. These activities provide the framework for placing painting in the larger build sequence. Faros describes this coordination as part of its home-building process, which is outlined on its home building and new-home construction page.
Sequence the work around readiness
Painting generally follows the work that creates or repairs the surfaces being coated. Drywall finishing, sanding, electrical and plumbing work, trim installation. And other activities should be planned so the painting team is not asked to finish areas that remain exposed to dust, impact, or access needs. The exact order can vary by project, but the key question is whether each area is genuinely ready for the next trade.
A practical schedule includes a readiness review before each major painting phase. That review can confirm that the relevant surfaces are accessible, the finish expectations are documented, preceding trades have completed their work, and protected areas are ready for production. If a room is not ready, moving the crew elsewhere may protect quality better than forcing the schedule forward.
Use planned inspections and direct updates
New-home construction benefits from regular site communication because small conflicts can affect several later activities. Progress updates should identify completed areas, open issues, upcoming handoffs, and decisions needed from the builder or homeowner. Daily site management, quality control, subcontractor supervision, timeline management, and issue resolution are all part of the broader project-execution process described by Faros.
Inspection cadence should include more than a final look. Builders and homeowners can review representative completed areas, confirm the finish against the approved scope, and record corrections before closeout. Direct communication with the project lead also makes it easier to resolve access conflicts, protect completed surfaces, and keep the painting phase aligned with the remaining construction schedule.
What Must Be Ready Before Painting Begins?
Painting should begin only after the surfaces, work area, and project expectations are ready. In a new home, confirm the drywall finish, complete repairs, control dust and moisture. Protect adjacent work, and document who approves the surface before the first coat is applied.
Drywall needs more than a quick visual check. Joints, fastener heads, corners, and transitions should be properly finished, sanded, and free of ridges or visible defects. Small imperfections can become much more noticeable after primer and paint, especially when daylight or recessed lighting strikes a wall at an angle. The required finish level should be agreed upon before work starts. A highly illuminated feature wall, smooth contemporary interior, or large open room may reveal flaws that are less apparent in a utility space.
Repairs also need time to cure and be blended into the surrounding surface. The painting crew should identify nail pops, settlement cracks, damaged paper, uneven patches, and incomplete caulking rather than covering them and hoping they disappear. Faros explains the connection between preparation and smooth finished walls in its guide to drywall preparation and painting. That preparation stage is where many visible finish problems are prevented.
Moisture and dust are practical readiness issues. New construction can contain damp materials, active drywall work, tracked-in soil, and airborne sanding residue. Surfaces should be dry and clean, and other dusty trades should be coordinated so freshly prepared walls are not contaminated before priming. If ventilation is needed during interior coating work, the plan should account for safe airflow without spreading dust through finished areas. Product selection and application should follow the applicable manufacturer instructions and project specifications.
Protection is part of surface readiness, not an optional extra. Floors, cabinets, windows, fixtures, hardware, and finished flooring should be covered or otherwise protected before sanding, spraying, rolling, or brushing begins. The protection plan should also identify access routes and areas where other trades may still be working.
Before release, the builder, homeowner, or designated project lead should complete a readiness sign-off. A useful checklist records the rooms released, drywall condition, repair status, lighting conditions, moisture or dust concerns, protected surfaces, and any items assigned for correction. Faros emphasizes credentials, reliability, communication, and finish quality when homeowners evaluate a Denver residential painter. That same expectation applies on a new-home project: clear acceptance criteria reduce rework and make the final walkthrough more productive.
Primer, Coatings, and Application Methods for a New Home
Primer and finish coatings are part of a complete paint system, not interchangeable steps. For a new home, the right sequence connects substrate preparation, product compatibility, application method, and inspection. Ceilings, walls, trim, doors, and exterior surfaces each receive the treatment their location requires.
Specifications from the University of Houston describe interior painting as both surface preparation and application of paint systems to interior substrates. They also define paint broadly, including primers, enamels, sealers, fillers, and finish coats. That distinction helps builders and homeowners evaluate the work as a system rather than judging the final color alone. Read the University of Houston interior-painting specification.
| Surface | Preparation | Application | Checkpoint |
|---|---|---|---|
| Ceilings | Confirm the substrate is clean, repaired, and ready for primer or the specified finish system. | Use the method and sheen specified for the ceiling, with consistent coverage across the field. | Check uniform appearance from normal room viewing angles before fixtures and final cleanup. |
| Walls | Prepare gypsum board and other interior substrates before applying the coating system. | Apply compatible primer and finish coats according to the product and project specification. | Inspect for flashing, missed areas, visible repairs, and consistent sheen in available light. |
| Trim and doors | Prepare the substrate carefully and confirm the selected primer, undercoat, and topcoat work together. | Use the application approach suited to the required smoothness and edge control. | Review edges, corners, hardware protection, and the finish from both sides of each door. |
| Exterior surfaces | Verify the surface is ready for the specified exterior coating and sealer where applicable. | Follow the coating manufacturer’s application requirements and permitted conditions. | Check coverage, transitions, exposed details, and areas requiring touch-up before closeout. |
Compatibility is a practical quality checkpoint. The University of Colorado Anschutz specification requires primers and undercoats to be compatible with one another and with the topcoat. It also calls for coating application to follow manufacturer recommendations for minimum dry film thickness, with safety data sheets available before application. Those requirements reinforce why product selection should be coordinated before the crew begins, especially when several substrates meet at one detail. Review the CU Anschutz painting specification.
For a new home in the Denver Metro Area, application method should support the specified result and the condition of the surface. Spraying, rolling, brushing, and hand detail each have a place. But the visible checkpoint remains the same: an even, properly bonded finish with clean transitions and no unresolved defects.
How Do You Coordinate Trim, Doors, and Detail Work?
Trim, doors, baseboards, casework, and other finish details need their own sequence inside a new-home painting plan. The goal is to protect completed surfaces, give each material the right preparation, and create a clear review point before the next trade or the homeowner takes possession.
Coordination starts with the finish schedule and the condition of the room. Walls and ceilings may receive their initial coats before interior doors, casing, and baseboards are installed or fully adjusted. Once those elements are in place, the painter can address nail holes, joints, caulk lines, scuffs, and small installation marks without treating unfinished construction as final work.
Sequence the work around installation and access
A practical sequence often separates broad-area painting from detail painting. Protect floors, cabinets, hardware, hinges, glass, and finished flooring before spraying, rolling, or brushing near them. Doors may be removed when that provides better access and a cleaner finish, then labeled and returned after the coating has dried sufficiently. Fixed casework requires careful masking and hand work around edges, reveals, shelves, and adjoining walls.
This is not simply a matter of choosing a brush or roller. Interior painting includes both substrate preparation and application of the paint system, as described in the University of Houston interior-painting specification. Colorado State University also separates gypsum board from painting and coating within Division 09. That reinforces the value of treating surface readiness and finish application as related but distinct stages. Review the interior painting specification and confirm the project requirements before work begins.
Contact Faros about your new-home painting project.
Use hand detail and a defined sign-off
Trim and doors deserve a close inspection from normal viewing distance and from the angles where light exposes uneven caulk, missed edges, brush marks, or contamination. Hand detail should follow the specified sheen and finish, with protection removed carefully so fresh edges are not pulled or damaged. Hardware, door swings, cabinet alignments, and adjacent surfaces should be checked before the final review.
A useful sign-off is specific rather than general. Walk the home by room, record any remaining corrections, identify who owns each item, and schedule the touch-up window around other trades. A staged process of preparation, application, quality inspection, and final walkthrough is a practical model for keeping detail work visible and accountable. The owner or builder can then approve completed areas with a shared understanding of what was inspected and what remains.
Questions to Ask Residential Painters Before the First Coat
Before paint enters a new home, the homeowner, builder, and painting crew should agree on more than colors. The right questions clarify trade sequencing, surface readiness, products, protection, communication, and the inspection process so expectations are documented before work begins.
- What exactly is included in the painting scope? Ask whether the scope covers ceilings, walls, doors, baseboards, trim, casework, garage areas, exterior surfaces, primer, finish coats, protection, and post-walkthrough touch-ups. Confirm which items belong to the painter and which remain with the builder or another trade.
- Which surfaces must be ready before your crew arrives? Establish who verifies drywall finishing, repairs, sanding, dust removal, caulking, and moisture conditions. Ask what happens if a surface is not ready, and require a clear readiness sign-off before the first coat.
- How will you handle different substrates and finish expectations? New homes can include gypsum board, wood trim, metal components, and other substrates. Ask which primer and coating system is planned for each area, what sheen is specified, and how the team will confirm that the finish matches the approved selections.
- How does painting fit into the overall build schedule? Discuss preceding and overlapping trades, access dates, dry time, return visits, and the inspection cadence. A painting schedule should coordinate with the builder’s timeline rather than treat the work as an isolated task.
- How will finished surfaces and other materials be protected? Confirm the protection plan for floors, cabinets, windows, fixtures, hardware, and completed work. Ask how the crew will control dust, overspray, splatter, and traffic while other trades continue working.
- Who is responsible for daily communication and issue resolution? Identify the primary contact and agree on how progress updates, color decisions, access changes, surface concerns, and schedule conflicts will be recorded. Direct oversight and timely communication help prevent small construction issues from becoming closeout problems.
- When will inspection and touch-ups occur? Ask who participates in the walkthrough, how deficiencies are documented, and when corrections are completed. Confirm that touch-ups are checked after the final trade activity, with the punch list and closeout responsibilities clearly assigned.
- What broader selection questions still need separate review? If you are comparing credentials, insurance, experience, and reliability, use this guide to choosing a Denver residential painter. Then return to the new-construction questions above, because a general selection review does not replace a project-specific plan for readiness, sequencing, and closeout.
Frequently Asked Questions
When should painting begin in a new-construction home?
Painting should begin after drywall finishing, repairs, sanding, and cleanup are complete, with other trades coordinated around the work. Confirm the readiness of each area before the first coat so moisture, dust, or unfinished surfaces do not compromise the result.
How can homeowners tell whether drywall is ready for primer?
Drywall should have a consistent finish, with seams, fasteners, corners, and repairs addressed before priming. Walk the home under practical lighting and document visible defects or areas needing additional preparation. Surface preparation is a core part of an interior paint system, not a separate afterthought, as described in the University of Houston interior-painting specification: interior painting specification.
Is primer necessary for every new-construction surface?
Primer selection depends on the substrate and the specified coating system. Gypsum board, interior wood trim, and metal surfaces may require different primer types. Primers and undercoats should be compatible with the topcoat and applied according to the product manufacturer’s directions, consistent with the University of Colorado Anschutz painting specification: primer compatibility guidance.
How are trim, doors, and casework handled during new-home painting?
Trim and doors need careful protection, clean transitions, and detailed brushwork after surrounding surfaces are prepared. Confirm the finish, sheen, color, and sequence for each area before application, then inspect edges, joints, hardware areas, and overspray during the walkthrough.
What should happen during the final painting walkthrough?
The walkthrough should identify touch-ups, missed details, protection issues, and any items that need another trade’s attention. Record each item on a punch list, assign responsibility, and verify completion before closeout. Faros describes closeout as including a final walkthrough, punch-list completion, warranty documentation, and maintenance guidance: home-building process.
Contact us about your new-home project
Coordinating painting with construction milestones can help homeowners and builders keep finish work aligned with the broader build. Faros Construction Services can discuss your Denver Metro Area project, including how painting and related construction work may fit your plans, surfaces, and communication process.