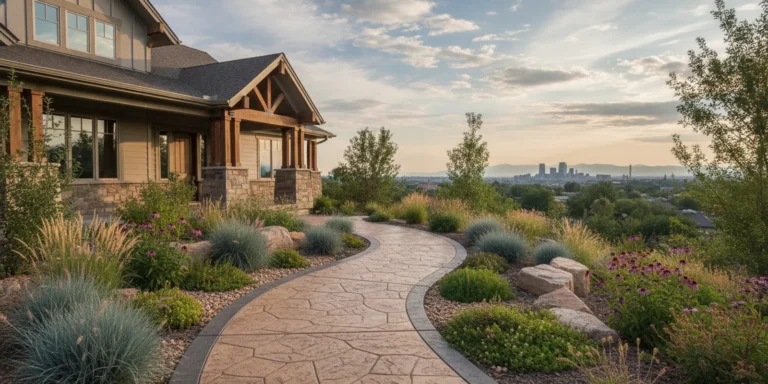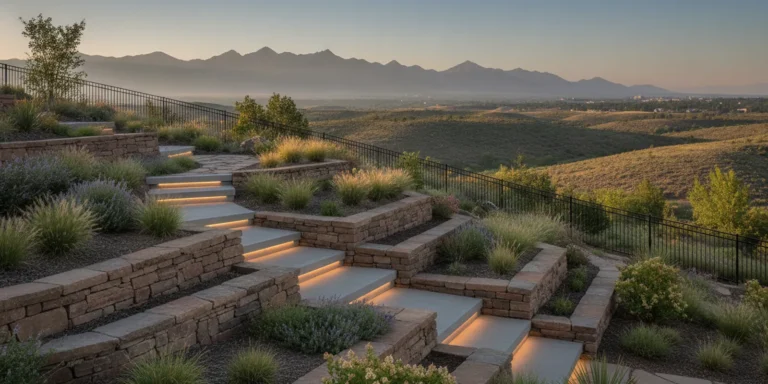

A sloped yard can lose soil quickly when runoff follows the same path after every storm. In the Denver Metro Area, that challenge is shaped by grade changes, drainage patterns, and soil that may expand or heave as moisture conditions change. A wall is not simply a row of attractive blocks. It must be planned to hold back soil, move water safely, and connect with the rest of the landscape.
Retaining wall construction begins with a careful site assessment, a stable base, effective drainage, and materials suited to the slope and surrounding design. A professional build helps protect the yard from erosion while creating a durable, usable transition between elevations.
Schedule a consultation with the Faros team to plan your retaining wall project
The right approach becomes clearer when you understand the forces acting on the wall and why drainage and structural planning matter before installation begins.
Why Retaining Wall Construction Matters for Sloped Denver Yards
Retaining wall construction gives a sloped Denver Metro Area yard the structure it needs to manage soil, water, and usable space. When the wall is designed for the site and built with proper drainage, it helps control erosion, resist lateral soil pressure, and create a more stable outdoor area.
A retaining wall is not simply a decorative border. Soil behind the wall pushes outward, creating lateral pressure that increases with the height and weight of the backfill. Saturated soil can add even more force, which is why wall design must account for grading, drainage, foundation conditions, and anything placed near the top of the slope. A wall that looks substantial but lacks the right base or drainage plan can shift, lean, crack, or fail over time.
Managing erosion on Denver slopes
Sloped yards naturally direct stormwater downhill. During intense rain or rapid snowmelt, that flow can carry soil away, expose roots, wash out planting areas, and undermine walkways or patios. A properly planned wall divides a steep grade into more manageable elevations. Combined with controlled drainage and suitable landscaping, it slows runoff and helps keep soil where it belongs.
Denver-area properties also commonly include clay soils that can expand when wet and contract as they dry. Those seasonal changes can contribute to soil slump, heave, and movement around a wall. Good retaining wall construction responds to these conditions with a stable base, well-compacted backfill, and a drainage system that reduces water buildup behind the structure.
Protecting the home and reclaiming the yard
Stabilizing a slope can protect foundations, fences, plantings, hardscapes, and other improvements located below or above the wall. It can also turn an awkward grade into level terraces for planting, seating, access routes, or other outdoor uses. That added function matters in established Denver neighborhoods where the yard must serve several purposes without expanding the property footprint.
Wall height and site conditions also affect the level of planning required. A wall retaining about four feet or less, with level backfill and no added loading near its top, may follow standard residential construction details. Taller walls, tiered designs, sloped backfill, or added loads typically require review by a structural engineer and may involve additional local requirements. Confirming those details early helps prevent changes after construction begins.
For homeowners planning a durable slope solution, Faros provides retaining wall services with attention to Denver soil, drainage, grading, and long-term use. A carefully built wall protects more than the slope itself. It preserves usable yard space, reduces avoidable maintenance, and supports the long-term value and function of the property.
Step One: Site Assessment and Soil Analysis
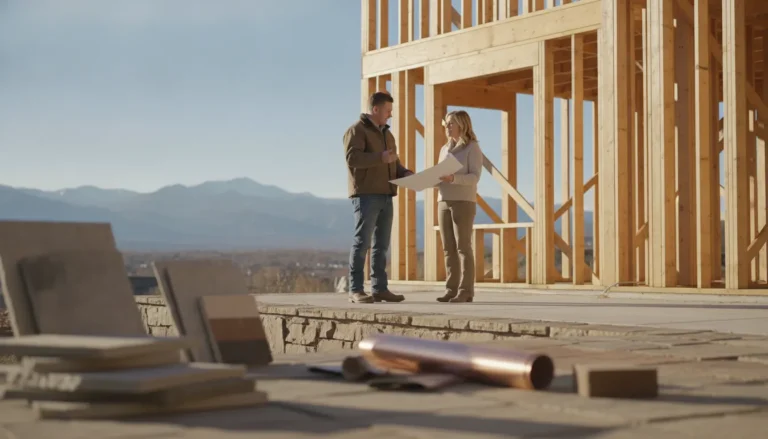
A professional retaining wall project begins with understanding the site, not digging the first trench. A careful assessment identifies utility conflicts, slope conditions, soil behavior, water movement. And local requirements so the wall is designed for the Denver Metro Area property it must support.
The first step is a thorough walk-through of the proposed wall location and the surrounding yard. The installer reviews where the slope begins and ends, how much earth the wall will hold. And whether nearby driveways, patios, fences, foundations, or other structures could affect the design. Existing grades are measured rather than estimated. Even a modest change in elevation can alter how water travels across the property and where pressure builds behind the wall.
Buried utilities must also be located before excavation. Gas, electric, water, irrigation, and communications lines can cross a backyard or run close to a planned footing. Marking these services helps protect the property, the crew, and the project schedule. It also gives the contractor a chance to adjust the wall alignment when the safest route is different from the original concept.
Understanding Denver-area soil conditions
Soil analysis is especially important in the Denver Metro Area, where expansive clay soils can heave and shift as their moisture content changes. If the wall design ignores that movement, the structure may experience settlement, leaning, cracking, or pressure that the base and drainage system were not prepared to manage. The assessment should identify the existing soil, determine whether unsuitable material needs to be removed, and establish what type of compacted base and backfill the project requires.
Water is evaluated at the same time. The plan should account for roof runoff, irrigation, uphill drainage, low areas, and any route water may take after a storm. Colorado State University Extension recommends considering utilities, grading, existing landscape, and project sequencing as part of sound site planning. That broader approach helps the wall work with the yard instead of creating a new drainage problem. Colorado State University Extension provides useful guidance on planning and sequencing landscape improvements.
Finally, the contractor checks setbacks, easements, neighborhood requirements, and applicable local building codes. Permit or engineering requirements can vary with wall height, placement, retained soil, and nearby loads. Resolving those questions before construction keeps the design practical and helps ensure the finished wall is safe, functional, and properly integrated into the landscape.
Choosing the Right Retaining Wall Materials
The right material depends on the wall’s height, soil pressure, drainage plan, site conditions, and the look you want for your Denver Metro Area property. Segmental concrete block, natural stone, poured concrete, and treated timber can all work when they are matched to the site and installed with a properly prepared base.
Material selection is one part of sound retaining wall construction. A professional assessment should consider slope, expansive or clay-heavy soil, water movement, nearby structures, and the long-term investment you want from the finished landscape.
| Material | Best use | Look | Durability considerations |
|---|---|---|---|
| Segmental concrete block | Terraced yards, garden walls, and engineered residential walls | Clean, structured, and available in several colors and textures | Interlocking units provide flexibility, but the base, setback, drainage, and reinforcement must be correct for the wall height and soil conditions. |
| Natural stone | Landscape features where the wall should blend with planting and existing stonework | Organic, varied, and highly site-specific | Strong stone can last for decades, while irregular pieces require careful placement and a stable foundation to limit shifting. |
| Poured concrete | Modern designs, space-limited sites, and walls requiring a continuous structural form | Minimal and architectural, with options for finishes or facing materials | Reinforcement, footing design, curing, and drainage are essential. Cracks or water pressure can become serious concerns when construction details are overlooked. |
| Treated timber | Lower garden terraces, rustic landscapes, and temporary or modest-height applications | Warm, natural, and informal | Even treated wood remains vulnerable to prolonged moisture, soil contact, decay, and movement. Drainage and appropriate treatment help, but its service life differs from masonry options. |
Match the material to the whole landscape
Think beyond the face of the wall. The best selection coordinates with steps, patios, fences, planting beds, and the architecture of the home. Segmental block often suits a clean, repeatable layout, while natural stone can soften a sloped yard with varied joints and texture. Poured concrete may complement contemporary outdoor living areas, and timber can support a more relaxed garden character.
For a closer look at available options, review these retaining wall materials before making a design decision. Faros can then evaluate how the preferred material will perform with the property’s grade, soil, drainage needs, and intended use.
Drainage: The Backbone of a Durable Retaining Wall
Proper drainage is the most important protection against premature retaining wall failure. When water becomes trapped behind the wall, hydrostatic pressure pushes outward on the structure, which can cause bulging, cracking, leaning, or complete failure over time.
In the Denver Metro Area, drainage deserves special attention because clay soils can hold water instead of allowing it to move quickly through the ground. A durable installation gives that water a controlled path away from the wall rather than allowing pressure to build within the backfill.
How proper drainage is installed
A professional drainage system usually begins with a perforated drain pipe installed along the base of the wall. The pipe collects water moving through the backfill and directs it to a safe discharge point. Such as daylight, a suitable drainage outlet, or an approved connection when site conditions allow. The outlet must be planned carefully so water does not simply collect at the wall’s base or flow toward another part of the property.
The pipe should be surrounded by clean, free-draining gravel. This aggregate creates open spaces that allow water to move toward the pipe instead of remaining in compacted soil. Soil backfill, construction debris, and fine material can clog those spaces, so the drainage zone needs to be separated from surrounding soil with filter fabric. The fabric allows water to pass while helping keep clay and other fine particles from migrating into the gravel and pipe.
Depending on the wall system and its design, weep holes may provide another route for water to escape through the face of the wall. They are especially useful where water needs relief at specific locations, but they are not a substitute for a properly designed drain system behind the wall. Weep holes also need to remain clear after installation and landscaping.
Why drainage details matter in clay soil
Clay can become heavy and saturated after snowmelt, irrigation, or extended rainfall. That added moisture increases the load behind the wall and can make poor backfill perform even worse. A gravel drainage zone, protected pipe, and appropriate surface grading work together to reduce that risk. The finished grade should direct runoff away from the wall, while downspouts and irrigation should not discharge directly into the backfill area.
Site water management is part of responsible landscape planning. Colorado State University Extension emphasizes evaluating water movement and landscape conditions as part of a sound design process. Those same principles help a retaining wall function as part of the yard instead of becoming an obstacle that collects runoff.
Before construction begins, confirm where collected water will go, how the wall connects to existing grades, and whether nearby utilities or hardscape limit the available drainage route. These decisions are easier to address during design than after a finished wall begins showing signs of movement.
Footings, Base Preparation, and Installation Steps
The process for building a segmental retaining wall starts with stable excavation, a compacted aggregate base, and a carefully leveled first course. From there, each course, drainage component, and backfill lift must be installed in the right sequence so the finished wall can manage soil pressure and seasonal movement.
- Excavate to stable soil. Mark the wall alignment, confirm utility locations, and excavate a continuous trench wide enough for the block, base material, and working space. Remove organic soil, loose fill, and soft spots until the trench reaches firm, stable ground. The excavation should extend below the local frost influence and provide enough depth to bury part of the first course. Standard residential guidance often begins with a 4 to 6 inch base trench. Plus additional depth for the buried block, but actual dimensions depend on wall height, soil, drainage, and site conditions.
- Place and compact the aggregate base. Add the specified angular, free-draining aggregate in controlled layers. Rake it evenly, check the elevation, and compact each layer until the base is dense and stable. A level base is essential because small errors at the bottom become larger alignment problems as additional courses are installed. Confirm the base follows the planned line and grade before setting any block.
- Set and level the first course. Place the first row of block below grade as designed, with each unit fully supported by the compacted base. Level blocks from front to back and side to side, then check the string line or layout. Remove and correct any high or low spots rather than trying to force later courses to compensate. The first course establishes the wall’s alignment, batter, and long-term appearance.
- Build upward with the required setback. Clean each block before placing the next course, engage the manufacturer’s connection system, and maintain the specified setback or batter. Stagger vertical joints between courses, keep the face aligned, and check level frequently. Do not stack through an obstruction or change the wall angle without revisiting the design.
- Install the drainage layer and perforated pipe. Place clean drainage aggregate behind the wall and install a perforated pipe at the designed base elevation, maintaining a reliable outlet. Filter fabric may be used to separate soil from the drainage stone when specified. Water buildup can sharply increase lateral pressure, so drainage is a structural part of the wall, not an optional finishing detail. [Fairfax County residential retaining wall details] also show why wall design and construction must follow appropriate residential details.
- Backfill with clean gravel in lifts. Add free-draining backfill behind the wall in manageable lifts, compacting each lift before adding the next. Keep heavy equipment far enough from the wall to avoid damaging block or creating excessive pressure. At the same time, place suitable soil in the landscape zone and shape the finished grade so surface water moves away from the wall rather than toward it.
- Install the cap and finish the site. Secure the cap units as specified, verify the final line, and complete adjoining grading, planting, or hardscape work without blocking drainage outlets. Inspect the wall for consistent joints, level transitions, clean edges, and water-management details before the site is considered complete.
Height and loading determine whether standard residential details are appropriate. The Fairfax County reference applies to certain non-tiered residential walls retaining no more than about four feet of earth with level backfill and no surcharge. Taller walls, tiered walls, sloped backfill, or walls supporting nearby structures may require a structural engineer and local review before construction begins.
Common Retaining Wall Mistakes to Avoid
Most retaining wall failures begin with preventable preparation errors, especially poor drainage, inadequate base work, or a design that does not match the site. Homeowners can screen for these problems before retaining wall construction begins by asking how water, soil movement, wall height, and material selection will be handled.
Skipping drainage behind the wall
Water trapped behind a retaining wall adds pressure to the structure and can worsen movement, cracking, leaning, or joint separation. This is one of the most important warning signs to discuss during planning. A sound design should show how water will move through the backfill and where it will discharge. Using appropriate drainage aggregate, a perforated drain line where needed, filter fabric, or other site-specific measures.
Be cautious if a proposal treats drainage as an optional add-on. Denver Metro weather brings periods of heavy moisture, while freeze-thaw cycles can turn saturated soil into a serious heaving force. The wall should be planned as part of the yard’s overall drainage strategy, not as an isolated vertical feature.
Building on an undersized or poorly compacted base
The first course cannot remain stable if the soil beneath it settles unevenly. A shallow trench, weak subgrade, or thin aggregate base may look acceptable during installation, then shift as the ground responds to moisture and seasonal freezing. Clay soils common in the Denver area deserve particular attention because they can expand, contract, and hold water.
Ask how unsuitable soil will be addressed and how aggregate will be placed and compacted. The base should be level, firm, and appropriate for the wall system. Each lift of backfill also needs proper compaction. Simply filling the space behind the wall without controlling placement can leave voids that later settle and pull the wall out of alignment.
Ignoring engineering needs for taller walls
Wall height is not the only consideration. Slope above the wall, nearby driveways or structures, tiered walls, soil conditions, and drainage all affect the forces the wall must resist. Residential code practice commonly calls for structural review as walls approach or exceed roughly three to four feet, depending on the jurisdiction and site conditions. A qualified professional can identify when an engineer, permit, or additional structural detail is appropriate.
Choosing material without considering the soil
A material should suit the wall’s height, exposure, drainage plan, geometry, and surrounding landscape. Selecting a system for appearance alone can create problems when the soil is expansive, the site is wet, or the wall must support a slope. The same material may perform well in one location and be a poor choice in another.
Tying the wall into unstable ground
A retaining wall cannot correct an unstable slope by itself. If the wall is placed on loose fill, eroding soil, or ground that is already moving, settlement and rotation may continue around the structure. Look for a plan that evaluates the full slope, transitions into stable ground, and coordinates grading with the wall. Addressing these conditions before construction is far more reliable than waiting for visible movement after completion.
What to Expect When You Work With Faros
When you choose Faros for retaining wall construction in the Denver Metro Area, you can expect an owner-led process built around careful planning, clear communication, and durable workmanship. Each project is evaluated as part of the property as a whole, so the finished wall supports the landscape instead of creating new drainage or grading problems.
A Consultation Focused on Your Property
The process begins with a conversation about your goals, the areas of your yard that are difficult to use, and the results you want from the retaining wall. Ricardo Alfaro brings direct owner involvement to that initial discussion, helping identify practical options without pushing a one-size-fits-all design.
Faros then reviews the site conditions that will influence the build. The team considers slope, soil, existing grading, drainage patterns, nearby structures, access, utilities, and the relationship between the wall and the rest of the landscape. This assessment helps establish a design that fits the property and accounts for the conditions common throughout the Denver Metro Area.
Design and Permitting Before Construction
Once the site has been assessed, Faros develops a clear plan for the wall, its materials, base preparation, drainage, and final appearance. When local requirements apply, the team addresses permitting and Denver area code considerations before construction begins. Planning these details early reduces surprises and creates a shared understanding of the work ahead.
Retaining walls do more than hold soil in place. They must manage water and resist lateral pressure from the ground behind them. A thoughtful design accounts for those forces, the surrounding grade, and the intended use of the yard. For related property improvements, explore Faros hardscape and landscape services.
Clear Communication During the Build
During construction, the team follows the agreed plan while keeping you informed about progress and any site conditions that require attention. Quality begins below the visible surface, with a properly prepared base, stable installation, effective drainage, and appropriate backfill. Faros focuses on careful execution rather than rushing toward the quickest possible completion.
That approach reflects a commitment to lasting results over a lowest-bid mentality. Good craftsmanship protects the investment in your outdoor space and helps the finished wall remain functional through seasonal changes, heavy weather, and everyday use.
Final Walkthrough and Workmanship Warranty
When the work is complete, Faros conducts a final walkthrough with you. This is an opportunity to review the finished wall, surrounding grade, drainage details, site cleanup, and any care recommendations. The team also stands behind its work with a workmanship warranty, giving you a clear point of contact after construction is finished.
From the first consultation through the final walkthrough, the goal is a straightforward experience and a retaining wall built to serve your home for years. Author: Ricardo Alfaro
Schedule a free consultation for your retaining wall project
Frequently Asked Questions
What is the process for building a retaining wall?
A professional build begins with site planning, utility checks, grading review, and soil assessment. The crew then excavates a trench, prepares and compacts the aggregate base, sets the first course carefully, installs drainage, builds the wall, and backfills in controlled layers. This sequence helps the wall manage soil pressure and fit the surrounding landscape. Rutgers Cooperative Extension outlines these core installation steps.
How do you ensure proper drainage for a retaining wall?
Drainage is designed behind the wall, not added as an afterthought. A typical system uses clean, free-draining gravel, filter fabric, and a perforated drain pipe at the base that directs water away from the structure. This reduces water buildup and the added lateral pressure it can create. Rutgers Cooperative Extension describes this drainage approach.
Do I need a permit for retaining wall construction?
Permit requirements depend on the municipality, wall height, site conditions, and any load above the wall, such as a driveway or structure. Before work begins, confirm requirements with the applicable Denver Metro Area jurisdiction. Walls retaining greater heights or supporting significant loads may also require structural review. Local code confirmation is recommended before construction.
What is the best material for a retaining wall?
There is no single best material for every site. Segmental concrete block, natural stone, and timber can all be appropriate, depending on the wall’s height, soil, drainage plan, desired appearance, and structural demands. The material should be selected after the site and grading are evaluated, rather than based on appearance alone.
Can I build a retaining wall myself?
A small decorative garden wall may be manageable for an experienced homeowner. But larger walls or walls supporting a slope require more careful base preparation, drainage, compaction, and structural planning. A professional evaluation is the safer choice when the wall is tall, near a structure, or exposed to significant soil or water pressure. Rutgers Cooperative Extension recommends professional construction for larger or heavily loaded walls.
Ready to Plan Your Retaining Wall Project?
A well-planned retaining wall can bring structure to a sloped yard while supporting drainage and a more usable outdoor space. The right next step is a conversation about your site, goals, materials, and the construction process. Schedule a consultation with the Faros team to discuss your retaining wall project in the Denver Metro Area.