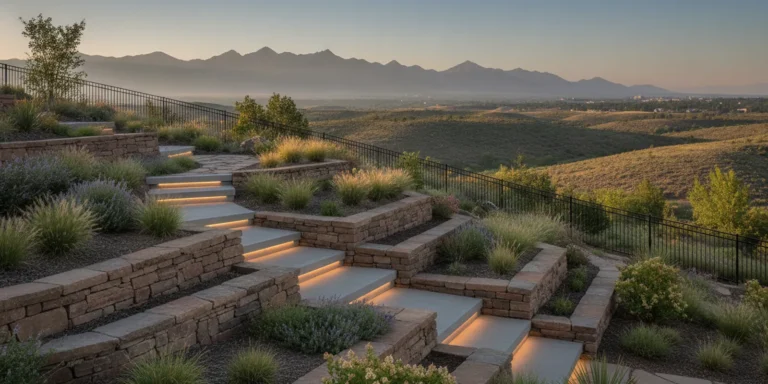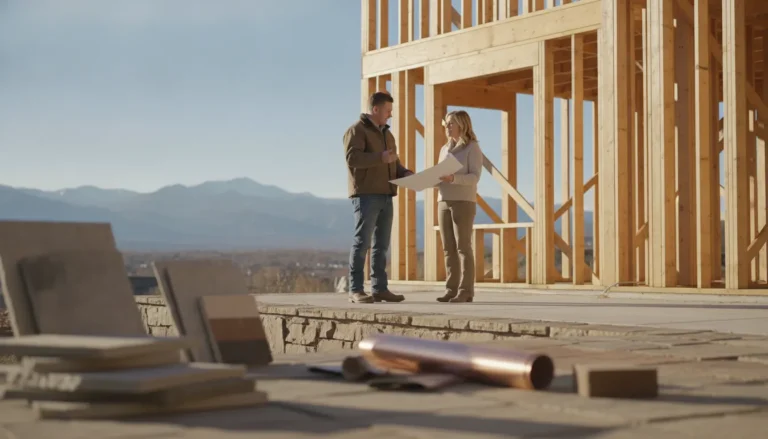

Pictures of stamped concrete walkways can help you imagine more than a surface pattern. They show how a path can connect an entry, patio, or garden, and how borders, color, and layout work together. For Denver Metro Area homeowners, the strongest design starts with how people will use the path, then chooses a finish that suits the home and site.
Talk with Faros about your walkway plans
Use inspiration images to identify details you want to discuss, not as a promise that every yard or installation will look exactly the same. Existing grades, access, drainage, and nearby construction all influence the final plan. Faros Construction Services works on residential concrete and hardscape projects in the Denver Metro Area, with an owner-led approach focused on careful planning and craftsmanship.
What should pictures of stamped concrete walkways help you decide?
Useful pictures help you compare the whole walkway, not just the stamp impression. Look at the path’s shape, width, edges, transitions, and relationship to the house and landscape before settling on a pattern.
When saving examples, note what attracts you in each one. It might be a calm stone texture, a crisp border, or a path that curves gently around planting beds. Separating those choices makes it easier to explain your preferences and avoid combining too many competing details.
- Overall character: Is the path formal and geometric, relaxed and winding, or somewhere between?
- Pattern scale: Do the stamped shapes feel appropriately sized for the walkway and nearby features?
- Color relationship: Does the concrete complement the home exterior, steps, and landscape materials?
- Edge treatment: Is there a contrasting border, a simple edge, or a transition to another surface?
- Everyday route: Does the layout connect the places people actually walk between?
Make a small reference collection rather than relying on one image. Include an example of the pattern, another showing the color direction, and a wider view that demonstrates a layout you like. A residential concrete project may involve more than the visible finish, so share what you like and what you would change.
Which stamped patterns suit a residential walkway?
Pattern choice sets the walkway’s visual tone. Stone-inspired textures can feel informal and blend with planting, while brick or tile motifs create a more ordered look near an entry or along a straight route.
Common pattern families include flagstone, slate, ashlar, cobblestone, and brick. The names describe broad visual styles, but the impression changes with the mold, joint definition, scale, and color. Ask to review full-size samples or completed work when available, because a small swatch cannot show how a repeated pattern reads across a long path.
| Pattern direction | Visual effect | Often considered for | Planning point |
|---|---|---|---|
| Irregular flagstone | Relaxed, varied shapes | Garden routes and informal curves | Check that the pattern scale feels balanced along narrow sections. |
| Slate or ashlar | Structured stone appearance | Entries and paths with a clean, tailored look | Coordinate the direction of the pattern with the route and nearby architecture. |
| Brick pattern | Repeated, orderly lines | Straight approaches and traditional details | Decide whether the layout should run across or along the path. |
| Cobblestone | Small, rounded-unit effect | Accents, borders, or character-rich settings | Review how busy the texture appears over the full walkway. |
| Large stone blocks | Broad, simple modules | Modern or understated landscapes | Keep joints and transitions intentional so the finish does not feel oversized. |
Public projects can also use stamped finishes to distinguish walking areas. For example, the City of Sedona describes animal-track panels stamped into a shared-use concrete path in its Uptown View Walk announcement. A Virginia transportation project document references a stamped brick pattern on a crossing and shared-use path, another example of how a repeated motif can help define a route (project proposal). These examples are inspiration, not a template for a private walkway.
How should you choose a border and color direction?
A border gives the walkway a visual frame, while color can tie the concrete to the home and landscape. Both choices work best when they support the main pattern instead of competing with it.
A narrow border in a related tone can make a path feel finished without drawing attention away from the texture. A darker edge creates a stronger outline. A border with a different pattern can add detail, but too many changes may make a short walkway look crowded. Consider how the edge meets steps, a porch, a driveway, or a patio, and keep the transition understandable from more than one viewpoint.
For color, begin with fixed elements that will remain in place: the home’s exterior, masonry, roof, and any existing paving. Then consider the landscape’s dominant tones. A restrained earth-inspired color often lets the stamped texture carry the interest, while a pronounced contrast can make the path stand out as a feature. Actual appearance varies with lighting and the finished surface, so review samples in context rather than selecting from a screen alone.
It can help to compare a few combinations side by side:
- One field color with a border in a slightly deeper tone.
- A single, muted color throughout, with pattern providing the visual detail.
- A more noticeable border color balanced by a simpler stamp.
Keep the number of finishes limited. If the walkway connects to a sitting area, compare it with the hardscape palette rather than designing each surface in isolation. These concrete patio design examples can help you think about how adjacent paving might relate. For a broader yard plan, review hardscape design options and integrated outdoor living spaces.
How can pictures of stamped concrete walkways guide the design?
Use pictures as a design brief by translating visual details into clear choices about texture, scale, edges, and setting. A reference becomes more useful when you can explain which part you want to borrow and how it might fit your yard.
Start by separating the image into layers. The broad view shows the walkway’s route and how much space it occupies. A closer view reveals the stamp texture, joint lines, and color variation. The edge view shows how the field meets lawn, planting, a wall, or another paved area. Each view answers a different question, so one attractive close-up is rarely enough to communicate the full idea.
When collecting examples, annotate each one with a short note. For example: “like the quiet slate texture, but prefer a straighter approach,” or “use the border idea, but keep the color closer to the home.” These notes distinguish the design element from the setting in the photograph. They also make it easier to compare alternatives without treating one picture as a complete specification.
Consider the viewpoint as well. A path seen from an upstairs window may emphasize shape and contrast, while a person walking toward the front door notices transitions and footing. Look at inspiration from both a distance and at ground level. Check whether the pattern still feels balanced when the walkway narrows, turns, or meets a landing.
- Save one example for the overall route and proportions.
- Save one detail for the stamp and border relationship.
- Write down the colors or materials around the path that should coordinate with it.
- Mark any feature in the reference that you do not want to repeat.
This approach keeps the conversation specific. It also leaves room for adjustments based on the actual site rather than forcing a photograph’s dimensions or conditions onto a different property.
How do you plan a walkway route that feels natural?
A good route follows the way people move through the yard while making each destination easy to reach. Start by mapping the connections, then decide whether a straight line or a curve makes the most sense.
List the destinations first: the front door, side gate, patio, garden, or another frequently used outdoor area. Observe the paths people already take. A new route that ignores those habits may look attractive in a rendering but get bypassed in daily use. Mark the proposed line on the ground and walk it from both ends. Check whether there is room to approach the door, turn comfortably, and pass without stepping into a planting bed.
Straight walks tend to reinforce a direct, formal approach. Gentle curves can guide movement through a garden or around a feature, but unnecessary bends may lengthen the route. The width should suit the number of users and the purpose. A simple access path has different needs from a route where two people might walk together or carry items. Discuss likely use and any accessibility priorities during planning rather than treating width as a decorative afterthought.
Think about how the path meets other elements. At a porch, coordinate the landing and steps so the transition feels intentional. Near a patio, avoid an awkward pinch point between the path, furniture, and planting. A simple porch design or a planned patio connection may influence the walkway’s starting point and direction. If a route crosses a change in elevation, consider the relationship to outdoor stairs and steps as part of the same circulation plan.
What drainage details belong in the design?
Drainage should be considered before the pattern and color are finalized. The walkway needs to work with the site’s existing grades and direct water in a way that does not create unwanted ponding or runoff toward structures.
Walk the area after rain or snowmelt if you can. Note where water collects, where it moves, and whether downspouts or nearby paved areas affect the proposed route. Share those observations during a site assessment. The finished design depends on actual site conditions, so there is no single slope or detail that fits every yard.
Pay attention to the connections at both ends and along the edges. A walkway that sits too high or low relative to a threshold, lawn, or adjoining surface can create a poor transition. Nearby walls, planting beds, and existing paving may also shape where water can go. A retaining wall and patio plan can affect the route and grade, while yard drainage planning may be relevant when water movement is already a concern. For a related look at how water affects concrete work, see this guide to concrete surface drainage.
Do not assume a decorative border will correct a drainage issue. The shape and finish are visible details; site grading and water management need their own review. Confirm how the walkway will meet existing surfaces and where runoff is intended to travel before construction begins.
What should you know about installation and seasonal care?
Stamped concrete needs coordinated preparation, placement, patterning, and finishing. A clear plan for access and adjacent work helps protect the desired appearance and reduces avoidable disruption during construction.
Before work begins, clarify the proposed limits, access route, nearby features to protect, and sequence with other improvements. If the walkway is part of a larger project, discuss whether concrete work should happen before or after walls, steps, landscaping, or a patio. Faros outlines its general approach from consultation and site assessment through design, preparation, construction, and final review on its construction services page. You can also review the company’s owner-led approach.
Concrete surfaces are exposed to seasonal weather. Use care guidance suited to the specific finish and follow the installer’s recommendations for cleaning and protection. Avoid harsh tools or unapproved products that could damage the surface. Keep leaves and debris from collecting, and address spills or grime with a method appropriate for the installed finish. If you notice a change in drainage or a surface concern, ask a qualified professional to review the condition rather than guessing at a repair.
Winter preparation is also part of caring for an outdoor route. Clear snow with methods appropriate for the surface and follow product guidance before using de-icing materials. The winter outdoor-space checklist offers broader seasonal planning ideas. For a path that meets a wall or garden edge, the related retaining wall design guide may help you think through adjacent features.
Plan a concrete walkway consultation
How can you compare walkway ideas before choosing?
Compare complete design concepts against the same practical checklist. This makes it easier to see which option suits your home, circulation needs, and landscape without getting distracted by a single striking detail.
For each idea, record the pattern family, color direction, border treatment, route shape, and transitions. Then check whether the design supports the way you use the yard. If one reference has the right texture but the wrong layout, keep the texture as a separate inspiration rather than copying the full scene.
- Gather references: Choose a few examples that show different combinations, plus at least one wide view.
- Mark the route: Sketch the start, destinations, turns, and connections to existing hardscape.
- Note site questions: Identify slopes, water movement, thresholds, and nearby work that may affect the plan.
- Narrow the finishes: Compare a small number of pattern and color combinations that complement the property.
- Review the full scope: Confirm what preparation, adjacent transitions, and coordination are needed before work starts.
If the walkway is connected to a fire feature or gathering space, use the intended seating arrangement to check circulation. A fire pit patio layout can provide a helpful reference for movement around a destination. If the design includes a sloped route, compare the walkway plan with landscape wall options and step transitions before choosing surface details.
Before making a final selection, review each option at the scale of the actual yard. A pattern that looks delicate in a close-up can dominate a narrow path, while a large-format impression may lose definition when used in a small entry area. Compare the sample or reference with the planned walkway width and the distance from which people will usually see it. Also consider what frames the path: lawn creates a different visual edge from gravel, planting, or a retaining wall.
Think through transitions one at a time. At the house, identify how the walk reaches the stoop or porch. At the far end, decide whether it stops at a gate, joins a patio, or continues as another route. At the sides, consider whether the border meets soil, planting, or another hard surface. These details influence whether the finished walkway feels like a connected part of the property or an isolated strip of patterned concrete.
It is useful to discuss preferences in terms of priorities. For example, you may want a low-contrast surface that lets the garden stand out, or a more defined path that makes the approach easy to read. A short list of must-haves and flexible details helps guide design choices while leaving room to address site conditions. Bring the same list to the final review so the proposed layout, selected finish, and adjacent work can be considered together.
Discuss your stamped concrete walkway plans with Faros
Frequently asked questions
These answers address common decisions homeowners face when using walkway pictures to guide a project. Site conditions and the final design still need individual review.
Do stamped concrete walkways have to look like stone?
No. Stone is a common visual direction, but stamped finishes can suggest brick, slate, cobblestone, or other repeated textures. Choose the look that fits the home and the scale of the route.
Can a stamped walkway include a contrasting border?
Yes. A contrasting or complementary border can frame the main pattern. Keep the number of colors and textures intentional, and plan how the border will meet steps, patios, and other surfaces.
What should I bring to a walkway planning meeting?
Bring a few reference pictures, a simple sketch of the route, and notes about where people walk, where water collects, and which existing features should remain. Photos of the actual yard can also help explain the setting.
How do I choose between a straight path and a curved one?
Choose based on the route’s purpose and the yard layout. A straight walk creates a direct connection, while a gentle curve can work around landscape features or guide movement. Walk the proposed route on site before finalizing it.
How should I care for a stamped concrete walkway?
Follow the installer’s care instructions for the specific surface. Keep the walkway clear of debris, use suitable snow-clearing methods, and check before applying cleaners or de-icing products.
Discuss your stamped concrete walkway with Faros
Thoughtful planning brings the pattern, route, drainage, and surrounding landscape together. With a clear set of references and an on-site review, you can shape a walkway that feels connected to your home and works for everyday use.
This article is by Ricardo Alfaro.