
A screened-in porch can turn an underused backyard edge into a comfortable place to dine, relax, and stay connected to the outdoors. For a Denver Metro Area home, learning how to build a screened in porch starts with more than choosing mesh and furniture. The roof, foundation, attachment to the house, drainage, permits, and snow exposure all need to work together. This guide explains the planning sequence and the points where a qualified contractor should lead the design and structural review.
Talk with Faros Construction Services about planning your screened-in porch.
How Does a Screened-In Porch Fit Your Denver Metro Area Home?
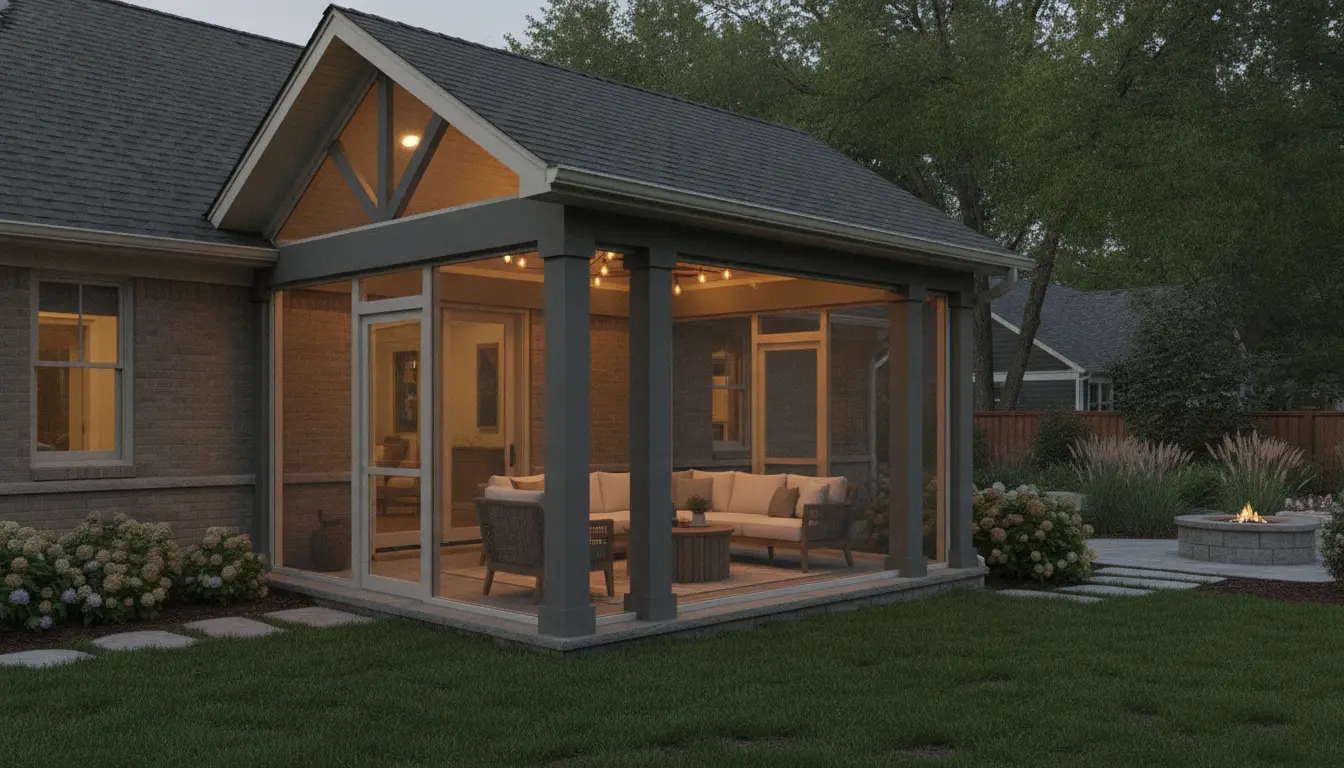
A screened-in porch is a covered outdoor room with mesh panels that limit insects while allowing air and daylight through. It is different from a fully enclosed addition because it usually has no insulated wall assembly or conditioned heating and cooling. That makes site orientation, roof protection, durable finishes, and realistic seasonal expectations especially important.
The best porch is designed around the way your household will use it. A dining-focused porch needs clear circulation and lighting. A lounge-focused porch may need deeper shade, privacy screening, and comfortable power access. If the porch will connect directly to an existing deck, patio, or kitchen, the transition between those spaces should be considered before framing begins.
Faros Construction Services builds decks, pergolas, and porches as part of a broader outdoor-living plan. A screened-in porch can be the central room in that plan, or it can connect to a patio, walkway, landscape edge, or outdoor kitchen. The decks, pergolas, and porches service can help coordinate those relationships instead of treating the porch as an isolated structure.
What Should You Evaluate Before Building?
Before construction, evaluate the proposed footprint, the existing house, the ground below it, the path of water, and the way people will enter and leave the porch. A careful site review catches conflicts early, when design changes are simpler and safer than field changes after materials arrive.
- Location and orientation: Note morning and afternoon sun, prevailing wind, views, privacy, and the relationship to nearby property features.
- House connection: Identify the wall, rim area, roof edge, or existing deck where the new structure may connect. Exterior finishes are not automatically structural attachment points.
- Ground conditions: Review slope, soil, existing footings, buried utilities, roots, and signs of standing water or settlement.
- Access: Plan how people will reach the porch from the home and yard. Door swings, stairs, handrails, and furniture paths should be checked together.
- Services: Locate electrical, gas, irrigation, drainage, and lighting needs before excavation or foundation work.
- Neighborhood requirements: Confirm applicable permit, setback, inspection, and association requirements for the property.
Take photographs and measurements during the first site visit, but do not use a rough sketch as a structural plan. A contractor should verify dimensions in the field and identify whether the porch can use an existing slab, needs new footings, or requires a more involved foundation approach.
How Do You Plan the Foundation and Structural Connection?
The foundation and house connection carry the porch safely through everyday use, wind, snow, moisture, and seasonal movement. A qualified contractor should determine the footing, post, beam, ledger, joist, fastener, and flashing details from the actual site and current requirements, rather than copying a generic plan.
Start by deciding whether the porch will be self-supporting, attached to the house, or a combination of both. A self-supporting frame can reduce dependence on the existing wall, but it still needs carefully located footings and lateral stability. An attached frame needs a verified load path into the home and protection against water entering at the connection.
Pay close attention to these structural checkpoints:
- Footings: New supports should be placed at locations that match the beams and posts. The depth, size, reinforcement, and bearing conditions require site-specific review.
- Posts and beams: Posts need a stable connection at the base and a secure connection to the beam. The beam layout should account for the roof and any screen framing above it.
- Ledger and wall attachment: If the porch attaches to the house, the ledger must connect to an appropriate structural member. Siding, trim, sheathing, and finishes alone are not enough.
- Flashing and separation: Metal flashing and compatible membranes help direct water away from the wall. The details must work with the existing siding and cladding.
- Lateral stability: Screens can catch wind, and a roof adds height and weight. Bracing and connections should be reviewed as part of the complete frame.
- Loads above: Roof framing, snow, lighting, fans, and any ceiling finish add demands that should be included in the design.
The American Wood Council deck construction guide is a useful reference for prescriptive wood-deck concepts, including footings, beams, joists, and ledger connections. It is not a substitute for a current site review or a contractor’s structural judgment. Existing homes, covered roofs, unusual spans, and local amendments can require a different approach.
Have the porch connection and foundation reviewed before you commit to a build plan.
Which Roof and Drainage Decisions Matter Most?
The porch roof should protect the living area without sending water toward the house, foundation, walkways, or neighboring property. Roof slope, edge details, gutters, downspouts, flashing, and discharge points should be designed as one system, with room for snow and seasonal runoff.
Begin with the roof relationship to the existing home. A porch roof that meets the house may need a carefully detailed wall or roof intersection. A freestanding roof may simplify the house connection, but it still must manage uplift, support, and drainage. The lowest edge should not create a concentrated stream beside the foundation.
Use a clear drainage plan that answers four questions:
- Where will water leave the roof?
- Where will gutters and downspouts be located?
- How will discharge move away from the foundation?
- What happens when snow or ice blocks part of the system?
Ground grading matters as much as the roof. The surface below and around the porch should direct water away from the home while preserving safe walking routes. If the porch meets an existing patio, the new work should not create a low spot at the threshold. Drainage improvements may include grading, a channel drain, a properly directed downspout, or a larger site solution coordinated with the landscape.
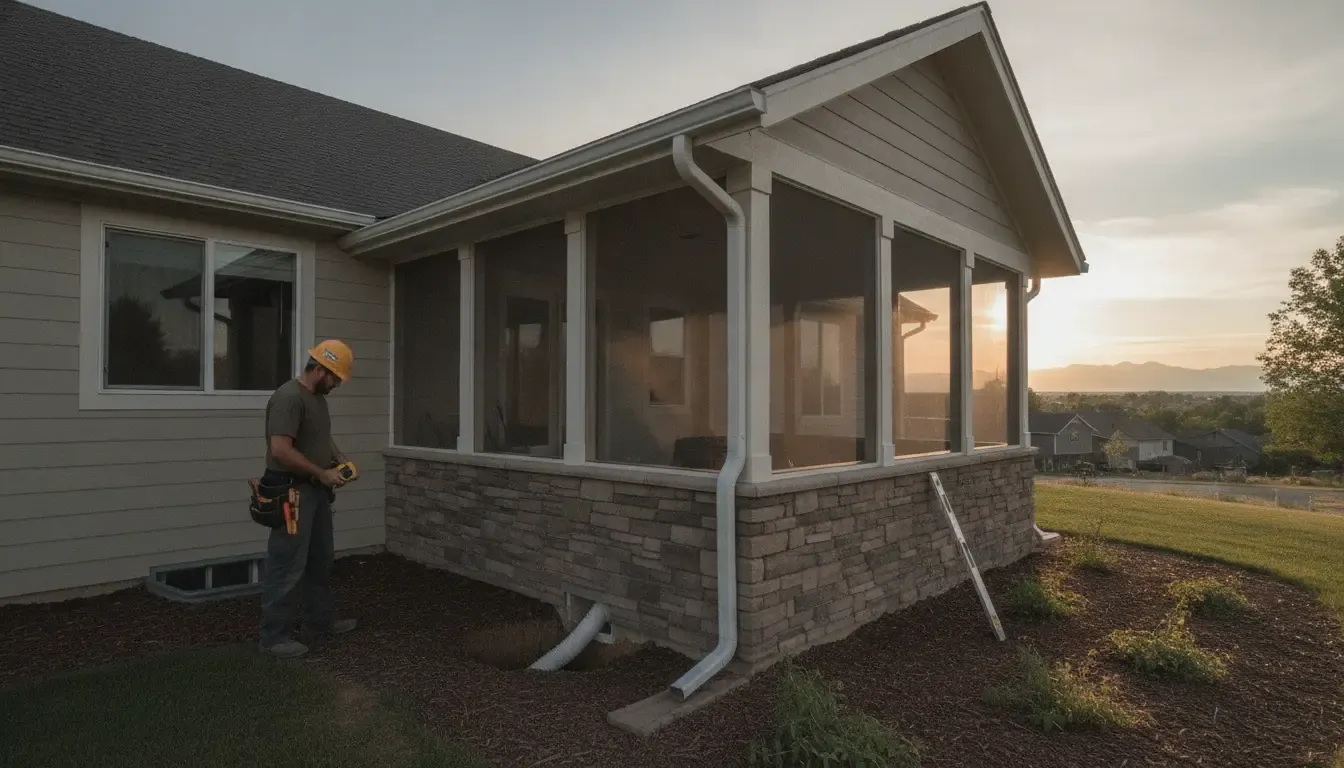
Do not rely on a roof overhang alone to solve water management. Wind can move rain, ice can redirect runoff, and screen walls still need protection at their base. A contractor should review the roof edge, wall connection, gutter system, foundation clearance, and final grade before the framing is closed in.
How Should You Choose Screening, Flooring, and Finishes?
Screening and finishes should match the porch’s exposure, maintenance expectations, and intended use. A good material plan balances visibility, airflow, durability, cleaning, pet traffic, furniture, and the possibility of replacing an individual panel without rebuilding the entire enclosure.
Screen options may include standard mesh, stronger pet-resistant mesh, or other products selected for the home’s conditions. Ask how each option handles sunlight, small tears, cleaning, and replacement. Screen framing also deserves attention because a neat, tensioned installation is more durable and more comfortable to look through than loose panels or improvised fasteners.
For the floor, coordinate the porch surface with the foundation and nearby outdoor spaces. Concrete can provide a durable, low-maintenance base when it is properly supported and detailed. Wood or composite decking can create a lighter deck-style feel, but the framing, ventilation, fasteners, and drainage below the surface still matter. Tile or other finishes require a suitable substrate and a plan for movement and moisture.
| Planning area | Questions to answer | Denver Metro Area consideration |
|---|---|---|
| Screen mesh | How will it handle pets, sunlight, cleaning, and repairs? | Choose a system that can be maintained through strong sun, wind, and seasonal use. |
| Floor surface | How will furniture, water, snow, and foot traffic affect it? | Coordinate the surface with drainage, freeze-thaw movement, and the adjoining patio or yard. |
| Ceiling and lighting | Will the porch need fans, recessed lights, or surface fixtures? | Plan electrical routes and fixture support before the ceiling is closed. |
| Doors and thresholds | How will people, pets, and furniture move through the opening? | Keep the threshold safe and manage water at the door during storms and snowmelt. |
Use finishes that support the overall outdoor-living plan. For example, a porch floor can align visually with a concrete patio while the screen framing complements the home’s trim. The Faros outdoor living spaces service can help connect the porch to patios, shade structures, lighting, and landscape features.
What Permits and Reviews Are Needed?
A screened-in porch can involve structural, roofing, electrical, zoning, and inspection requirements. The correct permit path depends on the property and the work proposed, so confirm the current requirements with the local building department before construction begins.
Denver’s official guidance for residential decks, porches, patios, pergolas, and carports is a useful starting point for understanding the review process. Properties elsewhere in the Denver Metro Area may follow different local procedures, adopted codes, or association requirements. A contractor should identify which authority applies to the address and what drawings or inspections are required.
Before submitting anything, prepare a project packet that may include:
- A site plan showing the home, property lines, proposed porch, setbacks, and drainage direction.
- Floor, roof, framing, elevation, and connection drawings that match the actual design.
- Foundation and footing information appropriate to the site.
- Details for stairs, guards, handrails, doors, screens, and roof drainage.
- Electrical and lighting information when the project includes power or fixtures.
- Association or neighborhood approvals when they apply to the property.
Do not schedule demolition or order every finish before the permit and design questions are settled. A thorough pre-construction phase gives the homeowner a clearer sequence, reduces avoidable changes, and provides a shared record of what the contractor intends to build.
How Do You Prepare a Screened-In Porch for Snow and Year-Round Use?
Denver Metro Area weather can shift quickly, so year-round usability starts with realistic planning rather than treating a screened porch like an interior room. The roof must be designed for its loads, water must be directed away from the structure, and furnishings and screens need a seasonal care plan.
Snow planning is not only a question of how much snow lands on the roof. Drifting, uneven accumulation, meltwater, ice at the roof edge, and blocked downspouts can all affect performance. A contractor should confirm the roof framing and connections for the applicable design conditions and show how water will leave the porch during thaw cycles.
To make the space more useful across the year, consider:
- Roof overhangs or shades that reduce direct sun without blocking needed daylight.
- Screen doors and hardware that can be adjusted or replaced as the porch settles into normal use.
- Lighting that supports evening use while limiting glare through the screens.
- Ceiling fans or other approved ventilation solutions where they fit the design.
- Furniture that can be cleaned, covered, or stored during severe weather.
- Clear access for inspecting gutters, roof edges, screens, fasteners, and the foundation.
A screened porch is generally best planned as a protected outdoor space, not a conditioned living room. If your priority is full winter comfort, compare the design with a three-season or fully enclosed addition before finalizing the scope. Faros has already explained the differences in its guide to screened porches and sunrooms, but the final decision should follow the home’s structure, intended use, and permitting requirements.
What Does the Construction Process Look Like?
A well-managed build moves from verified information to construction in a deliberate sequence. Faros Construction Services uses an owner-led process that begins with consultation and site assessment, continues through design and permitting, and ends with a walkthrough and care guidance.
- Consultation and site assessment: Discuss how you want to use the porch, inspect existing conditions, confirm access, and identify constraints.
- Measurements and design: Develop the footprint, roof, framing, screen system, floor, door, lighting, and drainage details.
- Structural and permit review: Confirm the attachment method, foundation approach, applicable requirements, and inspection path.
- Preparation: Protect the home, locate utilities, prepare the site, and coordinate material delivery and trade work.
- Foundation and framing: Install footings or supports, frame the floor and roof, and complete the house connection and flashing.
- Roof, drainage, and enclosure: Finish roof edges, gutters, downspouts, screen framing, doors, and weather-resistant details.
- Finishes and inspection: Complete flooring, trim, lighting, and cleanup, then address required inspections and the final punch list.
- Walkthrough and maintenance: Review screens, fasteners, drainage, seasonal care, and any warranty or maintenance guidance.
Homeowners can support the process by making decisions on use, access, lighting, and finishes early, keeping the work area clear, and asking for clarification when a detail changes. The most useful questions are specific: How does this connection carry load? Where will the water go? What will be inspected? How will this screen or finish be repaired later?
FAQs: Building a Screened-In Porch
These common questions address the planning decisions homeowners should settle before a screened-in porch moves from an idea to a permit-ready project.
Do I need a permit to build a screened-in porch?
Often, a screened-in porch requires review because it can include a foundation, structural framing, roof, stairs, electrical work, or an attachment to the home. Requirements vary by property and local authority, so confirm the current permit path before work starts.
Can a screened-in porch use my existing patio or deck?
Sometimes, but the existing structure must be inspected first. A patio may not have the footings needed for a roof and screen enclosure, while a deck may need reinforcement or a separate support system. Do not assume an existing surface can carry the new loads.
Should the porch be attached to the house or freestanding?
Either approach can work when it is designed for the site. An attached porch can create a convenient transition but requires careful structural and water-management details. A freestanding porch can reduce dependence on the wall, but it still needs stable foundations, lateral support, and a safe connection to the home entry.
Will a screened-in porch be comfortable during winter?
A standard screened porch is an outdoor space that protects against insects, direct sun, and light rain, not a heated interior room. Roof design, wind exposure, furnishings, and seasonal maintenance can extend its usefulness, but an enclosed addition may be a better fit when winter comfort is the primary goal.
What should I ask a screened-in porch contractor?
Ask how the foundation, house connection, flashing, roof drainage, snow loads, screen system, permits, inspections, electrical work, and final walkthrough will be handled. Also ask who will remain responsible for communication and quality control throughout the project.