There’s a special kind of pride that comes from stepping back and admiring a project you built with your own two hands. If you’re ready for a challenge that adds serious value and beauty to your home, a retaining wall is a fantastic choice. Success isn’t just about muscle; it’s about technique and planning, especially here in the Denver area where our soil and weather demand a smart approach. This guide breaks down how to build a retaining wall with concrete blocks into clear, manageable steps. We’ll show you how to create a solid foundation, manage water pressure, and stack your blocks for maximum strength, giving you the confidence to build a structure that is both beautiful and incredibly durable.
Key Takeaways
- Build for Denver’s Climate: A wall’s longevity depends on its foundation and drainage. To combat our freeze-thaw cycles, you must dig your footing below the frost line and install a gravel backfill and perforated pipe system to manage water pressure.
- The Right Materials Create a Stronger Wall: Never use standard cinder blocks, as they will crack under lateral pressure. Instead, choose solid, interlocking retaining wall blocks and lay them in a staggered pattern to ensure the structure is strong enough to last.
- Plan for Safety and Regulations First: Before breaking ground, always call 811 to locate utility lines and check local building codes for permit requirements, especially for walls over four feet. Knowing when a project requires a professional ensures it’s built correctly and safely.
What You’ll Need for Your Retaining Wall
Before you break ground, gathering all your supplies is the best way to set yourself up for a smooth and successful project. A few trips to the hardware store mid-project can really slow down your momentum. Think of it as your pre-build checklist. Here’s a complete rundown of the materials, tools, and safety equipment you’ll need to build a sturdy and beautiful retaining wall that lasts.
Choosing the Right Concrete Blocks
This is one area where you absolutely don’t want to cut corners. While it might be tempting to grab standard cinder blocks to save a few dollars, they simply aren’t designed to handle the immense lateral pressure from the soil your wall will hold back. Instead, you need to use special, solid retaining wall blocks. These are heavier and specifically engineered for strength. Many feature a small lip on the bottom edge that helps them interlock with the row below, creating a much more stable and unified structure that can stand up to Denver’s changing seasons.
Your Materials Checklist
Having a clear list makes shopping so much easier and ensures you don’t forget a critical component. For a durable retaining wall, you’ll want to gather these key items. If you’re unsure about quantities or sourcing the best local materials, a professional hardscape contractor can be a great resource.
- Retaining Wall Blocks: Calculate the square footage of your wall face and add about 5% extra to cover any cuts or mistakes.
- Mortar Mix: Choose a high-strength type designed specifically for masonry projects.
- Concrete: This is for pouring the footing, which acts as the stable foundation for the entire wall.
- Cap Blocks: These provide a clean, polished look for the top course of your wall.
- Rebar: Steel reinforcement rods may be necessary for added strength, especially for taller walls.
Tools and Equipment for the Job
You don’t need a workshop full of expensive equipment, but having the right tools on hand is essential for getting the job done correctly and efficiently. A good step-by-step guide will show you how each tool is used, but here’s what you should have ready to go before you start:
- Shovel or trenching tool
- Wheelbarrow for mixing concrete and mortar
- Mason’s trowel
- 4-foot level
- String line and stakes to keep your courses straight
- Chalk line
- Rubber mallet for tapping blocks into place
- Concave jointer for finishing mortar joints
- Tape measure
Don’t Forget Your Safety Gear
Working with concrete and mortar can be messy and hazardous if you aren’t careful. The dust can irritate your lungs, and wet cement is caustic and can cause skin burns. Before you start mixing or cutting, make sure you have the proper safety gear. This isn’t optional—it’s essential for protecting yourself throughout the project. At a minimum, you should always wear:
- Safety glasses or goggles to protect your eyes from dust and debris.
- Heavy-duty, waterproof gloves to protect your hands from the alkaline cement.
- A dust mask, especially when mixing dry concrete or mortar.
Prepare Your Site and Foundation
A strong retaining wall starts with a solid foundation. Think of it like building a house—you wouldn’t put it on shaky ground, right? The same principle applies here. The preparation you do before laying a single block is what will keep your wall standing straight and strong for years to come. This phase is all about creating a stable base that can handle the pressure from the soil behind it and withstand Denver’s unique climate, from heavy snow to summer heat.
Taking the time to properly assess your site, dig a correct trench, and pour a sturdy concrete footing will save you from headaches down the road. A wall built on a weak foundation can lean, crack, or even collapse, turning your weekend project into a costly repair job. We’ll walk through exactly how to get this critical first stage right, setting you up for a successful build.
Assess the Site and Locate Utilities
First things first, map out exactly where your wall will go. Use stakes and string to create a clear outline. Before you dig, you must find out what’s happening underground. The most important call you’ll make is to 811, the “Call Before You Dig” hotline. This free service sends local utility companies to your property to mark the location of any buried lines like gas, water, and electricity. Hitting one of these is dangerous and expensive, so don’t skip this step.
You also need to check in with your local building office. In the Denver metro area, retaining walls taller than four feet often require a permit and may even need plans from an engineer. It’s always better to ask first than to have to tear down your work later.
Dig the Trench Correctly
Once your site is marked and clear of utilities, it’s time to grab your shovel. You’ll need to dig a trench for the wall’s footing. The key here is to dig deep enough to get below the frost line, which is the depth to which the ground freezes in winter. In Denver, this is crucial for preventing your wall from heaving and shifting when the ground freezes and thaws.
Your trench should also be wide enough to accommodate the concrete footing, which we’ll get to next. A good rule of thumb is to make the trench at least twice as wide as the concrete blocks you’re using. Make sure the bottom of the trench is level and tamp it down firmly to create a compact, stable base for the footing.
Pour a Solid Concrete Footing
The concrete footing is the foundation of your foundation. It distributes the wall’s weight evenly and anchors it to the ground. This footing needs to be at least twice as wide as your concrete blocks. So, if you’re using standard 8-inch blocks, your footing should be at least 16 inches wide. The depth should be about the same as the width of one block.
After mixing your concrete, pour it into the trench, making sure it’s level. You can use a trowel to smooth the surface. If your wall is going to be tall or hold back a significant amount of soil, it’s a good idea to place rebar into the wet concrete for extra strength. Let the footing cure for at least two to three days before you start laying blocks. This step requires precision, and if you’re unsure, a professional concrete contractor can ensure it’s done right.
Foundation Depth for Denver’s Soil
Working in the Denver area means dealing with our famous expansive clay soil. This type of soil swells when it gets wet and shrinks when it dries, which can put a lot of pressure on structures like retaining walls. This is another reason why digging your foundation below the frost line is so important—it helps minimize the impact of soil movement.
By creating a deep and stable foundation, you give your wall a fighting chance against the shifting ground. A properly prepared base ensures that your wall remains a beautiful and functional part of your yard, not a maintenance problem. Understanding our local conditions is key, and it’s something an experienced hardscape and landscape contractor always accounts for.
Lay the Concrete Blocks
With your foundation set and cured, it’s time for the most rewarding part: seeing your wall come to life. Laying the concrete blocks is where precision and patience really pay off. Each course builds upon the last, so getting the first one perfect is the key to a straight, strong, and professional-looking wall. This process requires a methodical approach, checking your work as you go to ensure everything is level and aligned. Taking your time here will prevent headaches and costly fixes down the road. For homeowners in the Denver area, building a sturdy wall that can handle our unique soil and weather conditions is essential, and it all starts with proper block-laying technique. As a professional hardscape and landscape contractor, we know that a solid structure depends entirely on a solid start.
Start with the First Course
Your first row of blocks, or the first course, is the most important one you’ll lay. It sets the standard for the entire wall. Begin by lightly wetting the concrete footing where you’ll be working; this prevents the dry concrete from pulling moisture out of your mortar too quickly. Spread a one-inch layer of mortar along the footing. Using the tip of your trowel, create a shallow V-shaped groove down the middle of the mortar bed. This helps the mortar spread evenly when you set the block. Apply a layer of mortar to the end of your first block and firmly press it into place on the footing, giving it a little wiggle to set it securely.
Keep It Level and Aligned
A level is your best friend during this stage. After placing each block, use your level to check that it’s perfectly flat from front to back and side to side. You also need to make sure it’s plumb, which is just a builder’s term for perfectly vertical. Use a rubber mallet to gently tap the blocks into alignment as needed. Don’t just check individual blocks; place your level across several blocks at a time to ensure the entire course is straight. It might feel tedious, but checking and re-checking every step of the way is what separates a DIY project from a professional-grade wall that will last for decades.
Use a Staggered Block Pattern
To give your wall maximum strength, you’ll want to lay the blocks in a staggered pattern, often called a running bond. Think of a classic brick wall—the joints don’t line up vertically. This pattern helps distribute the pressure from the soil behind the wall across a wider area, preventing weak spots. To achieve this, you’ll need to cut a block in half to start your second course. From there, each new course will begin with a half-block, ensuring the joints are offset from the course below. This interlocking technique is fundamental to the structural integrity of any block retaining wall.
Apply Mortar and Reinforcement
As you build your wall, you’ll need to add reinforcement, especially if it’s over a couple of feet high. The rebar you placed in the footing should extend up through the hollow cores of the blocks. As you complete a few courses, it’s time to fill those cores with grout to lock the rebar in place and create a solid, reinforced structure. A good rule of thumb is to use a coarse grout for block cores wider than four inches and a fine grout for anything narrower. This ensures there are no voids and that the rebar is fully encased, turning your wall into a single, powerful unit. This is a critical step any expert concrete contractor would never skip.
Handle and Place Blocks Safely
Finally, let’s talk about safety. Concrete blocks are heavy and abrasive, and wet mortar can irritate your skin. Always wear heavy-duty waterproof gloves to protect your hands and safety glasses to shield your eyes from any splashes or debris. When you’re lifting the blocks, remember to lift with your legs, not your back, to avoid strain. Working safely ensures your project is a positive experience from start to finish. After all, the goal is to build a beautiful retaining wall you can be proud of, not to end up with a sore back or an injury.
Plan for Proper Drainage
If you take away only one thing from this guide, let it be this: proper drainage is the key to a long-lasting retaining wall. Water is the number one enemy of any retaining structure. When it collects behind the wall, it creates immense pressure that can cause bowing, cracking, and even total failure. This is especially true in the Denver metro area, where our freeze-thaw cycles can turn trapped water into a powerful, destructive force. A solid drainage plan isn’t just a suggestion; it’s an essential part of the building process that protects your investment and ensures your wall stands strong for years to come.
Why Water Pressure Matters in Denver
Water that gets trapped in the soil behind your retaining wall creates something called hydrostatic pressure. Think of it as the weight of the water pushing relentlessly against the back of your wall. In Denver, this problem is amplified by our climate. When that trapped water freezes, it expands by about 9%, exerting incredible force on your blocks. This repeated cycle of freezing and thawing can push a poorly drained wall right over. That’s why managing water isn’t just about preventing sogginess; it’s about releasing this pressure and protecting the structural integrity of your entire hardscape and landscape project.
Install Perforated Drainage Pipes
One of the most effective ways to manage water is with a perforated drainpipe. This is simply a pipe with small holes or slits that you’ll place at the base of the wall, right behind the first course of blocks. To prevent the holes from getting clogged with dirt, it’s a great idea to use a pipe that comes with a fabric “sock” or wrap it in landscape fabric yourself. Make sure you lay the pipe so it has a slight downward slope, allowing gravity to carry the water away from the wall to an exit point, often called “daylighting.” This simple component is your wall’s best defense against water buildup.
Place Your Backfill and Gravel
What you put behind your wall is just as important as the wall itself. Never backfill directly against your blocks with the native soil you dug out. That dense soil will trap water. Instead, you need to create a drainage zone using gravel. Fill the space directly behind the wall with at least 12 inches of ¾-inch angular gravel. This creates a porous layer that allows water to flow freely down to your perforated drainpipe at the bottom. As you build each course of your wall, add another layer of gravel behind it, compacting it as you go. This ensures you have a consistent drainage column from top to bottom.
Add Weep Holes for Water Management
For an extra layer of protection, consider adding weep holes to your wall. Weep holes are small gaps or pipes placed in the bottom course of the wall that give water another escape route. They are a simple way to relieve any hydrostatic pressure that might build up at the base. You can create them by leaving a small, mortar-free gap between a few blocks on your first course or by inserting a short piece of 1.5-inch PVC pipe through the block. While a perforated pipe and gravel backfill are your primary drainage system, weep holes provide excellent backup support to keep your wall dry and stable.
Finish and Reinforce Your Wall
With the main structure of your wall in place, it’s time for the finishing steps that ensure it’s strong, stable, and looks great. These final details are what separate a temporary fix from a lasting feature in your landscape. Properly reinforcing, backfilling, and capping your wall are essential for its long-term performance, especially with Denver’s variable weather. Taking your time here will pay off for years to come.
Install Cap Blocks for a Finished Look
Cap blocks, or capstones, are the flat, solid blocks that sit on the very top of your wall. They provide a clean, professional look and protect the hollow cores of the blocks below from collecting water and debris. To install them, apply a layer of mortar to the top course of your wall and press the cap blocks firmly into place. For a polished appearance, use a special tool called a concave jointer to smooth the mortar joints. This simple step gives your wall a beautiful, cohesive finish that ties the whole project together.
Add Geogrid for Taller Walls
If your retaining wall is over a few feet tall, you’ll need to add reinforcement to handle the immense pressure from the soil behind it. Geogrid is a synthetic mesh that stabilizes the soil, effectively tying it back into the hillside. You lay the geogrid on top of a course of blocks, letting it drape down the back of the wall and extend several feet into the soil you’ll be backfilling. As you add more courses, you’ll layer in more geogrid. This is crucial in the Denver area, where soil naturally moves with freezing and thawing cycles. For complex projects, working with an experienced hardscape and landscape contractor ensures your wall is engineered to last.
Backfill and Compact the Soil
Proper backfilling is all about drainage. The space directly behind your wall should be filled with gravel, not dirt. Gravel allows water to flow freely down to your drainage pipe, preventing hydrostatic pressure from building up and pushing against your wall. If you use dirt, you’ll end up with mud seeping through the blocks every time it rains. Add the gravel in 6- to 8-inch layers, compacting each layer thoroughly before adding the next. This ensures the backfill is dense and stable. You can add a layer of topsoil at the very top if you plan to add plants.
Add Your Finishing Touches
Now for the fun part—making your new retaining wall a beautiful part of your yard. Landscaping is a great way to soften the look of the concrete blocks and integrate the wall into your garden. You can plant cascading flowers or vines in the soil on top to spill over the edge, or add shrubs and perennials at the base. Consider installing low-voltage lighting to highlight the wall’s texture at night. Your retaining wall doesn’t just have to be functional; it can be a key element in creating beautiful and inviting outdoor living spaces.
Avoid These Common Mistakes
Building a retaining wall is a fantastic project, but a few common missteps can lead to a leaning, cracking, or collapsing wall down the road. Taking the time to get the details right from the start will save you from major headaches and costly repairs. Let’s walk through the most frequent mistakes so you can build a wall that’s not only beautiful but also strong enough to last for years.
Improper Foundation and Footing
Your wall is only as strong as the foundation it sits on. A common error is making the footing too narrow or too shallow. A good rule of thumb is to make the footing at least twice as wide as your concrete blocks. So, for an 8-inch block, you’ll want a 16-inch-wide footing. In the Denver area, it’s also critical that your footing is deep enough to sit below the frost line. This prevents the ground from shifting during our freeze-thaw cycles and pushing your wall out of place. Pouring a solid concrete footing is the most important step toward a stable, long-lasting wall.
Forgetting About Drainage
Water is the number one enemy of a retaining wall. When water builds up in the soil behind your wall, it creates immense pressure. During a Denver winter, that trapped water can freeze, expand, and exert enough force to push the entire wall over. The fix is simple: proper drainage. Always fill the space directly behind your wall with gravel, not dirt. Gravel allows water to drain down and away freely. Installing a perforated pipe at the base is also a key part of a good drainage system that will protect your investment from hydrostatic pressure.
Ignoring Height Limits and Permits
Before you even break ground, it’s essential to check in with your local building office. Many homeowners don’t realize that retaining walls over a certain height—often four feet—require special permits and engineering. Taller walls may need steel reinforcement (rebar) or plans from a licensed engineer to be considered safe and up to code. Ignoring these regulations can lead to fines and an order to tear down your hard work. You can find more information about local requirements from the Denver Community Planning and Development office.
Choosing the Wrong Materials
Not all blocks are created equal. A frequent and costly mistake is using standard cinder blocks for a retaining wall. These blocks are designed to handle vertical loads, like in a house foundation, not the intense lateral (sideways) pressure from the soil behind a retaining wall. They will eventually crack and fail. Instead, you need to use blocks specifically made for retaining walls. These are heavier and often feature a small lip on the back or an interlocking design that helps them securely lock together, creating a much stronger and more durable structure.
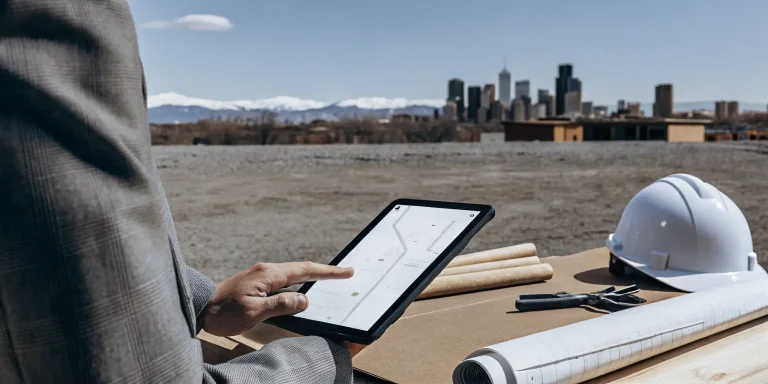
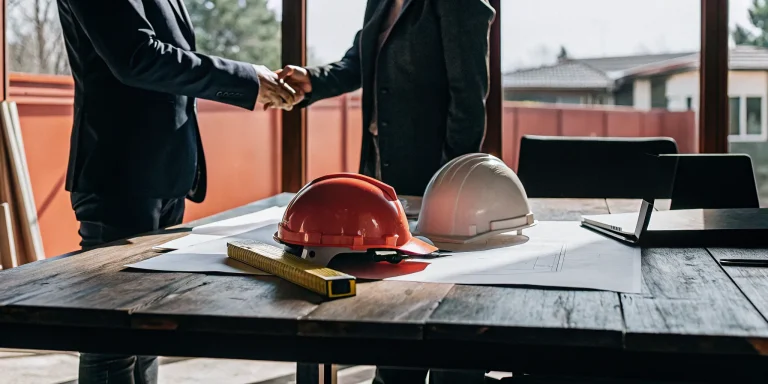
Know When to Call a Pro in the Denver Area
Tackling a DIY project can be incredibly satisfying, but some jobs have hidden complexities that can turn a weekend project into a long-term headache. Building a retaining wall, especially in the Denver metro area, is one of those projects. While a small, decorative garden wall might be a great DIY challenge, larger or more critical walls often require a professional touch to ensure they are safe, effective, and built to last.
Knowing your limits is key. A poorly constructed retaining wall can fail, leading to property damage, safety hazards, and costly repairs that far exceed the initial savings of doing it yourself. It’s not just about stacking blocks; it’s about understanding soil mechanics, water drainage, and structural integrity—factors that can be particularly tricky in our local environment. Bringing in an expert from the start provides peace of mind, guaranteeing that the job is done right the first time. A professional hardscape and landscape contractor has the experience, equipment, and understanding of local conditions to build a structure that stands the test of time and adds real value to your home. They can see potential problems before they start and build a solution that works with your landscape, not against it.
For Complex Soil or Engineering Needs
Here in the Denver area, our soil has its own unique personality, and it isn’t always cooperative. Issues like poor drainage, expansive clay soil, and the potential for erosion can seriously complicate a retaining wall installation. A professional can properly assess your property’s specific conditions and design a wall that can handle them. They understand how to manage water runoff and ensure the foundation is stable, preventing the wall from shifting, cracking, or failing down the road. This expertise is crucial for a successful and long-lasting project that protects your investment and your property.
When Your Wall Has Height or Structural Issues
The taller the wall, the more pressure it has to withstand. A retaining wall that’s more than a few feet high is managing an immense amount of force from the soil behind it. If it’s not engineered correctly, the risk of a collapse becomes very real. Professionals can perform the necessary engineering assessments to ensure your wall’s design, materials, and reinforcement are sufficient for its height. They also handle the complexities of local building codes and permits, making sure your project is fully compliant and, most importantly, safe for everyone. This step is non-negotiable for ensuring the structural integrity of your wall.
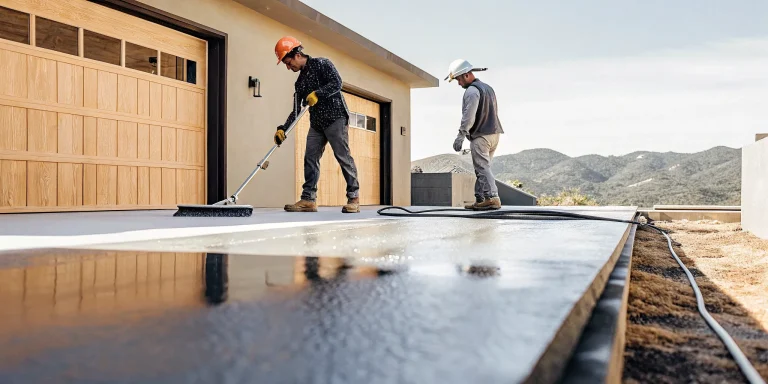
To Save Time, Labor, and Future Costs
Let’s be honest: building a retaining wall is hard physical work. Each concrete block can weigh around 85 pounds, and the process of digging, leveling, and stacking is demanding. Hiring a professional team saves you from days of back-breaking labor. More importantly, it saves you from the risk of costly mistakes. An expert concrete contractor has the right tools and techniques to work efficiently and accurately. Investing in professional installation from the start is often the most cost-effective choice, protecting you from the expense and stress of fixing a failed wall later on. It’s about getting a beautiful, durable result without the personal wear and tear.
Related Articles
- Paver Base 101: Your Complete Guide for 2026
- Hardscape and Landscape Contractor – Faros Construction Services
- Concrete – Faros Construction Services
Frequently Asked Questions
Is building a retaining wall myself really cheaper than hiring a contractor? While you might save on labor costs upfront, a DIY retaining wall can become incredibly expensive if it fails. The cost to tear down a leaning or cracked wall and have it rebuilt correctly will always be higher than the cost of having it professionally installed from the start. Think of hiring an expert as an investment in peace of mind and a guarantee that the job is done right the first time, especially when dealing with the structural complexities of taller walls or tricky soil conditions.
If I can only focus on getting one thing perfect, what should it be? This is a tough one because two things are equally critical: the foundation and the drainage. A wall built on a shallow or uneven footing will inevitably shift and fail. At the same time, a wall without a proper drainage system behind it will be pushed over by the immense pressure of water-logged soil. You can’t have a lasting wall without getting both of these elements absolutely right.
Can I really not just use regular cinder blocks from the hardware store? You really can’t, and this is one of the most common mistakes people make. Standard cinder blocks are designed to handle vertical weight, like in a house foundation. They are not built to withstand the constant, sideways pressure that soil exerts on a retaining wall. Using them is setting your wall up to crack and bow over time. You must use solid, interlocking retaining wall blocks that are specifically engineered for this purpose.
How deep does my foundation really need to be for Denver’s weather? Your foundation trench must be dug below the local frost line. This is the depth at which the ground freezes during the winter. Digging below this point prevents the ground from heaving during our freeze-thaw cycles and pushing your wall out of alignment. A shallow foundation is one of the quickest ways to guarantee a failed wall in our climate, so this step is non-negotiable for a structure that lasts.
My wall will be just over four feet tall. Is it really that big of a deal to get a permit? Yes, it’s a very big deal. The four-foot height rule isn’t arbitrary; it’s a safety standard. A wall of that size is holding back tons of soil, and the risk of a collapse is significant if it isn’t properly engineered. The permit process ensures that your plans are structurally sound and that your wall won’t become a safety hazard for your family or property. It’s a crucial step that protects you in the long run.