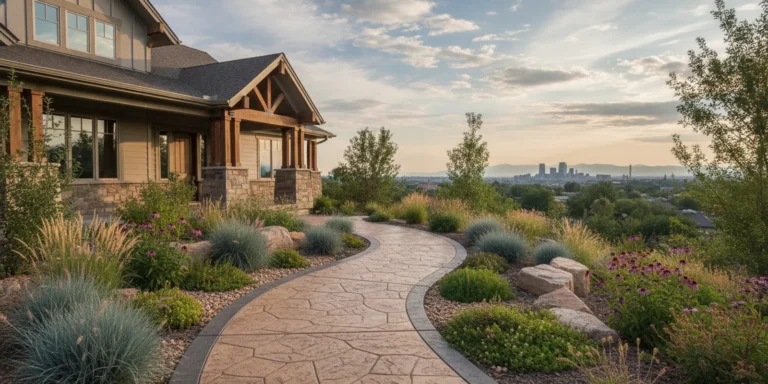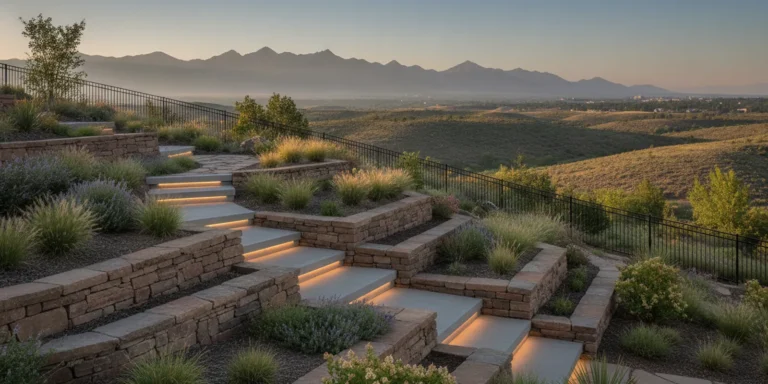

Denver homeowners planning a concrete landscape edging installation can create a clear boundary for lawns, planting beds, patios, and walkways that is easier to maintain. The best result starts with the site, not just the shape of the edging: water needs a path, the edge needs a stable base, and each transition should suit the surface beside it. This guide covers the practical decisions to make before work begins in the Denver Metro Area.
Discuss your landscape edging project with Faros
What should a Denver concrete landscape edging installation plan include?
A sound plan defines the boundary, elevation, drainage route, and connections to nearby features before concrete is placed. Reviewing those details together helps prevent an attractive edge from becoming an obstacle or redirecting water where it should not go.
Start by walking the whole intended line, not only the part visible from the patio. Note where the bed begins and ends, where a mower or wheelbarrow will pass, and where the edging meets a walk, driveway, step, or patio. Photograph the area from several angles. Mark existing sprinkler heads, drain outlets, utility features, tree trunks, and areas that stay wet after precipitation or irrigation.
Then decide what the boundary needs to accomplish. A low, smooth edge can separate a lawn from mulch or decorative stone while remaining easy to cross. A more defined profile may help hold loose material in a bed, but it also needs a considered height and a safe transition at paths. Edging is a boundary, not a retaining wall. Where the grade changes substantially or soil needs structural support, discuss a purpose-built solution rather than expecting a narrow edge to hold back a slope.
Faros describes its hardscaping services as including outdoor features such as patios and retaining walls. If the project involves several connected surfaces, review the broader construction services available and define which work belongs in the same plan.
How do you map the edging line before excavation?
Use a visible temporary line to test the route in the yard before setting its final position. A hose, rope, or marking paint can show whether a curve looks natural, leaves enough room for planting, and meets adjacent hardscape cleanly.
Walk both sides of the proposed line. From the lawn, check how it looks from the house and from common approaches to the yard. From the bed, check that shrubs and other plants will have enough usable soil and that the edge will not crowd their mature spread. Consider the actual mowing route as well: too many small bends or tight corners can make trimming slower and leave narrow strips of grass that are difficult to maintain.
It can help to mark the line and leave it in place long enough to view it at different times of day and from different doors or windows. Use flags or another visible marker at endpoints and where the route changes direction. This makes it easier to notice a curve that narrows the lawn, hides a gate, or conflicts with a usual walking path. If the layout includes several beds, compare their outlines with one another so that the boundaries feel related rather than improvised.
Use broad, consistent curves when the yard calls for a flowing line. For a formal layout, align straight runs with a house wall, patio, or walkway instead of introducing an unrelated angle. At a meeting point, decide in advance whether the edging will stop against the other surface, continue alongside it, or turn to form a defined corner. The installer should be able to follow that decision consistently.
For paths and patios, compare the proposed edge with the surface joints and walking direction. A line that crosses a walkway may create an awkward ridge; a line that runs beside it may need a small, clear separation. Review the proposed relationship to existing concrete with the concrete work in view, rather than treating each element as an isolated feature.
Which edging profile and layout suit each part of a yard?
The appropriate profile depends on what the edge separates, how people move through the yard, and how the boundary connects to nearby construction. Compare the main conditions before choosing a consistent height or shape for every run.
| Yard condition | Planning focus | Detail to review |
|---|---|---|
| Lawn beside mulch or planting soil | Clear separation and easy mowing | Keep the top profile visible without creating a troublesome wheel or mower crossing |
| Loose gravel or decorative stone beside lawn | Containment and a clean mowing line | Confirm the edge height and how the base material will meet it |
| Bed beside a walkway | Safe, comfortable passage | Avoid an unexpected projection or abrupt height change along the walking route |
| Bed beside a patio | Consistent finished elevations | Coordinate the edge with patio drainage, joints, and the planned planting area |
| Sloped or frequently wet area | Water movement and ground stability | Set the line and elevations only after reviewing where water travels |
This comparison is a starting point, not a substitute for checking actual site levels. A profile that works beside a level lawn may be unsuitable where a walkway slopes or where water concentrates. Ask how the proposed shape affects both sides of the boundary, including whether soil or mulch could spill onto a path.
A simple plan can record the start and stop points, curves, crossings, material on each side, and the intended connection to existing features. Include photos with notes about low spots and irrigation. For a project that also changes the overall yard, Faros offers outdoor living space construction; keeping the edge coordinated with the wider layout can help the individual features read as one space.
How should the site be prepared for concrete edging?
Preparation should establish a clean route and stable support while protecting existing utilities, irrigation, plants, and finished surfaces. The exact work depends on soil and site conditions, so the plan should describe what will be removed, where the edge will sit, and how the disturbed area will be restored.
Before excavation, identify irrigation tubing and heads, visible drains, lighting wires, and other features near the proposed route. Do not assume that a visible line shows the full path of a buried system. Confirm what lies below the work area through the appropriate utility-location process and communicate any private systems or landscape features that may not be included in a standard utility marking.
Clear only what is needed for access and installation. Roots close to trees and established shrubs deserve particular care. Changing the soil level or cutting major roots can harm a plant or affect its stability. If a proposed line would pass close to a mature tree, discuss a route that respects the root area instead of forcing the edging through it.
The prepared channel and support should match the planned profile and ground conditions. Loose, disturbed material, organic debris, or an inconsistent base can contribute to movement over time. Ask how the installer will prepare the route, manage transitions in firmness, and finish the soil on both sides. The finished top should be checked along the entire run, not only at its ends.
Plan access and material staging before work begins. Consider where equipment can travel without damaging the lawn, existing concrete, or plantings, and where excavated material will go. Protecting adjacent surfaces and agreeing on how the disturbed lawn or bed will be left helps make the handoff clear. Faros outlines its owner-led approach and company principles for homeowners who want to understand how project communication is handled.
How does a Denver edging installation plan affect drainage?
Edging should follow a drainage plan rather than block one. Before installation, identify where water comes from, how it currently moves, and where it can safely continue after the boundary is in place.
Observe the yard during or after precipitation and irrigation. Look for water that crosses the proposed route, collects near the house, runs down a walkway, or pools at a low point. Note roof downspouts and existing drain outlets as well. An edge can interrupt shallow surface flow if it is placed across a route without a planned outlet or controlled transition.
Do not assume that a small opening will solve a drainage issue. The location, elevation, and receiving area all matter. Water should not simply be shifted toward a foundation, a neighbor’s property, or a walkway. If the yard has recurring ponding, soil movement, or a concentrated flow path, treat that as a site condition to investigate before deciding the edging line. Drainage corrections may need to be designed as their own work and coordinated with the edge.
Check the final elevations against nearby surfaces. The edging should not create a dam at the low side of a patio or direct runoff along the base of a wall. At each end, decide how surface water will pass or disperse. Where the edge meets a walkway or another hard surface, review the joint and slope together rather than filling a gap in a way that traps water.
For related planning, read Faros’s guide to concrete driveway drainage. Its focus is a different part of a property, but the same useful habit applies: map water movement before setting permanent elevations. A contractor can assess the particular site and explain when drainage needs a separate scope.
How should edging transition to lawns, beds, walks, and patios?
Every change in adjacent surface needs a deliberate connection so that the edging looks finished and does not create an avoidable maintenance or walking problem. Sketch each connection and confirm the elevation before installation.
- At a lawn: Consider how a mower wheel will track along the edge and whether the top should be flush, slightly raised, or shaped for a clear boundary. A very narrow strip of turf between the edge and another feature can be difficult to mow.
- At a planting bed: Leave workable soil for plants and space for mulch. Keep the edge from sitting against plant crowns or forcing roots into an unnecessarily confined strip.
- At a walkway: Maintain a predictable walking surface. Resolve any elevation difference or corner where people may step across the boundary, and keep the transition clear of loose stone.
- At a patio: Coordinate the edge with the patio perimeter and water path. Make a clear decision about whether the materials meet, remain separated, or form a defined planting pocket.
- At a gate or access route: Check clearance for people, carts, and maintenance equipment. A raised edge in the wrong place can make routine access inconvenient.
Transitions also affect appearance. A straight run that stops short of a patio may leave an unintended gap, while an abrupt curve can look disconnected from the lines of the house. Review the shape from more than one viewpoint and consider how the space will look when plants fill out. In a compact yard, a simple line and fewer changes in direction can make the layout easier to understand.
Where the proposal includes steps or changes in grade, review those details with the connected hardscape. Faros’s patio construction information can help frame the conversation when a patio is part of the same project. The objective is a coordinated plan, not an edge added after the other elevations have already been fixed.
What helps concrete edging hold up through changing seasons?
Durability depends on suitable design and installation, stable support, water management, and reasonable care. No single profile or installation detail guarantees that movement or surface changes will never occur, especially where the ground and drainage conditions vary.
Discuss how the installer will address the route’s ground conditions, changes in direction, ends, and connections to existing hardscape. Ask what can lead to cracking or movement at the particular site and how those conditions will be handled. Avoid assuming that a thicker-looking edge can compensate for poor preparation or water trapped against it.
Cold-weather cycles and moisture can affect outdoor materials and the ground beneath them. Good drainage and consistent support are important planning considerations, but site-specific performance depends on the full assembly and local conditions. The American Concrete Institute publishes technical information about concrete; homeowners can use it as a starting point for general background and ask a qualified professional how relevant guidance applies to their project.
After completion, inspect the boundary periodically. Look for a new gap, a noticeable change in elevation, displaced soil, loose material washing over the edge, or water collecting where it did not before. Remove soil or mulch that covers too much of the profile, and keep lawn growth from obscuring the line. If a change appears, document its location and timing and ask a qualified contractor to assess the cause before making a patch that could hide a drainage or support issue.
During the final walkthrough, view the work from both sides and follow it from end to end. Check whether the surface is consistent, whether each connection is intentional, and whether soil or aggregate is left at the planned level. Test the ordinary routes people use through the yard, and look at gates, steps, and walkways for changes that might catch a foot or wheel. Take a few photos of completed transitions and note any agreed follow-up work. A careful walkthrough gives both homeowner and installer a shared record of what was completed.
For a wider project involving walls, patios, or several site features, compare the work sequence as well as the finish details. Faros’s retaining wall and patio planning guide addresses coordination between larger hardscape elements. Edging should be considered in that same overall sequence if it depends on their elevations or drainage.
What should you ask before hiring an edging installer?
Ask for a clear description of the route, preparation, drainage decisions, transitions, cleanup, and how changes will be discussed. These questions help you compare the proposed work based on scope and communication, not just appearance.
- Where will the edging start and stop? Review the line on site and identify every bend, endpoint, crossing, and connection.
- How will the route be marked and checked? Confirm that the layout will be reviewed before excavation and that irrigation, utilities, and nearby planting are considered.
- What preparation is included? Ask what material will be removed, how the support will be prepared, and what condition the disturbed lawn or bed will be left in.
- How will water move? Point out downspouts, wet areas, low spots, and surface-flow routes. Ask how the edge will meet existing drainage features.
- How will transitions be finished? Discuss the lawn, beds, walks, patios, and access points individually, including any elevation changes.
- What is excluded or dependent on other work? Clarify whether planting, irrigation changes, drainage improvements, or repair of existing surfaces require separate coordination.
- How will you review the finished work? Agree on a walkthrough that checks the full line, connections, cleanup, and visible changes to adjacent areas.
A written scope should make the line and related work understandable to someone who was not part of the original conversation. It can include a simple sketch, selected profile, site notes, preparation approach, and responsibilities for adjacent work. If the plan changes after excavation reveals an unexpected condition, pause and agree on the revised approach before proceeding.
Review your Denver Metro Area edging plan with Faros Construction
Contact Faros Construction to discuss a concrete landscape edging plan
Frequently Asked Questions
These answers cover common planning questions, but the right detail depends on the layout and conditions of the individual property.
Is concrete edging suitable for every garden bed?
Not always. It may suit a bed that needs a defined, lasting boundary, but roots, tight access, drainage routes, steep grade changes, and future planting plans can affect the decision. Review the full line and purpose before choosing a material or profile.
Can edging be installed beside an existing patio or walkway?
It can be planned alongside existing hardscape, but the elevation, joint, water movement, and access should be checked first. The edge should not create an abrupt trip point, trap water, or interfere with the use of the path or patio.
Does concrete edging solve a wet or poorly drained area?
No. Edging defines a boundary; it is not, by itself, a drainage correction. Identify the source and route of water, then plan any needed drainage work separately and coordinate it with the edging.
How can I tell if my proposed line is practical?
Mark it temporarily and walk the route from the house, lawn, and nearby paths. Check mowing access, bed width, tree and irrigation locations, water flow, and how each endpoint meets another feature. Adjust the line before excavation if it creates a narrow strip or awkward crossing.
Plan your Denver Metro Area edging project with Faros Construction
A well-planned edge should make the yard easier to use and maintain while fitting the property’s drainage and surrounding hardscape. Review the proposed line, site preparation, and transitions together before installation begins. This guide was written by Ricardo Alfaro.