A fresh coat of paint will highlight every hairline crack and nail pop on your walls. Skipping surface prep often leads to a finished look that appears messy and unfinished. Investing the time to fix these flaws is the only way to get a smooth, pro result in your Denver home.
Drywall repair before interior painting is the most important step in getting a flawless finish for your home. This process involves finding and patching holes, sanding away rough spots, and sealing cracks that would otherwise show through new paint. Homeowners who skip this step often find that new paint shows flaws rather than hiding them. According to experts in the field, a wall must be smooth and clean for paint to stick right. In the Denver Metro Area, weather changes can cause drywall to shift, making expert patching needed for lasting results. Fixing these issues early ensures that your investment in new paint provides the high-quality look and long-term value your property needs.
Many homeowners wonder if they can just paint over small dents or scuffs to save time. However, knowing why drywall repair before interior painting is crucial will help you avoid a poor finish that needs more work later. The path begins with
Why Drywall Repair Before Interior Painting is Crucial
Many homeowners in the Denver Metro Area think a new coat of paint will hide wall flaws. This is a common mistake that many people make when they try to save time. In truth, fresh paint often makes small dents and cracks look worse. Doing drywall repair before interior painting is the only way to get a smooth look. It ensures the surface is ready to hold the color and shine you want. Without this step, your hard work and money might go to waste.
Why paint does not hide wall flaws
Paint is thin and acts just like a light skin for your walls. When you roll paint over a hole or a crack, the liquid settles into the low spots. This creates a shadow that stands out even more once the paint dries. Glossy or satin paint types are the worst for this. They reflect light and show every tiny bump and scratch on the wall surface. Fixing these issues first is a key part of residential interior house painting services that last.
Dents and nail pops can also cause problems for how well paint sticks. Dust and loose bits of old drywall prevent the paint from bonding well to the wall. Over time, this can lead to the paint peeling or flaking off in large chunks. By filling holes and sanding them flat, you create a strong base. This helps the paint stay on the wall for many years. It also prevents the need for touch-ups just a few months after you finish the job.
The value of expert skill
Expert help makes a big change in how your home looks. A pro knows how to blend a patch so you cannot see it. This takes a steady hand and the right tools. Proper prep work also follows safety rules for dust in the building trade. It is about much more than just the way your finished room looks. It is about doing the job right the first time so your walls stay strong and safe.
Choosing to fix your walls first is a smart move for your home value. In the Denver market, buyers look for homes that are well-kept. Smooth and clean walls show that you care for your home, and they set a high bar for the rest of your house. When you skip the small repairs, the whole room can feel messy or old. Good prep work turns a simple paint job into a full home upgrade.
Small cracks can also be early signs of deeper issues like the house settling into the soil. A pro can tell if a crack is just on the surface or if it needs more work. Fixing these small spots now saves you from bigger repairs later. It keeps your home safe and looking its best. Putting time into good prep work is the best way to ensure your new paint looks great for a long time.
Common Drywall Defects that Show Through Fresh Paint
Most homeowners in the Denver Metro Area want a perfect finish when they start a project. But a new coat of paint often makes old wall issues look worse instead of hiding them. You must find and fix these spots first. Proper drywall repair before interior painting ensures your walls look smooth and clean once the job is done.
Hairline cracks and open seams
Small cracks often show up near doors, windows, and corners. These gaps usually happen because a house shifts or settles into the ground over time. If you just paint over a crack, it will likely open up again in a few months. This happens because the wall still moves.
You need mesh tape and a thin layer of joint compound to bridge the gap. This keeps it from coming back. Open seams are another common issue. These occur when the paper tape between two drywall sheets starts to pull away from the wall. This can leave a long, straight line that is very easy to see under fresh paint.
You must remove the loose tape and apply a new layer to make the surface level. Without this step, the line will create a shadow that ruins the look of your room. Taking the time to re-tape these joints is a key part of a high-quality job.
Nail pops and surface bumps
Nail pops look like small, round bumps or dimples on your wall. They happen when a nail or screw pulls away from the wood stud behind the drywall. Simply hitting them with a hammer does not solve the problem for long. The stud will move again and push the nail back out.
The best fix is to add a new drywall screw near the pop to pull the board tight against the wood. Once the new screw is in place, you must patch and sand the area until it is flush with the wall. Ensuring the patch is level prevents shadows from appearing after you paint. A smooth surface is the only way to get a professional look.
Texture mismatches and water marks
Many homes in Denver have textured walls like orange peel or knockdown. If you fix a hole but do not match the old pattern, the patch will be very clear. It will look like a flat spot on a bumpy wall. You must use a spray or sponge to mimic the nearby texture before the paint dries. This takes a steady hand and the right tools to blend the two areas together.
Water stains leave ugly brown or yellow marks that are hard to hide. Even with many coats of paint, the stain can bleed through and show up again. This happens because the stain can soak through water-based paint. You must fix the leak first and then use a sealer to block the mark. This ensures the new paint stays bright and clean for years to come.
| Defect. | Common Cause. | Repair Solution. |
|---|---|---|
| Hairline Cracks. | House settling. | Apply mesh tape and compound. |
| Nail Pops. | Stud movement. | Add new screws and patch. |
| Water Stains. | Past leaks. | Seal with primer and repaint. |
| Open Seams. | Tape failure. | Remove old tape and re-tape. |
| Texture Gaps. | Poor blending. | Use spray texture to match. |
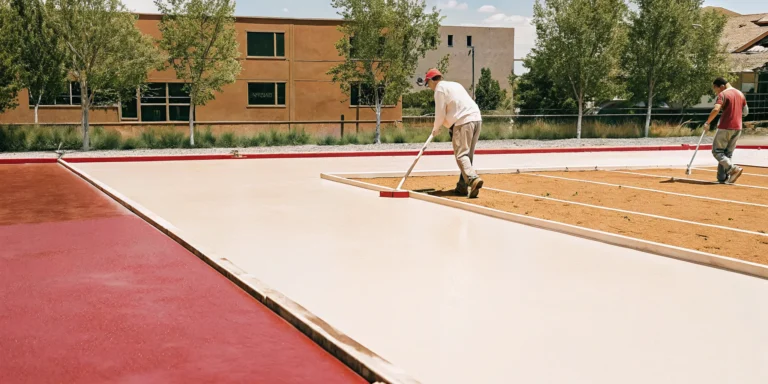
Safety is also a key part of the process. Sanding these repairs can create fine dust that can harm your lungs. The CDC notes that breathing in this dust over time can lead to throat and airway irritation (cdc.gov). Using tools with a vacuum or wet sanding helps keep your home safe during preparing walls for painting.
Step-by-Step Wall Preparation and Repair Sequence
A fresh coat of paint only looks as good as the wall beneath it. For homeowners in the Denver Metro Area, proper wall prep is the base for a top-tier finish. Skipping these steps often leads to peeling or marks later on. A clear preparing walls for painting plan makes sure that every part of the room is ready for the new color.
Checking the Surface and Cleaning
The first step in drywall repair before interior painting is a close look at the room. Shine a light from the side to find small dents or cracks. You should also look for grease, dirt, or dust. Walls in kitchens or near doors often have oils that can stop paint from sticking. Use a damp cloth or a mild soap to wipe these spots before you start any fixes.
Scraping away loose paint is also a key task at this stage. Use a stiff knife to clear any flakes that are not stuck to the wall. This stops the new paint from pulling the old layers off. If you find deep cracks, you may need to widen them a bit so the new paste has a better grip. This careful work is what makes a project look great for years.
The Fix-it Order
Once the walls are clean, you can start the repair work. Most pro teams follow an exact order to make the job fast and clean. Using the right tools for each part helps you get a smooth surface without wasting time.
- Find Damage: Look for nail holes or cracks under bright light. Mark each spot with a piece of tape so you do not miss any repairs later.
- Clean the Area: Remove loose paint and old flakes. Wipe the spot with a damp sponge to clear away dirt that could stop the patch from sticking.
- Fill the Holes: Put paste in small holes and use joint compound for larger cracks. Use a wide knife to spread the material thin and flat.
- First Sanding: Let the paste dry fully before you sand. Use a fine grit paper to level the patch with the rest of the wall.
- Second Coat: Apply a second thin layer of paste if the patch shrinks as it dries. This is common for deep holes or large cracks.
- Final Sanding: Sand the final coat until it is flush. Use a vacuum or a soft cloth to remove every bit of dust from the surface.
Dust Safety and Final Prep
Sanding makes a lot of fine dust that can spread through your whole home. This dust can also be a health risk if you breathe it in. Drywall paste can have silica, which is linked to long-term lung risks. The CDC warns that silica dust can be harmful to people if it is not handled well.
To keep your home clean, use a vacuum sander or wet sanding methods. These tools catch the dust before it enters the air. You should also seal off doors and vents with plastic sheets. Once the sanding is done, wipe the walls one last time with a soft cloth. This makes sure no dust stays behind to ruin the smooth look of your new paint.
Is Priming Drywall Patches Necessary?
Proper drywall repair before interior painting is only half the battle. Once you fill a crack or patch a hole with joint compound, you must apply a primer before the topcoat of paint. Many property owners in the Denver Metro Area wonder if this extra step is truly needed. Skipping this crucial phase can lead to visible flaws that ruin the appearance of your newly painted walls.
The Problem of Paint Absorption
Drywall joint compound is highly porous. It acts like a dry sponge, sucking the moisture and binders out of your fresh paint when applied directly. This uneven paint absorption causes a common visual defect known as flashing. The painted patch will look dull, flat, or even slightly shiny compared to the surrounding wall. Making every repair spot stand out in the natural light of your room. Using a quality primer seals the repaired area, preventing the joint compound from absorbing the paint unevenly and ensuring a uniform appearance.
Ensuring Strong Paint Adhesion
Applying primer is also vital for paint adhesion. Primer creates a solid, stable surface for the paint to bond to, which is especially important after sanding joint compound. Dust particles can remain on the surface even after a thorough cleaning. According to professional surface preparation standards verified on Dayco Painting, primer locks down any micro-dust and forms a tight bond with the wall. This steps prevents the paint from peeling, bubbling, or cracking over time, especially during temperature and humidity shifts in Colorado.
Achieving a Seamless Professional Finish
For high-quality results, the transition between the drywall patch and the rest of the wall must be completely invisible. A dedicated coat of primer acts as a bridge, evening out the texture differences. Whether you are dealing with minor nail pops or a major wall restoration, priming ensures the color and sheen of your paint look identical across the entire wall.
At Faros Construction Services, we never skip this step because proper preparation is what delivers a durable and seamless finish. For more details on how our expert team handles these projects, you can explore our residential interior house painting services today.
How Drywall Dust Control Protects Your Home’s Air Quality
Health risks of wall dust
Fixing walls before you paint creates a lot of fine dust. This dust can hang in the air for a long time. It is not just a mess to clean up. Breathing it in can hurt your lungs and throat. Many mud mixes have harmful bits like silica that can cause long-term health issues if you do not use a mask. A NIOSH study found that many mud mixes use talc, gypsum, and mica too. These tiny bits can cause bad coughing or throat pain over time.
For people in the Denver Metro Area, keeping this dust out of your air vents is vital. If the dust gets in your vents, it can spread to every room in the house. This makes the air hard to breathe for your family. It can even lead to issues like a sore throat or dry cough.
Pro crews know how to seal off the work area to stop this spread. We use heavy plastic and tape to keep the dust in one spot. We also turn off the air units while we sand to keep the dust from moving around. This simple step protects your air filters and keeps your whole house clean.
Clean tools for a safe home
Pro crews use special tools to keep your air safe. One top way is vacuum sanding. These tools hook up to a strong vacuum with a high-grade filter. They catch the dust right as the sander moves over the wall. This keeps most of the mess from ever getting into the air. It is a big step for drywall repair before interior painting in a lived-in home. This method protects your chairs, rugs, and floors from a thick layer of white film. You will not have to spend days cleaning your house after the paint job is done.
Another way to cut down on dust is wet sanding. This method uses a damp sponge to smooth out the dry mud. Since there is no dry rubbing, the dust stays wet and does not float. Both ways help keep your home clean and your family safe. Our team focuses on these steps to give you the best drywall repair before interior painting results without the mess. We aim for a safe work site on every local job.
Better paint and better air
Dust control is not just about health. It also makes your new paint look better. If dust sits on the walls, the paint will not stick well to the surface. This can lead to peeling, cracks, or bumps later on. A clean work area means the paint bonds to the wall the right way. This adds more value to your home and makes the finish last much longer.
Thorough cleaning is the final step. After we finish the repair, we wipe down the walls to remove any left over bits. This ensures the primer and paint go on smooth. By choosing a team that cares about air quality, you protect your health and your home. This is a core part of how we handle every project for our clients in the Denver Metro Area.
When to Call a Professional Painter or Drywall Specialist
Most home painting projects start with a close look at the walls. You might see small dents, tiny cracks, or holes from old wall anchors. It can be hard to know if you need a painter or a drywall expert for these fixes.
In most cases, drywall repair before interior painting is a standard part of the prep work. Professional painters usually fix minor surface damage so the final paint looks smooth and clean.
Minor prep and the painter’s role
Professional painters handle many small tasks to get a room ready. This often includes filling nail pops and small screw holes. They also fix light cracks that happen over time. These small repairs help create a smooth base for the new paint.
Most residential interior house painting services include this type of basic prep. It is a key step to avoid seeing bumps or shadows once the walls are dry. Using the right tools is also vital for these small jobs.
A painter might use a putty knife to fill a hole with joint compound. After the compound is dry, they sand it until the area is level. This process must be done with care to keep the air clean in your home.
Drywall dust can contain silica, which may cause lung health risks if people breathe it in. A pro team uses vacuum systems or wet sanding to keep dust levels low. This keeps your Denver home safe during the project.
Structural issues and drywall specialists
Some wall damage goes beyond what a painter can fix. Large holes, water damage, or sagging ceilings often need a drywall expert. If you see deep cracks that keep coming back, it could be a sign of settlement issues.
These core problems require a team with unique tools and skills. A drywall pro can replace whole sheets of board. They can also fix large sections of the ceiling to make the space safe and sound again.
You should also call a specialist if you need a full skim coat. This is a thin layer of compound spread over the whole wall to hide texture. This job takes a lot of time and a very steady hand.
If the damage covers many spots, a pro drywaller will help. They will make sure the surface is flat before the painting crew starts. This ensures the walls are ready for a high-end finish.
Ensuring a seamless finish in Denver
Faros Construction Services focuses on high-end results for every project. We know that the best paint job starts with a perfect wall. Our team checks every inch of your space in the Denver Metro Area to find any flaws.
We fix the small things and tell you if an expert is needed for bigger ones. This honesty helps you protect your home value and get a finish that lasts. We believe in the quality of our work on every job.
That is why we offer a 1-year workmanship warranty on all our projects. This gives you peace of mind that your walls will stay beautiful. Whether we fix a few nail pops or a whole room, we treat your home with care.
Our goal is to give you a smooth, professional look that makes your home feel new. We take pride in our craft and our service to the community. You can trust our team to deliver the best results for your home.
Frequently Asked Questions
Do professional painters fix drywall before painting?
Most residential interior house painting services in the Denver Metro Area include minor repairs. This usually covers small holes from nails, minor dents, and light cracks. Experts at Dayco Painting note that these steps are part of standard surface prep. However, if your walls have large holes or deep damage, you might need another expert to handle the work before the painters start their job.
How can I remove drywall anchors before painting?
To remove old plastic anchors, use a screwdriver to pull them out or a utility knife to cut the head off. Once the anchor is gone, push the remaining part into the wall. Fill the hole with a high-grade joint compound and let it dry. After it dries, sand the spot until it is level with the wall. This simple task ensures a smooth finish for your drywall repair before interior painting project.
Should I sand drywall after patching and before painting?
Yes, you must sand every patch to make it level with the rest of the wall. If you skip this step, the repair will show through the final layer of paint. Always wait for the joint compound to dry fully before you start. Since sanding creates fine dust, consider wearing a mask or using a vacuum system. According to the CDC, catching dust at the source helps protect your home air quality.
What is the process for repairing drywall corners before painting?
Fixing corners requires applying new joint compound to the edge. If the metal corner bead is bent or broken, you may need to replace it. Use a putty knife to spread the compound evenly and make the corner strong. Once dry, sand the area with care to keep the lines sharp and clean. This work is vital for homes in the Denver Metro Area that have seen settling cracks or impact damage over the years.
Ready to set up your drywall repair and painting?
Small cracks and holes in your walls can seem minor, but they often lead to bigger issues and uneven paint if left alone. Waiting too long means you might have to deal with much larger repairs that take more time and effort later on. By acting now, you can stop small damage from becoming a major burden and get back to your normal life with a fresh home sooner.
Starting your project today helps you enjoy a smooth finish that stays looking great for years while avoiding the stress of a long fix. Our local team in the Denver Metro Area is ready to help you with every step to ensure your property stays in top shape. You can see our interior painting services for more details on our process.
Ready to get started? Call (720) 594-5604 to schedule a free consultation today.