
A fresh coat of paint can transform a room, but in a space with soaring ceilings, the quality of the job is on full display. There’s nowhere for mistakes to hide. Wavy cut-in lines, subtle roller marks, and uneven sheens become glaring flaws when they’re two stories high, detracting from the very beauty you’re trying to enhance. This is where true craftsmanship matters, and why finding the right house painters for vaulted ceilings and stairwells is crucial for protecting the beauty and value of your Denver metro area home. A professional team delivers the meticulous prep work and flawless application these grand spaces deserve.
Key Takeaways
- Recognize the Risks of Working at Height: The biggest challenge isn’t the painting itself, it’s the safety risk. Working on tall ladders or scaffolding in tricky spaces like stairwells requires experience and proper equipment; if you’re not comfortable, it’s best to hire a pro.
- Choose the Right Materials for the Job: A professional finish comes from more than just technique. You need to meticulously prep your surfaces by cleaning and patching, and select the right paint sheen: a flat finish for ceilings to hide imperfections and a durable eggshell or satin for high-traffic stairwell walls.
- Vet Your Painter for a Quality Outcome: When hiring a professional, ask key questions about their insurance, safety protocols, and experience with high-ceiling projects. A trustworthy contractor will provide clear answers and have a portfolio of quality work, ensuring the job is done right.
What Makes Painting Vaulted Ceilings and Stairwells So Difficult?
Vaulted ceilings and grand stairwells are stunning architectural features that make a home feel open and bright. But when it’s time for a fresh coat of paint, that soaring height can quickly turn from a dream feature into a daunting project. It’s more than just a bigger wall; these spaces present unique challenges that can trip up even the most confident DIYer. Understanding what makes this job so tough is the first step in deciding whether to tackle it yourself or bring in a professional for your Denver metro area home.
Navigating Heights and Awkward Angles
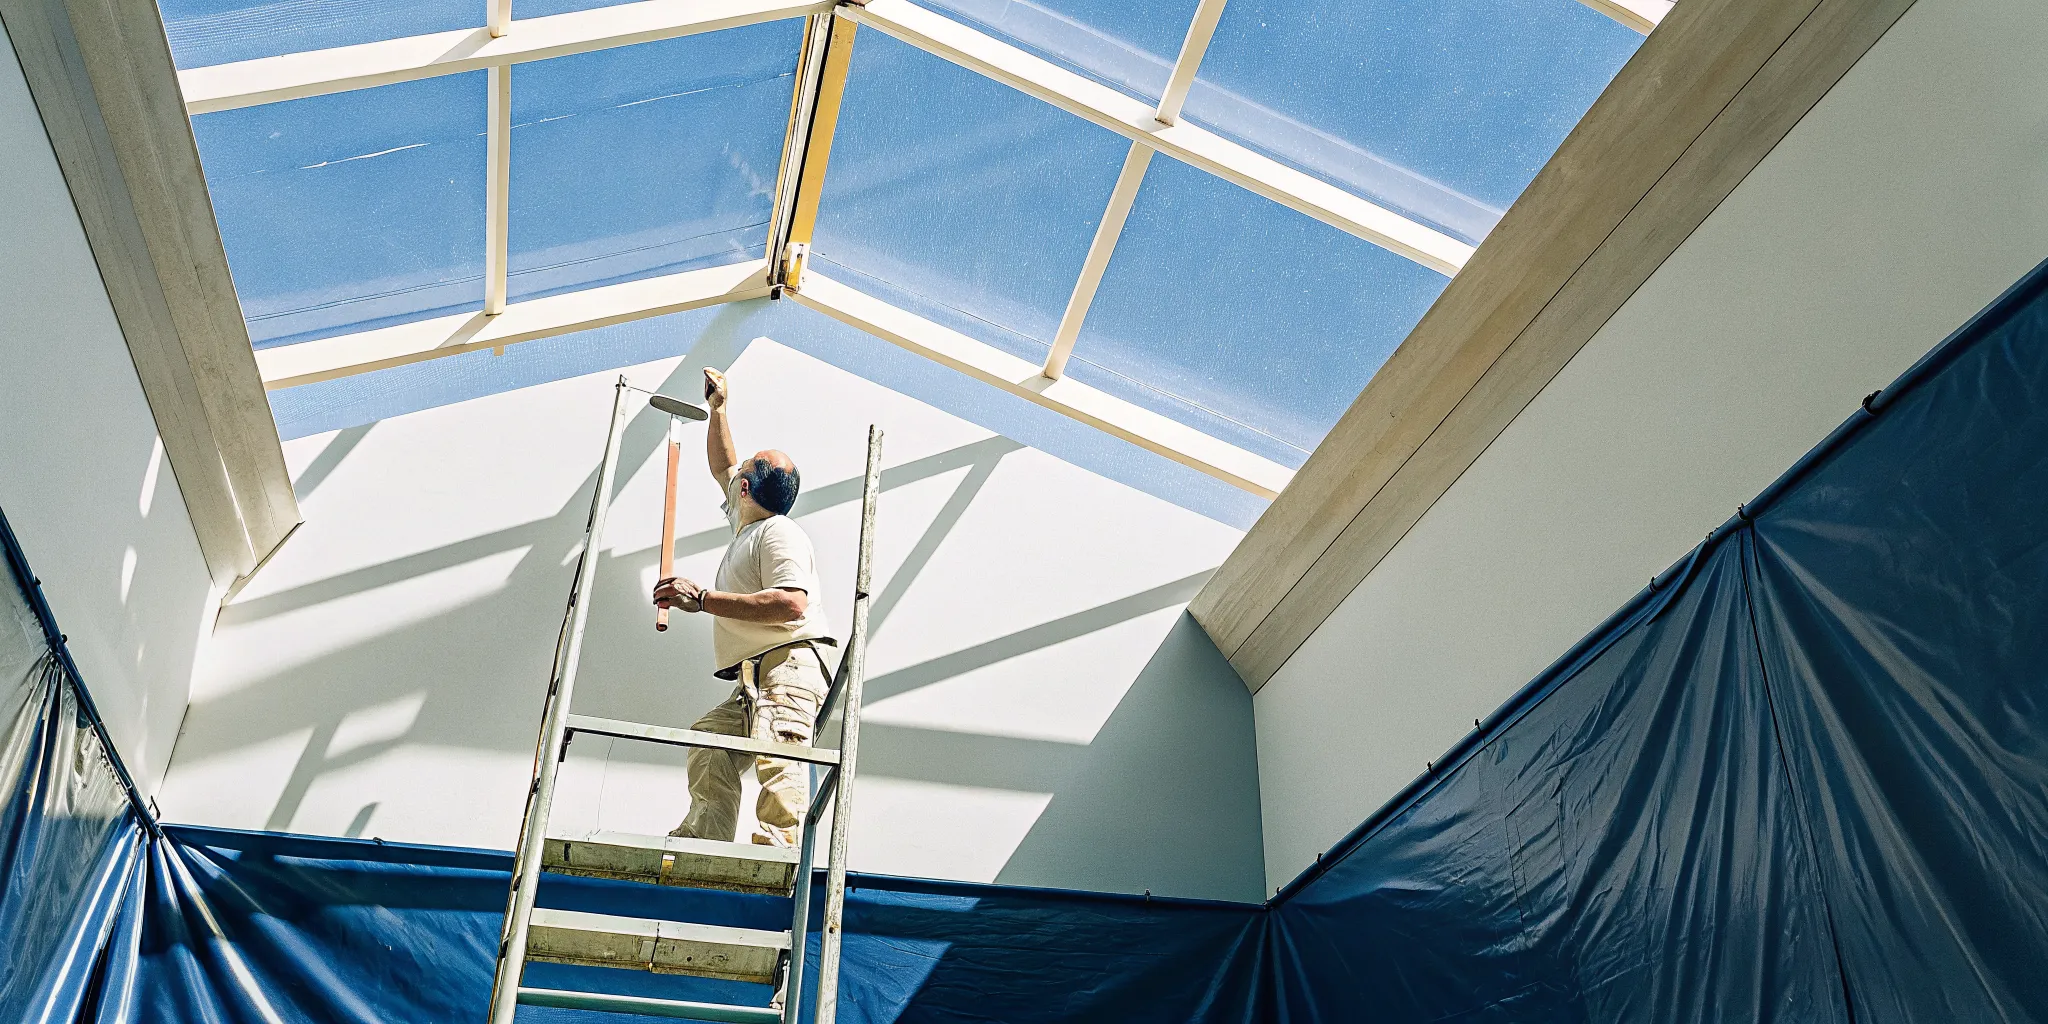
The most obvious challenge is the height. Perched on a ladder, trying to paint an 18-foot ceiling that slopes over a staircase, is physically demanding and requires a serious amount of focus. It’s not just about rolling the large, flat surfaces. The real test of skill comes with the detail work. Cutting in clean lines around windows, light fixtures, and trim becomes incredibly difficult when you’re stretched to your limit. This isn’t just painting; it’s a test of balance, precision, and endurance that can leave you with a sore neck and a less-than-perfect finish. It’s a core reason why many homeowners seek out a home builder with finishing expertise.
Overcoming Unique Accessibility Issues
Getting to those hard-to-reach spots is half the battle. A standard extension ladder might not feel stable on a staircase, and many specialized tools aren’t designed for these tricky setups. For instance, a scissor lift often can’t be positioned correctly over stairs, leaving you without a safe platform. This is why professionals often use a combination of equipment, like scaffolding and ladder levelers, to create a secure workspace. Without the right gear, you risk not only a sloppy paint job but also your own safety. It’s a project where having the proper tools and equipment is just as important as having the right technique.
Common DIY Painting Mistakes to Avoid
The biggest mistake you can make with a project like this is underestimating the risk. It’s easy to watch a few videos and think you’re ready, but painting high ceilings and stairwells is often considered an advanced-level job for a reason. Pushing past your comfort zone on a tall, wobbly ladder can lead to serious accidents. If you start the prep work and find yourself feeling unsafe or overwhelmed, that’s a clear sign to stop. Recognizing when a project is beyond your skill set isn’t a failure; it’s a smart decision. For a job this complex, getting help from an experienced team ensures it’s done safely and correctly from the start.
Essential Tools and Techniques for a Professional Finish
Achieving a flawless paint job on a vaulted ceiling or tall stairwell isn’t just about the paint you choose; it’s about having the right tools and knowing how to use them. Professional painters get those crisp lines and that even, smooth finish because they’ve mastered specific techniques and invested in specialized equipment. While a DIY approach is tempting, these challenging spaces demand more than a simple roller and a can-do attitude. Understanding what goes into a professional job will help you appreciate the skill involved and decide whether it’s a project you’re truly prepared to handle.
From selecting the right ladder or scaffolding to mastering the art of cutting in from 20 feet away, every step is critical. It’s one thing to paint a standard bedroom, but it’s another entirely to maintain a wet edge on a massive, angled ceiling or to paint a straight line where the wall meets the ceiling two stories up. These are the details that separate a weekend project from lasting, quality craftsmanship. This section will walk you through the essential tools and methods the pros use, so you can see what it really takes to get that picture-perfect result.
Choosing the Right Equipment: Ladders, Scaffolding, and Lifts
Working safely and efficiently at height starts with the right foundation. For two-story foyers and soaring ceilings, a standard stepladder won’t cut it. Professionals assess the space to determine the best equipment, which often means renting scaffolding to create a stable, wide platform for working over long periods. When painting above stairs, a simple A-frame ladder becomes wobbly and dangerous. In these cases, specialized extension ladders paired with a ladder leveler are essential for creating a secure base on an uneven surface. Choosing the wrong setup not only risks an uneven paint job but, more importantly, your safety.
Must-Have Painting Tools: Extension Poles, Rollers, and Sprayers
To reach high spots without constantly repositioning a ladder, an extension pole is your best friend. You can attach brushes or rollers to these poles, allowing for long, continuous strokes that are key to an even finish. While rollers are great for covering large surface areas, a paint sprayer can provide an exceptionally smooth finish in a fraction of the time. However, using a sprayer effectively takes practice. Without the right technique, you can end up with drips, uneven coverage, and a huge mess from overspray. Professionals know how to manage the tool for a perfect, factory-like finish every time.
Pro Tips for Cutting In Clean Lines
“Cutting in” is the process of painting the edges and corners where a roller can’t reach, like where the ceiling meets the wall or around trim. This is what creates those sharp, satisfying lines that define a professional paint job. It requires a steady hand, a quality angled brush, and a lot of patience. For high ceilings, painters will often use a paintbrush on an extension pole to carefully paint the perimeter first. Rushing this step or using a shaky hand is a dead giveaway of an amateur job, resulting in wavy lines and smudges that draw the eye for all the wrong reasons.
Techniques for Flawless Rolling and Spraying
Once the edges are cut in, it’s time to fill in the main surfaces. The key to avoiding streaks and lap marks is to always maintain a “wet edge,” meaning you overlap each new stroke of the roller onto the still-wet paint from the previous one. Professionals work in methodical sections to ensure the entire surface is painted before any part of it starts to dry. This technique ensures a seamless, uniform appearance across the entire wall or ceiling. When using a sprayer, the technique involves consistent speed and distance from the surface to apply a thin, even coat without drips.
Safety First: Drop Cloths, Harnesses, and Protective Gear
Before a single drop of paint is applied, a professional crew takes extensive safety precautions. First, they cover your floors, furniture, and fixtures with drop cloths and plastic sheeting to protect them from paint splatters. When working at significant heights, personal protective equipment is non-negotiable. This includes non-slip footwear, safety glasses, and sometimes even a harness. Painting is a physically demanding job, and doing it on a ladder or scaffold adds a layer of risk. If you ever feel unsafe or unsure while prepping for a project, it’s a clear sign to call in professionals who have the training and experience to get the job done safely.
How to Prep Your Space for a Perfect Paint Job
A flawless paint job is all about the prep work. It’s the least glamorous part of the project, but it’s what separates a professional-looking finish from a sloppy DIY disaster. Taking the time to properly prepare your walls, ceilings, and the room itself ensures the paint goes on smoothly and lasts for years. Think of it as laying the foundation for a beautiful transformation. Skipping these steps might save you a little time upfront, but it almost always leads to headaches and a finish you’re not happy with.
Whether you’re tackling a project yourself or just want to understand what a professional team should be doing, knowing these prep steps is key. From clearing the room to the final swipe of primer, each stage plays a vital role. We’ll walk through exactly what needs to happen before a single drop of paint hits the wall, so you can get the crisp, clean results your home deserves. For complex jobs with high ceilings and tricky angles, this meticulous preparation is what ensures a safe and successful outcome.
Clear and Protect Your Room
Before you even think about opening a can of paint, you need to create a clear and protected workspace. Start by removing everything you can from the room: furniture, rugs, wall art, and even outlet covers and switch plates. For larger pieces of furniture that can’t be moved out, push them to the center of the room and cover them completely with plastic sheeting. Next, protect your floors. Even the steadiest hand can have a stray drip, so cover the entire floor with drop cloths. This step isn’t just about preventing paint splatters; it gives you the space you need to move around safely and efficiently, especially when working with ladders or scaffolding.
Clean and Repair Walls and Ceilings
Paint needs a clean, smooth surface to adhere to properly. Over time, walls and ceilings collect dust, cobwebs, and grime that can prevent paint from sticking. Wipe down all surfaces with a damp cloth or a sponge with a mild cleaning solution. Once the walls are clean and dry, inspect them for any imperfections. This is your chance to fill nail holes, patch small cracks with spackle, and sand any rough spots until they are completely smooth. This attention to detail is a hallmark of true quality craftsmanship and is essential for achieving a seamless, professional finish that will look great for years to come.
Why Priming Is a Non-Negotiable Step
Skipping primer is one of the most common painting mistakes, and it’s one you’ll want to avoid. Primer is the secret weapon for a perfect paint job. It acts as a base coat that ensures your new paint color looks true and vibrant, without any old colors or stains bleeding through. It also creates an ideal surface for the paint to grip onto, which means better adhesion and a more durable finish. If you’re painting over a dark color, covering stains, or working with new drywall, primer is absolutely essential. It might feel like an extra step, but it will save you from needing multiple coats of paint and give you a much more even and long-lasting result.
Plan for Ventilation, Lighting, and Color
Proper planning goes beyond just the paint. Good ventilation is crucial for your safety, so open windows and use fans to keep fresh air circulating and reduce paint fumes. You’ll also need excellent lighting to see what you’re doing. Bring in extra work lights to illuminate every corner, which helps you spot any missed patches or uneven application before the paint dries. Finally, think about how light will interact with your chosen color. A color swatch can look completely different in a sun-drenched stairwell versus a dimly lit hallway. Test your paint in small areas to see how it looks throughout the day before committing. If planning for all these variables in a large, complex space feels overwhelming, it might be time to schedule a consultation with a professional.
Choosing the Best Paint Finish for Your Space
Picking a paint color is the fun part, but the finish you choose is just as crucial for getting a professional result. The paint’s sheen affects everything from how it hides imperfections to how well it holds up to daily life. For tricky areas like vaulted ceilings and busy stairwells, the right finish can make all the difference. A finish that works wonders on a high, out-of-reach ceiling might be a disaster on a wall that gets constant handprints and scuffs. Let’s break down the best options for your space so you can choose with confidence.
Flat and Matte: The Go-To for High Ceilings
For vaulted ceilings, a flat or matte finish is almost always the right answer. These finishes have very little to no shine, which means they absorb light instead of reflecting it. This quality is fantastic for hiding minor surface imperfections like bumps, nail pops, or drywall seams that a glossier paint would highlight. Using flat finishes gives your ceiling a smooth, uniform look that feels expansive and elegant. While they aren’t as easy to clean as other sheens, that’s rarely a concern for a surface that’s well out of reach. The goal is to draw the eye upward without distracting it with flaws, and a matte finish does that perfectly.
Eggshell and Satin: Durability for Stairwells
Stairwells are a completely different story. As one of the highest-traffic areas in your home, the walls are bound to get their share of scuffs, fingerprints, and general wear. This is where durability is key. Eggshell and satin finishes offer the ideal balance of a soft, low-sheen look with practical washability. They have a slight gloss that makes them much easier to wipe clean than a flat paint. This subtle sheen also reflects a small amount of light, which can help brighten up a narrow or enclosed staircase without creating a distracting glare. It’s the perfect choice for walls that need to look great while standing up to the demands of a busy household.
How Light Changes Everything
Never underestimate how the light in your home will interact with your paint finish. The amount of sheen dramatically changes how light reflects off the walls, which can alter your perception of the color and the space itself. A flat finish on a vaulted ceiling will give the color a deep, consistent richness, even as the natural light changes throughout the day. In contrast, a satin finish in a stairwell will catch the light from windows or fixtures, making the space feel more open and airy. Before you commit, it’s a great idea to test a paint sample on the wall and observe how it looks in the morning, afternoon, and evening light.
Should You DIY or Hire a Pro?
Deciding whether to tackle a big paint job yourself or bring in a professional is a classic homeowner’s dilemma. While I’m a huge fan of rolling up my sleeves for a good DIY project, painting vaulted ceilings and tricky stairwells is a completely different challenge. It’s not just about getting a smooth finish; it’s about staying safe while you do it. Before you commit, let’s walk through what this project really involves so you can make the best choice for your home and your peace of mind.
The Hidden Dangers of DIY High-Ceiling Painting
The biggest hurdle with painting high-ceiling areas is, well, the height. Working on a ladder for hours is physically demanding and can be risky, especially in awkward spaces like stairwells. Safety has to be your top priority. As painting experts note, this kind of job involves working at heights, and if you’re not comfortable on a ladder, it’s wise to hire someone. Even experienced DIYers admit that working alone high above a staircase can feel unsafe. A slip could lead to serious injury, and it’s a risk that’s just not worth taking for a coat of paint.
When to Tackle It Yourself (and When to Call for Help)
So, where do you draw the line? A good rule of thumb is to consider hiring a professional for any walls or ceilings over 10 feet tall. If the thought of climbing a tall ladder makes your stomach drop, that’s your answer right there. A professional crew not only has the right safety equipment but also the experience to work efficiently and deliver a flawless finish. If you’re in the Denver metro area and decide that this project is more than you want to handle, our team at Faros is always ready to help. You can schedule a consultation to see how we can give you a beautiful result without the risk.
Your DIY Checklist: Essential Gear and Prep Work
If you’re still determined to do it yourself, proper preparation is everything. This isn’t a project you can start on a whim. You’ll need a sturdy ladder that’s tall enough for the job; for two-story spaces, you may even need to rent scaffolding. You’ll also want to get a ladder leveler to create a stable base on your stairs. Once you have your equipment, you need to prep your space by removing all furniture and decor, covering floors and stairs with drop cloths, and carefully applying painter’s tape. Finally, be sure to use the right materials, like a high-quality ceiling paint with a flat finish that helps hide imperfections.
How to Hire the Right Painter for High-Ceiling Projects
Finding the right professional for a high-ceiling paint job is about more than just getting the work done; it’s about ensuring it’s done safely and beautifully. Since painting vaulted ceilings and tricky stairwells is often best left to the pros, you’ll want to vet your candidates carefully. Knowing what to look for, what to ask, and which red flags to avoid will help you hire a team you can trust to deliver lasting results in your Denver metro area home.
Spotting Quality Craftsmanship vs. a Quick Fix
A quality paint job is all in the details. True craftsmanship shows up in perfectly straight cut-in lines, an even finish with no drips or roller marks, and a thoroughly protected workspace. A quick fix, on the other hand, often leaves behind sloppy edges, paint splatters on your floors or trim, and an uneven sheen. A professional team understands that meticulous prep work is the foundation of a flawless finish. They take the time to properly clean, patch, and prime surfaces, ensuring the final coat looks incredible and stands the test of time. When you review a contractor’s past projects, you can see the difference that a commitment to quality makes.
Key Questions to Ask Any Potential Painter
Before you commit, it’s smart to have a list of questions ready. This helps you gauge a painter’s experience and professionalism. Start with the basics: “Are you licensed and insured?” and “Can you provide references from recent jobs?” Then, get specific to your project. Ask about their experience with high ceilings and what kind of equipment they plan to use, like scaffolding or lifts. You should also inquire about their process for protecting your furniture and flooring. A confident, transparent contractor will have clear answers. Finding an expert team that communicates openly is key to a smooth and stress-free project from start to finish.
Warning Signs to Watch For
Just as there are signs of a great contractor, there are also red flags that signal you should walk away. Be cautious if a painter is vague about their process, can’t provide proof of insurance, or pressures you to make an immediate decision. An unusually low bid can also be a warning sign, as it may indicate they plan to cut corners on prep work or materials. Painting high ceilings is an advanced project that involves real safety risks. If a contractor seems dismissive of these challenges or you feel uneasy for any reason, trust your gut. It’s always better to contact a professional you feel confident in.
Non-Negotiable Safety Standards
When working at height, safety is the top priority. A reputable painter will never compromise on it. They should arrive with the correct equipment, such as stable scaffolding and ladders appropriate for the job, not just a rickety stepladder. Ask them about their safety protocols and how they plan to secure the work area. A professional crew will have a clear, step-by-step process that ensures the job is done efficiently and without incident. This commitment to safety is a hallmark of all professional construction services and protects not only the workers but also you and your home. Don’t hesitate to ask for specifics; your peace of mind is worth it.
Get a Flawless Finish Without the Risk
Painting vaulted ceilings and tricky stairwells is a demanding job. While the satisfaction of a DIY project is tempting, these specific tasks carry a heavy dose of difficulty and risk. Your safety should always be the number one priority, and working at significant heights on ladders or scaffolding requires more than just a steady hand; it requires proper training and equipment. If you feel even slightly uncomfortable with heights, it’s a clear sign to hand the project over to a professional. A fall can lead to far more serious problems than a simple paint spill.
Beyond the safety concerns, hiring an expert ensures a higher quality outcome. Professionals bring the right experience and specialized tools needed to produce a smooth, even, and durable finish that’s difficult to replicate on your own. They understand how to navigate awkward angles and use the correct techniques to avoid common DIY mistakes like drips, roller marks, and uneven coverage. This expertise is what separates a decent paint job from a stunning one that truly enhances your space.
Ultimately, bringing in a professional is an investment in your home and your peace of mind. You get to skip the stress of managing a difficult and potentially dangerous project and instead trust that the job will be done right. When you’re ready to achieve that perfect look without the hassle, the best first step is to schedule a consultation with an expert team. They can help you plan your project and deliver the lasting, flawless results your home deserves.
Related Articles
Frequently Asked Questions
What is the single hardest part of painting a vaulted ceiling? It’s rarely one single thing, but rather the combination of challenges. You are often trying to maintain your balance on a ladder, cut a perfectly straight line where the wall meets the ceiling, and keep a consistent wet edge with your roller, all while being stretched to your physical limit. It’s a true test of endurance, precision, and focus that is much more demanding than a standard painting project.
I have a good extension ladder. Is that enough to paint my two-story foyer? While a good ladder is a start, it often isn’t enough for a job this complex and potentially dangerous. For a stairwell, a standard ladder can be incredibly unstable on uneven steps. Professionals use specialized equipment like ladder levelers or even build scaffolding to create a secure, flat platform to work from. Using the wrong setup not only compromises your safety but also makes it nearly impossible to get a clean, professional-looking finish.
Why can’t I just use the same paint finish for both the ceiling and the walls? You could, but you would be sacrificing either appearance or durability. Ceilings look best with a flat or matte finish because it hides small imperfections that are common on large, open surfaces. However, that same flat paint on a high-traffic stairwell wall would scuff and stain easily. Using the right finish for each specific surface ensures your ceilings look flawless and your walls can handle daily life.
I’m pretty handy, but the height makes me nervous. How do I know if I should hire a pro? The best advice is to trust your instincts. If the thought of spending hours on a tall ladder over a staircase makes you feel uneasy, that’s a clear sign to call a professional. This is not the type of project to test your comfort with heights. A professional crew has the training, safety gear, and experience to work at height confidently, which gives you peace of mind and a guaranteed beautiful result.
When I’m getting quotes, what is the most important thing to look for in a painter? Beyond confirming they are licensed and insured, you should focus on their specific experience with high-ceiling projects. Ask them directly what kind of equipment they plan to use and what their safety protocols are. A true professional will be able to walk you through their process with confidence, explaining how they will protect your home and ensure a flawless finish. Vague answers or a dismissive attitude toward safety are major red flags.