
Outdoor kitchen layout ideas should begin with the way people move, cook, serve, and relax, not with a grill catalog. A well-planned arrangement keeps the cook connected to guests while giving food preparation, hot appliances, seating, and cleanup their own comfortable zones. For Denver Metro Area homeowners, the right layout also accounts for sun, wind, drainage, utilities, and seasonal weather.
Talk with Faros Construction Services about your outdoor kitchen layout.
Which outdoor kitchen layout works best for entertaining?
The best outdoor kitchen layout for entertaining separates active cooking from guest circulation without isolating the person at the grill. L-shaped, island, and well-planned linear layouts can all work, but the right choice depends on the shape of the yard, the location of the home, the number of guests, and how often food is prepared outdoors.
Think of the layout as a sequence. Ingredients should move from storage to prep, then to cooking and serving, while guests should have an easy route to seats, shade, drinks, and the rest of the backyard. When those paths cross repeatedly, even a beautiful kitchen can feel crowded.
Start with the guest journey
Before choosing a shape, trace a typical gathering from the back door to the outdoor kitchen, dining area, seating, and yard. Mark where guests naturally pause to talk. The kitchen should be close enough to feel social, but its hottest and busiest work areas should not sit in the middle of the main walking route.
Also consider where guests will set down a plate, refill a drink, or carry food to a table. A serving counter facing the dining zone can reduce back-and-forth trips. A separate beverage or snack station can keep people away from the grill while preserving conversation.
What are the main outdoor kitchen layout ideas?
The most useful outdoor kitchen layout ideas include linear, L-shaped, U-shaped, island, and galley arrangements. Each creates a different relationship between the cook, the house, the guests, and the available yard, so the best design is the one that supports the way your household actually entertains.
| Layout | Works well for | Entertaining advantage | Planning watchpoint |
|---|---|---|---|
| Linear | Narrow patios and side yards | Keeps cooking close to one wall or edge | Needs careful placement of prep and serving space |
| L-shaped | Corner patios and medium yards | Creates a natural separation between cooking and gathering | Corner storage and utility routes need early planning |
| U-shaped | Large, dedicated outdoor rooms | Gives the cook generous work surfaces and a defined zone | Can feel enclosed if seating and circulation are too tight |
| Island | Open yards with room to move around | Lets the cook face guests from multiple directions | Utilities and clear circulation must be coordinated below and around the island |
| Galley | Long, narrow outdoor areas | Creates an efficient path between opposing work runs | Guest traffic should not squeeze between the two sides |
Linear layouts for compact entertaining areas
A linear layout places the grill, prep surface, storage, and serving area along one run. It is a practical choice when a patio is narrow, when the kitchen needs to stay against a house wall, or when most guests gather elsewhere. Keep the prep and landing surfaces generous enough for more than one person, and avoid putting the only serving spot directly beside the grill.
For a small footprint, prioritize the elements that receive daily use. A dependable grill, landing space on both sides, weather-ready storage, and a nearby dining surface often serve a household better than too many appliances packed into one line.
L-shaped layouts that divide work and conversation
An L-shaped kitchen uses two connected runs to create a corner. One leg can hold the grill and other hot appliances, while the second supports prep, storage, or serving. This arrangement works well for entertaining because the outer edge can face guests while the inside corner keeps the work zone organized.
An L shape is especially useful when the outdoor kitchen connects to an existing patio or sits near a pergola. The short leg can define the kitchen without closing off the yard. Plan the corner carefully so it does not become a dead spot for storage or block the route between the house and the dining area.
Island layouts for a social cooking experience
An island puts the kitchen in the center of the outdoor room. The cook can face a dining table, bar seating, or a fire feature instead of working with their back to everyone. This can be one of the most engaging outdoor kitchen layout ideas for homeowners who want cooking to be part of the gathering.
Island layouts require more than a countertop placed in the middle of a patio. They need a clear path on every active side, a practical route for gas or electrical service, and a plan for how food reaches the table. A raised serving edge can help define the guest side, but it should not replace a comfortable work surface.
How should cooking and guest zones connect?
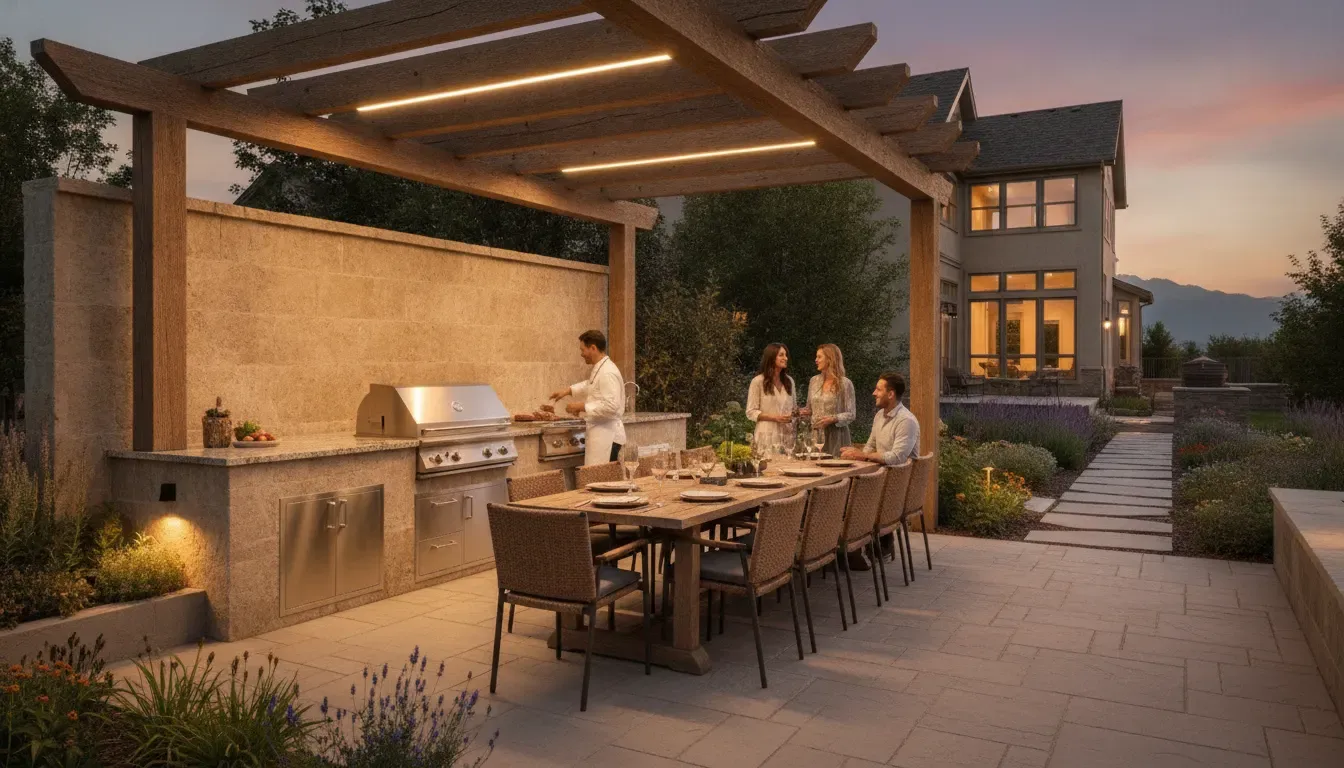
A comfortable outdoor kitchen connects four zones: cooking, prep, serving, and gathering. Keep the most-used tools and ingredients between storage and prep, place serving space between the kitchen and dining area, and preserve a clear route around hot appliances so guests can socialize without entering the active work area.
Build a practical work sequence
The cook should be able to reach storage, prep space, the grill, and serving space without repeatedly crossing the same traffic lane. That does not require a perfect indoor-style work triangle. It requires a short, intuitive sequence that matches the meals your household actually prepares.
- Storage zone: Place utensils, pans, seasonings, and outdoor-safe supplies near the prep surface.
- Prep zone: Leave uninterrupted counter space for cutting, assembling, and staging food.
- Cooking zone: Give the grill and other heat-producing appliances a defined area away from casual traffic.
- Serving zone: Add a landing surface between cooking and dining so hot food does not travel across guest paths.
- Cleanup zone: Locate waste, recycling, and a sink or rinse point where they are accessible without blocking the cook.
Separate circulation from work
A pathway to the yard, pool, garden, or seating area should not require guests to pass between the grill and the prep counter. If the only route runs behind the person cooking, the design will feel busy during a gathering. A contractor can help test these movements on the site before permanent work begins.
Remember the view from both sides of the kitchen. The cook may want a sightline to children or guests, while the guest side should look finished and inviting. Cabinet fronts, a serving ledge, low walls, or planting can define the zones without creating a visual barrier.
How do Denver Metro conditions change the layout?
Denver Metro Area conditions make drainage, surface movement, sun exposure, wind, and utility planning part of the layout decision. A kitchen that looks efficient on a sketch can perform poorly if snowmelt reaches the cabinets, afternoon sun blinds the cook, or a sloped yard forces guests through the work zone.
Start by reviewing the existing patio, grade, soil, and drainage pattern. Colorado State University Extension explains why soil drainage affects how water moves through a landscape, which is useful background when deciding where a permanent kitchen base and nearby seating should sit. Read the Colorado State University Extension drainage notes before finalizing the site plan.
Plan for sun and wind
Observe the backyard at the times when you normally entertain. A west-facing grill may place the cook in direct afternoon sun, while a dining table in the same spot may become uncomfortable. A pergola, covered patio, wind screen, or carefully placed shade structure can improve comfort, but the layout must leave safe space for heat-producing equipment and required clearances.
Design around drainage and freeze-thaw movement
Water should move away from the kitchen base, doors, and seating areas rather than collect beside them. Use durable exterior materials and plan transitions between concrete, pavers, walls, and the kitchen structure so seasonal movement is managed rather than trapped. Faros Construction Services can coordinate an outdoor kitchen with a larger outdoor living space design when the project includes patios, shade, seating, or fire features.
Coordinate utilities before the surface is finished
Gas, electrical, water, drainage, and lighting routes should be considered before concrete, pavers, or other finished surfaces are installed. The utility plan can influence whether an island, wall run, or corner layout is practical. It can also affect where the refrigerator, sink, lighting, and outlets belong, so appliances should be selected early enough to confirm their service requirements.
What belongs near the grill, prep, and serving areas?
Place the grill where the cook has room to work, the prep area where ingredients can be staged, and the serving area where guests can receive food without entering the hot zone. Outdoor-rated storage, lighting, waste handling, and weather protection should support those three primary areas instead of competing with them.
Near the grill
Keep heat-producing appliances together only when the manufacturer instructions and local requirements allow it. Provide landing space beside the grill, a safe route for moving cookware, and enough room to open doors or lids without colliding with guests. Avoid designing the grill as the only focal point if the goal is conversation.
Near the prep surface
Prep space should be close to storage and the sink or rinse point. Include a place for a cutting board, serving trays, and ingredients that are waiting their turn. If the kitchen is used for larger gatherings, a second prep or staging surface outside the main run can make the whole layout feel less crowded.
Near the serving and dining zone
A serving counter, pass-through, or short route to the dining table reduces carrying distance. Keep drinks and frequently accessed snacks on the guest side when possible. That simple separation lets people help themselves without opening drawers beside the grill or asking the cook to stop working.
Ask Faros Construction Services to review your site, cooking habits, and entertaining flow.
How can a layout make hosting easier?
The most successful outdoor kitchens make hosting easier by reducing unnecessary movement and giving every activity a home. Guests need a comfortable place to gather, the cook needs visibility and reach, and the host needs storage, lighting, shade, and cleanup support that work after the first meal is served.
Give guests a reason to gather near, not inside, the work zone
Bar seating can connect guests to the cook, but it should not force people to sit beside open flames or block the prep surface. A nearby dining table or lounge area often works better for longer meals. Use the edge of the kitchen to guide people toward seats, shade, a fire feature, or a view of the yard.
Make cleanup part of the plan
Dirty plates should have a route that does not pass through the cooking station. Storage for serving pieces, waste, and cleaning supplies can be placed at the end of a run or near the house, depending on the site. If the kitchen is part of a larger hardscape project, the surrounding walkway should support that return path.
Use lighting and shade to extend the gathering
Layered lighting can distinguish the prep surface, cooking area, walkway, and dining zone. Avoid placing a bright fixture directly in the cook’s eyes or over seating where glare makes conversation uncomfortable. Shade structures and weather protection should be considered with the kitchen layout, not added after the foundation and utility routes are complete.
Which layout fits common Denver Metro backyards?
Small patios often benefit from linear or compact L-shaped designs, while open yards can support an island with a separate dining zone. Sloped or irregular properties may need a retaining or grading strategy before the kitchen shape is selected, and larger outdoor rooms can use a U shape or galley arrangement if circulation remains open.
- Narrow side patio: Use a linear run along the least disruptive edge and place dining at the open end.
- Corner patio beside the house: Consider an L shape with the hot zone on one leg and serving or prep on the other.
- Open backyard: An island can face the main seating area while preserving routes around the kitchen.
- Sloped yard: Resolve grade, drainage, and retaining needs before committing to a kitchen footprint.
- Large covered outdoor room: A U shape or galley can provide more dedicated work space when the guest route stays clear.
The surrounding hardscape matters as much as the cabinets and counters. Faros Construction Services can coordinate patios, retaining features, paths, and cooking areas through its hardscape and landscape contracting service. If a deck or pergola is part of the plan, the decks, pergolas, and porches team can help connect shade and structure to the entertaining area.
How do you plan an outdoor kitchen layout before construction?
Plan the layout by documenting how the site is used, measuring the available footprint, mapping utilities and drainage, testing guest and service routes, and confirming permits before construction begins. The planning process should end with a coordinated site plan, not just a collection of appliance and material selections.
- List the ways you entertain: Note whether gatherings center on grilling, plated meals, drinks, family activities, or casual drop-in visits.
- Map the existing site: Record doors, windows, slopes, steps, trees, fences, utilities, shade patterns, and the route to the yard.
- Choose zones before equipment: Reserve space for cooking, prep, serving, dining, seating, storage, and cleanup.
- Test the circulation: Sketch or mark the footprint so you can walk the guest route and the cooking route before anything is built.
- Coordinate structure and utilities: Confirm the base, gas, electrical, water, drainage, lighting, shade, and surface transitions together.
- Confirm local requirements: Ask the applicable building department about permits and inspections. The City and County of Denver homeowner permit guidance is a useful starting point, but requirements can vary across the Denver Metro Area.
For a broader look at materials, appliances, and climate planning, read Faros Construction Services’ outdoor kitchen design guide for Denver. Keep this layout article as the decision tool for entertaining flow, guest movement, and how the kitchen should connect to the rest of the backyard.
Frequently asked questions about outdoor kitchen layouts
These common questions help homeowners narrow outdoor kitchen layout ideas before discussing a site plan with a local construction team.
What is the ideal layout for an outdoor kitchen?
The ideal layout keeps cooking, prep, serving, and cleanup connected while protecting a clear guest route. L-shaped and island layouts are often social, while linear and galley layouts can make better use of narrow areas.
Is an L-shaped or island outdoor kitchen better for entertaining?
An L-shaped kitchen can separate work from gathering and fit naturally into a corner. An island can make the cook more visible and social, but it needs enough room for people to circulate on every active side.
How much space should be planned around an outdoor kitchen?
Plan enough open space for appliance doors, safe work movement, serving, and guest circulation. The required clearances depend on the equipment, structure, fuel, and local requirements, so confirm them with the manufacturer and construction team.
Do outdoor kitchens need permits in the Denver Metro Area?
Permanent foundations, gas, electrical, plumbing, attached structures, and other site changes may require permits or inspections. Check with the city or county that governs the property before work begins.
How can an outdoor kitchen handle Denver weather?
Begin with drainage and a stable base, then select exterior-rated components and plan shade, wind protection, lighting, and seasonal care. A coordinated outdoor living design helps the kitchen work with the patio and landscape instead of fighting them.