
Volt landscape lighting is the 12-volt system that lets a Denver Metro yard stay usable after dark without running full household power to every fixture. The plan starts with the transformer, the wire runs, and the zones, not with a box of path lights. Get those three right and the fixtures you add later stay bright through a cold night.
Request a Faros outdoor living consultation
This guide is about system planning. For fixture ideas, path spacing, and uplighting, use the Denver landscape lighting ideas guide. For patio layouts, use the patio lighting ideas. For how a crew installs and hands off a system, use the outdoor lighting installers guide.
What Volt Landscape Lighting Means for a Yard
Volt landscape lighting, in homeowner terms, is a low-voltage system that steps household power down to about 12 volts before it reaches the fixtures. A listed transformer does that step-down. Thin cable then carries power to path lights, uplights, and step lights.
That is different from line-voltage lighting, which stays near 120 volts and usually needs conduit, deeper burial, and a licensed electrical scope. A 12-volt layout is still electrical work. It still needs a sound outdoor receptacle, weather protection, and a plan that matches the yard. It is simply safer to live with if a pet or a shovel finds a cable later.
The phrase also separates a planned system from a string of solar stakes. Solar lights skip the transformer, but they depend on winter sun. In the Denver Metro Area, short days, shade from evergreens, and snow on the panel make that a weak primary system. A volt system draws from the house, so brightness does not fall off after a string of cloudy days.
According to the U.S. Department of Energy, LED sources offer the highest efficiency of current lighting technologies and perform well in cold temperatures. That pairing is why a Denver volt plan usually specifies LED fixtures on a 12-volt transformer, not halogen lamps that waste power as heat.
Size the Transformer Before You Choose Fixtures
The transformer has to be larger than today’s fixture load, or the next fixture you add will dim the rest. Add the wattage of every lamp on that transformer, then leave unused capacity for growth and for cold-weather electrical loss.
A practical planning band is to keep the connected load near 70 to 80 percent of the transformer rating. A 300-watt transformer is a poor home for 280 watts of fixtures. Lamps get replaced, a tree gets a second uplight, and a step light appears after the patio is poured. Spare capacity is what makes those changes possible without a second power feed.
| Planning check | What to count | Why it matters in Denver |
|---|---|---|
| Connected watts. | Sum of every fixture on that transformer. | Stops a full load that leaves no room to add a light. |
| Spare capacity. | About 20 to 30 percent unused. | Covers a future path, tree, or step light. |
| Zones. | Separate switched groups, not one dump of fixtures. | Lets paths stay on when accent lights are off. |
| Distance. | Feet from transformer to the farthest fixture. | Long runs lose voltage and look dim at the end. |
| Placement. | Accessible wall, near a GFCI receptacle, out of splash. | Snow, irrigation, and grill heat all attack a bad spot. |
Place the transformer where you can reach it in January. A side wall near the outdoor living area is usually better than a far corner of the yard. Keep it off the grill hood, off the irrigation backflow, and above the splash line of a downspout. The cover should close fully, and the receptacle should be a GFCI outlet meant for outdoor use.
Read the nameplate before you commit to a model. Multi-tap transformers offer more than one output voltage, often a tap slightly above 12 volts. That higher tap can help a long run. It can also push the nearest fixtures too hot if you use it to hide a bad layout. Pick the tap after the wire plan exists, not before.
Do not hide the box behind a future shrub. You will need it for a tripped breaker, a timer change, or a lamp that fails. If the yard will grow into two areas, such as a front walk and a rear patio, plan two transformers or two clearly separated zones instead of one long loop. Two smaller boxes are often easier to live with than one box asked to feed the whole lot.
Plan Wire Runs So the Last Light Stays Bright
Voltage drop is the quiet failure of volt landscape lighting. The first fixtures near the transformer look fine. The last fixture on a long, thin cable looks dull, even when the lamp is new.
Cable has resistance. A longer run and a heavier wattage load both increase the loss. The fix is planned, not guessed. Keep high-watt fixtures closer to the transformer. Use a heavier cable on long runs. Split one overloaded run into two home runs. Avoid a single daisy chain that wanders the whole lot.
Walk the route before anyone digs. Mark irrigation, downspouts, and the places a deck, patio, or retaining wall will cover the cable forever. A wire under a new slab is not a wire you can repair in an afternoon.
- Mark the transformer and every fixture on a simple yard sketch.
- Group fixtures into zones by use, such as path, steps, trees, and patio.
- Measure each run, including the vertical rise to the transformer.
- Put the heaviest fixtures on the shortest runs.
- Choose a cable size that keeps the far fixtures from looking dim.
- Leave a service loop at the transformer and at each fixture.
- Test every zone at dusk before backfilling or setting hardscape.
Connections belong in listed connectors, not twisted wire and tape. Each splice should sit where it can be found later, above the soil line inside a fixture or in a junction point you mapped. Label the zones at the transformer in plain words. “Front path” beats “zone 2” when someone else services the yard.
Give yourself a way to test the run before the yard is finished. With the zone on at dusk, the last fixture should look like the first, not like a dying bulb. If it does not, shorten the load, split the run, or move to a heavier cable. Do not fix a dim end by aiming that fixture into the walk. Glare is not brightness.
Keep low-voltage cable out of the same trench as irrigation mainlines when you can. A nick from a future repair should not take both systems down. Where a sleeve passes under a walk, use a smooth conduit sized for a later pull, and cap the ends so soil does not fill it. Write the sleeve locations on the sketch you will keep.
Boulder County’s outdoor lighting publication explains why aim matters as much as power. Fully shielded, downward light cuts glare, light trespass, and skyglow. A bright far fixture that was oversized to beat voltage drop can fail that test. Fix the wire, then aim the light down.
Split the Yard Into Zones You Can Actually Use
A single switch that turns the whole yard on is not a plan. Zones let a path stay lit for a late arrival while accent lights on trees stay off. They also keep the transformer load understandable when one area needs service.
Most Denver Metro yards settle into four useful groups. Path and step lights handle safety. A small patio or deck group handles gathering. Tree and wall accents handle depth. A front-entry group handles arrival. Each group should have its own switch, timer, or photocell setting at the transformer.
Match controls to real routines. A path zone can follow dusk and dawn. A patio zone can use a switch near the door so it is not burning at midnight. Accent lights can run fewer hours than safety lights. That is also how you keep light off a neighbor’s windows without giving up the walkway.
Leave the fixture catalog to the ideas guide. Here, the decision is electrical. Count the watts on each zone. Note which zone is farthest from the transformer. Note which zone you might expand next summer. Write those numbers on the sketch before you buy cable.
A zone that mixes a bright uplight with a row of small path lights is hard to balance. The uplight wants a short run. The path lights want even spacing. Give the uplight its own home run when the tree sits far from the transformer. Leave the path on the longer, lighter circuit. You can still switch them together later if the controls allow it.
Controls should be understandable to a guest. A photocell that turns the path on at dusk is enough for safety. A patio zone that needs a wall switch near the door is enough for gathering. Avoid a stack of scenes nobody in the house can explain. If a timer needs a seasonal reset, put that note on the transformer door.
Plan lighting with your outdoor living project
Build the System Around Denver Weather and Hardscape
Freeze-thaw cycles, snow, and dry spells change where a volt system should live. A fixture at grade becomes a fixture under a plow berm. A cable in a soft bed becomes a cable under a saturated swale in April.
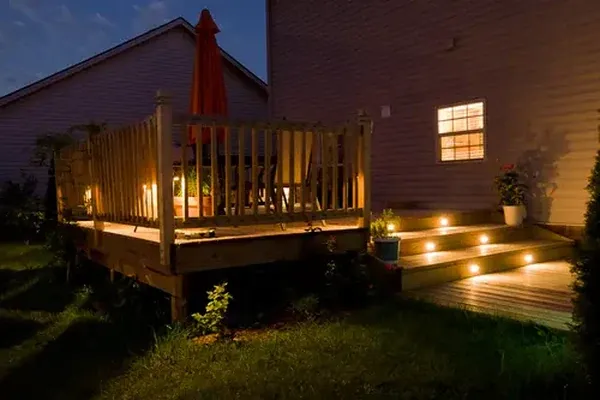
Set path lights back from the shovel line and from the edge a snowblower will ride. Keep step lights in the riser or under a nosing, not on a tread that ices over. Choose metal fixtures that can take a cold night and a hot afternoon. Keep plastic housings out of full south and west sun when you can.
Snow changes the picture even when the system is sized well. A fixture that looked correct in October can sit inside a berm by January. Leave a little extra lead at each stake so a spring reset does not require a new splice. After breakup, walk the yard once and stand up anything the plow or a shovel leaned over.
The Department of Energy cold-climate guides treat cold, wind, and moisture as design conditions, not afterthoughts. Use the same habit outdoors. Slope soil away from the transformer. Do not set a fixture in a low spot that holds meltwater. If irrigation will hit a lens every morning, move the head or change the spray.
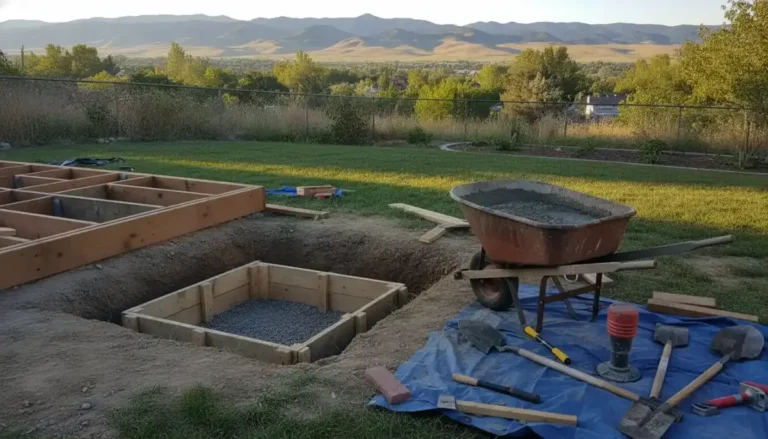
Time the wire with the hardscape, not after it. A patio installation, a deck or pergola, or a retaining wall and patio can cover the only sensible cable route. Tell the builder where the transformer sits and where sleeves should pass under walks before concrete is ordered.
Hardscape drainage planning belongs in the same conversation. A lighting trench that ponds water against a patio edge is a drainage problem wearing a lighting budget. Coordinate both before the first cut.
Denver rules are not the rules for every city in the Denver Metro Area. Confirm the jurisdiction before you assume a shield, a timer, or a permit path. City of Denver building guidance lives with Community Planning and Development. A neighbor city may differ.
A Field Checklist Before Anyone Digs
A volt landscape lighting plan is ready when a second person could build it from the sketch. If the sketch only shows dots for fixtures, it is not ready.
- Name the transformer location, the receptacle, and the spare capacity you are holding.
- List each zone, its wattage, and what it is for.
- Show cable routes, crossings under future hardscape, and places you will not dig.
- Note aim: down for paths and steps, controlled for trees, none toward windows.
- Call 811 before digging, and keep lighting trenches clear of marked utilities.
- Plan a dusk test with every zone on, then with only the safety zone on.
If the yard is part of a larger build, fold this sheet into the landscape design plan and the hardscape work. Lighting that arrives after the design is finished usually means a second mobilization and a worse route.
Faros builds outdoor living, hardscape, decks, and concrete work across the Denver Metro Area. The lighting plan should be settled with that work, so sleeves, grades, and gathering areas are decided once. Bring the sketch to a consultation rather than a bag of unmarked fixtures.
Talk through the yard plan with Faros
Frequently Asked Questions
What is volt landscape lighting?
It is a low-voltage yard system, usually about 12 volts, fed by a transformer from a standard outdoor receptacle. Cable runs from that transformer to the fixtures. It is not the same as line-voltage lighting, and it is not a set of solar stakes.
How large should the transformer be?
Add the wattage of every fixture on that transformer, then keep the total near 70 to 80 percent of the transformer rating. The unused share covers voltage loss and the next light you will want after the first season.
Why do far fixtures look dimmer than near ones?
The cable drops voltage as the run gets longer and the load gets heavier. Shorter runs for bright fixtures, heavier cable, and separate home runs fix it. Turning every lamp up to compensate usually creates glare instead.
Do Denver winters change the layout?
Yes. Keep fixtures out of plow and shovel lines, keep connections serviceable, and do not put the transformer where meltwater or a downspout collects. LED fixtures are a better cold-weather fit than older halogen lamps.
Can this wait until the patio is finished?
It can, but the cable route gets worse. Plan sleeves under walks, patios, and walls before concrete or decking covers them. A lighting plan that shares the hardscape schedule avoids cutting finished work later.
Start your Denver Metro lighting plan with Faros
Ricardo Alfaro is the owner behind Faros Construction Services. He reviews outdoor living and hardscape plans with Denver Metro homeowners so the lighting, grades, and structures work as one project.