Building with brick in the Denver metro area comes with its own unique set of rules. Our distinct freeze-thaw cycles and intense sun mean that proper technique isn’t just a suggestion, it’s a necessity for a project that will last. A generic brick install guide might not account for the way our climate affects materials, from mortar curing times to the need for expansion joints. That’s why we created this comprehensive walkthrough specifically for local homeowners. We’ll cover all the fundamentals of bricklaying while paying special attention to the considerations that matter most right here in Colorado, ensuring your hard work results in a durable, beautiful addition to your home.
Key Takeaways
- Start with a solid foundation: Your project’s success depends on proper preparation. This means gathering the right tools, selecting materials suited for the Denver climate, and ensuring your work surface is clean and stable before laying the first brick.
- Focus on consistent technique for a clean look: Professional results come from paying attention to the details. Use a level frequently, maintain uniform 3/8-inch joints with spacers, and use a wet saw for precise cuts to achieve a polished, durable finish.
- Mind the weather and your safety: Avoid laying bricks when temperatures might drop below 40°F, as this can weaken the mortar. Always use the correct safety gear, including gloves and safety glasses, to prevent injuries and ensure your project goes smoothly.
What You’ll Need for Brick Installation
A successful brick project starts long before you lay the first brick. It begins with gathering the right materials and tools for the job. Think of it like cooking a great meal; you need quality ingredients and the proper kitchen equipment to get the result you want. Rushing this step can lead to headaches and a finished product that doesn’t last.
Getting organized from the start ensures a smoother process and a more professional-looking outcome. We’ll walk through the three main areas you need to cover: choosing the best bricks and mortar for your project, assembling your toolkit, and making sure you have the right safety gear on hand. Taking the time to prepare properly will make all the difference.
Choosing the Right Bricks and Mortar
Walking into a supply yard can be overwhelming, but selecting the right materials is simpler than it looks. It’s important to know that modern bricks are engineered to meet specific construction requirements, offering different levels of strength and water resistance. For a patio in the Denver metro area, you’ll want a brick that can handle our freeze-thaw cycles. For a decorative interior wall, the technical specs might be less critical than the color and texture.
Making the right choice isn’t just about durability; it also impacts your home’s performance. Quality bricks can improve thermal insulation, which helps with heating and cooling efficiency. Talk to your supplier about your project specifics, and they can guide you to the best brick and the right type of mortar to hold it all together.
Your Bricklaying Toolkit
Having every tool you need within arm’s reach makes the entire installation process flow smoothly. You don’t want to be running to the store mid-project for a tool you forgot. Your essential bricklaying toolkit should include a tape measure, chalk line, and a sturdy level to keep your work precise. You’ll also need a few buckets for mixing mortar and for water, along with a power mixer or a mixing stick.
For the actual bricklaying, a trowel or mortar scoop is a must. To get clean cuts for edges and corners, you’ll need a saw with a masonry blade. Finally, have a stiff bristle brush and a jointing tool on hand to give your mortar joints a clean, finished look.
Don’t Forget Your Safety Gear
Bricklaying can be tough work, so protecting yourself is a top priority. Before you even mix your first batch of mortar, make sure you have the right Personal Protective Equipment (PPE). This includes sturdy gloves to protect your hands from scrapes and rough materials, safety glasses to shield your eyes from dust and debris, and a dust mask to avoid inhaling mortar or brick dust.
Depending on the scale of your project, you might also consider steel-toed boots to protect your feet. Safety isn’t just about what you wear; it’s also about being aware of your surroundings. Following safe work practices is the best way to prevent accidents and ensure your project is a success from start to finish.
Prepare Your Surface for Brick Installation
A beautiful, long-lasting brick feature starts long before you lay the first brick. Proper preparation is the secret to a professional-looking project that stands the test of time. Taking these initial steps ensures your surface is ready for a strong bond and a smooth installation process. Think of it as setting the stage for success; a little work upfront prevents major headaches down the road and guarantees your new patio, wall, or walkway looks fantastic for years to come. This groundwork is essential for any quality outdoor living space.
Clean and Inspect the Area
Before you begin, give your work area a thorough cleaning. Remove any dirt, dust, grease, or loose debris from the surface where you’ll be laying the bricks. A clean surface is crucial for getting the mortar to adhere properly. Once it’s clean, take a moment to inspect the foundation. Look for any cracks, chips, or uneven spots. If you’re working on a concrete slab, ensuring it’s in good shape is a must. Addressing these issues now will create a stable base for your brickwork and prevent problems later. If you find significant damage, it might be time to call in a concrete contractor to get it fixed right.
Apply Primers for a Strong Bond
Once your surface is clean and sound, applying a primer is a great next step. A primer acts as a bonding agent, creating an ideal texture for the mortar to grip onto. This simple step dramatically improves the adhesion between the surface and your bricks, which is key to the durability of your project. Think of it as giving the mortar something extra to hold onto. The type of primer you’ll need depends on the surface material, whether it’s concrete, wood, or drywall. This professional touch helps ensure your new hardscape feature remains solid and secure.
Map Out Your Layout
Planning your design before you start mixing mortar will save you a lot of trouble. Start by doing a “dry run,” laying out your bricks without any mortar to see how they fit and to finalize your pattern. This helps you anticipate tricky cuts and ensure the layout looks balanced. Once you’re happy with the arrangement, use a chalk line and a level to snap guidelines on your surface. These lines will act as your map, helping you keep your rows perfectly straight and your spacing consistent as you work. A well-planned layout is the foundation of any stunning design.
Factor in the Denver Climate
Here in the Denver metro area, the weather plays a big role in any outdoor project. Mortar needs time to cure properly, and freezing temperatures can ruin the process. If water in the mortar freezes before it sets, it can expand and create cracks, weakening the bond. As a rule of thumb, it’s best to avoid laying brick when the temperature is expected to drop below 40°F within 24 hours. The ideal conditions are dry and mild. Paying attention to the forecast ensures your hard work results in a durable, lasting structure that can handle Colorado’s changing seasons, a principle every good home builder follows.
Lay Your Bricks: A Step-by-Step Guide
Now for the fun part: bringing your design to life. Laying bricks is a methodical process where patience and precision pay off. Taking your time with each step ensures the final result is not only beautiful but also structurally sound and built to last. Think of it as a puzzle where every piece has its perfect place. By following a clear process, you can build with confidence and achieve a professional-looking finish. If you’re ever unsure, remember that the team at Faros Construction Services has years of experience with masonry projects across the Denver metro area. Let’s walk through the key steps to laying your bricks correctly.
Set a Strong Foundation with the First Row
The first row of bricks you lay is the most important one of the entire project. It serves as the foundation for every other brick, so it needs to be perfectly straight, level, and secure. Once you have your first row in place, it’s a good idea to step back and let the mortar cure for at least 12 hours, or even overnight. This gives it time to set properly, creating a stable base that won’t shift as you add more weight and rows on top of it. Rushing this step can compromise the whole installation, so give it the time it needs.
Keep Everything Straight and Level
As you start building up from your foundation row, your level will be your best friend. After placing every few bricks, grab your level to check that everything is staying perfectly horizontal and vertical. This simple, repetitive check prevents you from ending up with a slanted wall or patio. You can use small spacers to maintain consistent vertical gaps, but don’t worry if things aren’t flawless down to the millimeter. Sometimes, tiny imperfections can give your brickwork a unique, handcrafted character. The goal is a straight and sturdy structure, not machine-like perfection.
Build Up Your Rows with Even Spacing
Consistency is key to creating brickwork that looks clean and professional. As you lay your bricks, aim for a uniform 3/8-inch gap between them for the mortar. This spacing is crucial for the wall’s strength and gives it a classic, tidy appearance. A staggered pattern, often called a running bond, is a popular and strong choice for laying bricks. However, you can explore other brick bond patterns to find a design that complements your home’s aesthetic. Whichever pattern you choose, maintaining that consistent spacing is what will make the final result look polished.
Check Your Work as You Go
It’s much easier to fix a small mistake than a big one. After your first row is set, continue to check your work frequently as you build. Using a laser level can be a huge help here, as it casts a straight line across your entire work area, making it easy to spot any bricks that are out of alignment. By regularly stepping back and assessing your progress, you can catch and correct any issues early on. This habit ensures your lines stay true from the bottom to the top, leading to a final product you can be proud of.
Master the Details: Cutting and Spacing Your Bricks
Once you get your first few rows down, you’ll start finding a rhythm. This is where the small details make a huge difference, separating a DIY project from a professional-grade installation. Paying close attention to how you cut your bricks, space them, and handle corners will determine the final look and longevity of your work. These finishing touches create that clean, polished appearance everyone wants. For any large-scale project, working with an experienced hardscape and landscape contractor can ensure every detail is handled correctly from the start.
How to Cut Bricks for a Clean Finish
You’ll inevitably need to cut a brick to fit at the end of a row or around an obstacle. To avoid a jagged, unprofessional edge, using the right tool is essential. For the cleanest and most precise cuts, a wet saw or an angle grinder is your best bet. These tools are designed to slice through brick smoothly without causing it to chip or break. A clean cut not only looks better but also helps the brick fit snugly, maintaining the project’s structural integrity. Always wear your safety glasses and follow the tool’s instructions carefully to get a perfectly smooth finish every time.
Create Consistent Gaps Between Bricks
Uniformity is key to a beautiful brick surface. The gaps between your bricks, known as grout joints, should be consistent across the entire project. The easiest way to achieve this is by using spacers. We recommend using 3/8-inch spacers to create even joints that look neat and allow for the right amount of mortar. Simply place the spacers between each brick as you lay them. This simple step removes the guesswork from spacing and guarantees a balanced, symmetrical appearance. Consistent gaps also ensure the mortar properly bonds the bricks together, adding strength and stability to the entire structure. It’s a small detail that makes a massive impact.
Tackle Corners and Edges
Corners can be tricky, but a simple pro tip makes them much more manageable: start with your corner pieces first. Whether you’re building a wall or a raised garden bed, establishing the corners creates a solid framework for the rest of your installation. By setting the corners perfectly, you give yourself a clear guide to follow, ensuring your rows stay straight and level as you build them out. This approach helps you maintain clean lines and prevents alignment issues later. Getting the corners right sets the tone for the entire project and is a hallmark of quality craftsmanship in beautiful outdoor living spaces.
Plan for Expansion Joints
Here in the Denver metro area, we see a wide range of weather, from hot summer days to freezing winter nights. These temperature swings cause materials like brick and mortar to expand and contract. Without a way to manage this movement, your beautiful brickwork can crack and fail over time. That’s why planning for expansion joints is so important. These are small, intentional gaps in the masonry that allow for movement without causing damage. Proper moisture control and weatherproofing are critical for the longevity of any brick installation, and expansion joints are a key part of that system.
Apply Mortar and Finish the Joints
With your bricks laid out, it’s time for the step that truly brings it all together: applying the mortar and finishing the joints. This process is what creates the strong bonds and clean, uniform lines that define professional-quality brickwork. Getting the details right here makes all the difference in the final look and durability of your project, whether it’s a small garden wall or a full outdoor patio. It’s the difference between a project that looks good for a season and one that looks great for decades.
This stage requires a bit of patience and attention to detail, but it’s incredibly rewarding. Properly mixed mortar ensures your bricks are securely bonded, while well-finished joints protect the structure from moisture and weathering. Think of it as the finishing touch that transforms a simple stack of bricks into a beautiful, lasting feature of your home. Paying close attention to your mortar mix, application technique, and cleanup will give you a result you can be proud of for years to come. If you’re ever unsure, remember that the expert team at Faros is always ready to create stunning outdoor living spaces for you.
Mix Your Mortar to the Perfect Consistency
The secret to workable mortar is getting the right consistency from the start. You’re aiming for something that resembles thick pancake batter: smooth enough to spread but firm enough to hold its shape. A great tip is to use cold water when mixing, as this slows down the drying process. This gives you a more forgiving window to work before the mortar begins to set, which is especially helpful on warmer days in the Denver metro area when things tend to dry out quickly. Taking a few extra minutes to get the mix right will save you a lot of hassle and help you achieve a smoother, more consistent application.
Apply Mortar for a Solid Bond
To ensure every brick has a lasting hold, you’ll need to apply a thin layer of mortar to the back of each one. This technique, often called “back buttering,” guarantees complete coverage and creates a solid bond with the wall. Use a notched trowel to spread the mortar onto the wall first, then flip it to the notched side to create even ridges. These ridges help the mortar grip the brick securely, forming the foundation of strong, beautiful hardscape features. This step is crucial for preventing weak spots and ensuring your brickwork stands the test of time against the elements.
Fill and Shape the Joints
Now it’s time to fill the gaps between the bricks. Fill a grout bag about halfway with your mortar mix to keep it manageable. Start at the bottom of your project and work your way up, filling the horizontal joints first, then the vertical ones. Let the mortar set until it has the texture of firm, crumbly sand when you touch it. Once it reaches this stage, take a tool called a concave jointer and run it along the joints with steady pressure. This simple step smooths and compacts the mortar, giving you that classic, clean finish you see in professional work.
Clean Up for a Professional Look
A clean finish is the hallmark of a job well done. As you work, be sure to wipe away any excess mortar that gets on the face of the bricks. Use a stiff brush to remove it before it has a chance to dry and stain the surface. If you notice a light haze or a few stubborn spots after the joints are done, a gentle scrub with an asphalt brush can help clear it away. This final cleanup ensures your new brickwork looks sharp and polished, just like the beautiful results you can see in our project gallery.
Common Brick Installation Mistakes to Avoid
Even the most carefully planned brick project can go wrong if you fall into a few common traps. Taking your time and avoiding these frequent missteps will make a huge difference in the quality and longevity of your work. Let’s walk through what to watch out for so your project turns out just right.
Skipping Proper Surface Prep
It’s tempting to jump right into laying bricks, but a solid foundation is everything. Before you begin, make sure the surface you’re working on is strong, clean, and secure. For walls, this might mean installing a cement board or another appropriate backer. You should never apply brick over surfaces like wallpaper, glossy tile, or any wall that has moisture issues, as the mortar won’t bond correctly. A little extra time spent on surface preparation ensures your beautiful brickwork will last for years to come. Taking this step seriously prevents cracks and instability down the road.
Ignoring Temperature and Mortar Mix
The weather in the Denver metro area can be unpredictable, and it plays a huge role in how your mortar cures. Bricklaying should be avoided when temperatures dip below freezing, as this can cause frost damage and weaken the mortar before it has a chance to set properly. The ideal conditions are dry days with temperatures above 40°F. Cold weather can prevent the chemical reactions needed for the mortar to gain strength, leading to a weak bond. Always follow the mixing instructions for your specific mortar, as the right consistency is just as important as the right temperature for achieving a durable, professional finish for your outdoor living spaces.
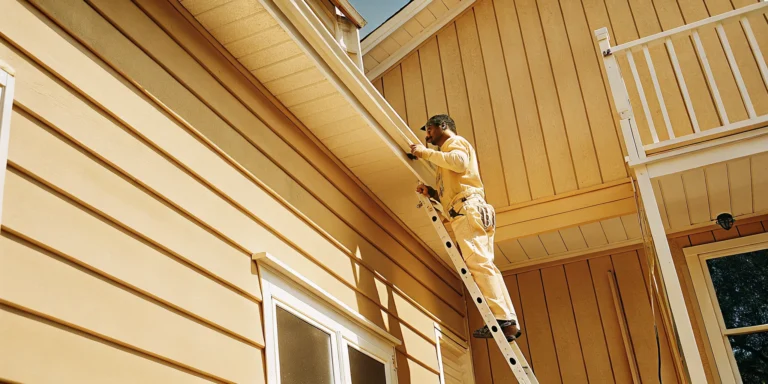
Using the Wrong Tools or Forgetting Safety
Having the right equipment is about more than just convenience; it’s about safety. Always wear Personal Protective Equipment (PPE), including safety glasses, heavy-duty gloves, and sturdy boots. If your project involves working at any height, ensure your ladders or scaffolding are completely stable and inspected before each use. Using a worn-out trowel or a cheap level can lead to sloppy work, but forgetting your safety gear can lead to serious injury. A safe worksite is an efficient worksite. Taking a few moments to put on the right gear and check your equipment is one of the smartest things you can do on any construction project.
Working in Bad Weather
Beyond just the temperature, you need to keep an eye on the forecast for rain or snow. Even a light drizzle can make your work area slippery and dangerous, creating a serious risk for slips and falls. Rain can also ruin your hard work by washing out the fresh mortar from the joints before it has a chance to cure, which severely weakens the structure. If bad weather is on the horizon, it’s best to cover your work with a waterproof tarp and wait for clearer skies. Protecting your project from the elements is critical for ensuring the mortar bonds correctly and your brickwork remains strong.
Related Articles
- How to Build a Concrete Block Retaining Wall Right
- How to Install Pavers for Beginners: Step-by-Step
- Walkway Paver Installation: The Ultimate Guide
Frequently Asked Questions
What is the single most important step for a beginner to get right? Without a doubt, it’s the preparation. This includes two key parts: ensuring your surface is perfectly clean and stable, and laying your first row of bricks with absolute precision. That first row acts as the foundation for the entire project. If it’s level and straight, everything you build on top of it will be easier to manage.
How critical is the weather in Denver for a brick project? It’s extremely important. Mortar needs to cure properly, and that process can be ruined by freezing temperatures. If you lay bricks when it’s below 40°F, the water in the mortar can freeze, expand, and create tiny cracks, which weakens the entire structure. It’s always best to work on a mild, dry day to give your project the strength it needs to last through our Colorado seasons.
My brick lines look a little uneven. How can I ensure they stay straight? The best habit to get into is checking your work constantly. After you lay every two or three bricks, place your level on top to make sure everything is still perfectly horizontal. Using a laser level can also be a huge help, as it gives you a constant straight line to follow across the entire wall. A little correction as you go is much easier than fixing a crooked wall later.
Do I really need a special saw to cut bricks? For a clean, professional-looking finish, yes. While you can try to break bricks with a hammer and chisel, you often get a rough, jagged edge. Using a wet saw or an angle grinder with a masonry blade gives you a precise, smooth cut every time. This makes a huge difference in how your corners, edges, and final pieces fit together.
What’s the secret to getting those clean, professional-looking mortar joints? The secret is all in the timing and the right tool. After you fill the joints with mortar, you need to wait for it to set just enough so it’s firm to the touch, like crumbly sand. At that point, you can take a tool called a concave jointer and press it firmly as you run it along the joint. This compacts the mortar and creates that classic, smooth, and indented look.