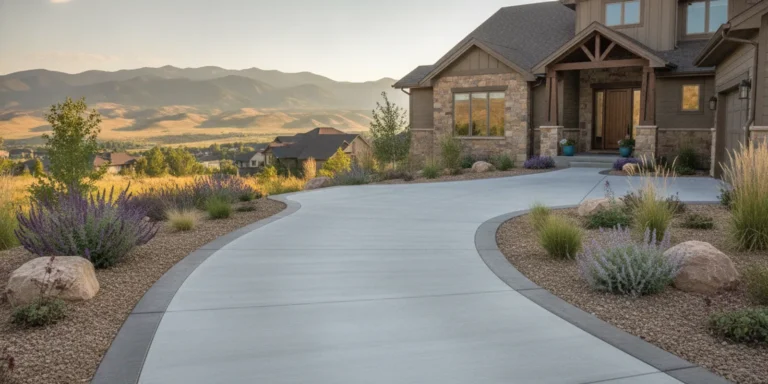

Concrete landscape edging maintenance Denver homeowners plan through the seasons can help keep garden beds defined and reveal small issues before they spread. In the Denver Metro Area, sun, changing moisture, winter freezing, and spring runoff make regular observation more useful than waiting for a visible failure.
Discuss your landscape edging project
How does concrete landscape edging maintenance Denver begin?
Begin with a slow visual inspection along the full run, then check how water, soil, and nearby plants interact with the edge. A few notes and photos from the same viewing points each season can help distinguish a new change from a longstanding surface mark.
Walk both sides of the edging, including corners, joints, transitions, and areas near downspouts or slopes. Look for sections that lean, lift, sink, separate, or appear newly cracked. Note whether a gap is narrow and stable or widening, and whether nearby soil has washed away. Do not assume every hairline mark means the edging needs replacement; its direction, change over time, and effect on alignment matter.
Check the top edge for chipped corners and uneven height. A line that used to sit just above the surrounding soil may now be buried, while another section may be exposed after runoff removes soil. Also look for roots pressing against the concrete, mower or trimmer marks, and hardscape elements that have shifted toward the edging.
Record the date, recent weather, and location of anything that seems different. Take a wide photo showing the bed and a closer image of the affected section. This simple record is useful when tracking gradual movement and when explaining a concern to a contractor. For an overview of related work, see Faros’s concrete services and hardscaping services.
Make the inspection consistent. Start at one end and move in the same direction each time. Divide a long border into sections, such as the entry bed, side yard, and patio edge, and mark them on a simple sketch. At each section, ask the same questions: Is the top line level with its previous position? Is the soil flush with the edge or newly missing? Is there a gap at a joint? Has water or plant growth changed since the last check? A repeatable route makes small changes easier to recognize than an occasional glance from across the yard.
Separate a surface mark from a movement concern. A chipped corner can be visible without changing the line of the border. By contrast, a new step between adjoining sections, a gap that is becoming wider, or soil disappearing beneath an edge suggests that more than appearance may be involved. Photograph the feature beside a fixed reference point, such as a walkway corner, and avoid scraping or filling it before you have recorded its condition.
How can drainage protect concrete landscape edging?
Water should move away without pooling against the edging or carrying soil out from beneath it. Check the bed after rain or snowmelt to see where water travels, where it slows, and whether runoff leaves a channel or sediment trail.
Observe the ground on both sides. A low spot may collect water beside the concrete, while a concentrated flow from a downspout can scour soil at one point. Look for muddy deposits, exposed roots, washed-out mulch, and small rills that point toward or away from an edge. These are clues about how water is moving, not proof of a structural problem by themselves.
Keep soil and mulch from forming a dam against the concrete. A thick layer piled above the top can hide cracks and allow wet material to remain in contact with the edge. Pull it back enough to see the concrete clearly, while keeping the bed planting intact. Avoid digging abruptly beside the edging, because removing supporting soil can make an already loose section less stable.
If water repeatedly pools, first identify its source. Check whether a downspout outlet, irrigation head, or sloped area is sending water toward the bed. Adjusting a sprinkler pattern may resolve a localized wet patch; broader grading or drainage changes need a coordinated plan so runoff is not simply redirected to another part of the property. Faros’s guide to planning concrete drainage offers additional context about observing water flow around hard surfaces.
Do not seal a drainage issue behind a quick surface patch. If water keeps removing soil, the underlying flow needs attention before the edge can be expected to stay in place. For wider yard planning, explore the company’s backyard renovation planning guide and outdoor living services.
A practical water check has three parts. First, note the weather and whether the ground was already wet before the event. Second, follow the visible route from its source toward the edging, including any roof outlet, paved surface, or sprinkler spray. Third, look for what remains afterward: a shallow pool, damp soil, a fresh sediment fan, or a small channel. Repeat the check after a different rain or watering cycle. This helps you tell a one-time splash from a recurring pattern that deserves attention.
When inspecting irrigation, run each nearby zone briefly and watch the spray rather than relying on the controller setting. A head aimed at the concrete may keep one spot wet even when the rest of the bed drains normally. Adjusting the direction or replacing a damaged head can address that direct source. If the water instead arrives from a broad slope or continues to gather after irrigation is off, do not assume a sprinkler adjustment will solve it. Document where water enters and where it exits so any broader landscape plan accounts for the whole flow path.
Talk with Faros about your concrete and landscape plans
What should you do about weeds and soil along the edge?
Remove small weeds carefully and keep the soil line visible, but avoid pulling forcefully where roots emerge through a crack or joint. The goal is to control growth without widening an opening or loosening soil that supports the edging.
For isolated weeds, hand-pull when the soil is slightly damp and remove as much of the root as practical. Use a narrow hand tool with care, directing it away from the concrete. Do not drive a metal blade down between the edge and soil, and do not strike the concrete with a hoe or power tool. Repeated impacts can chip the surface, while aggressive digging can create a void along the side.
Keep turf from creeping over the top. Trim along the edge with controlled strokes and hold the equipment so the line does not become a repeated impact point. Where grass has grown into a bed, remove it in small sections rather than levering large mats against the concrete. Replenish displaced soil gently, without packing wet material hard against the edge.
Mulch can reduce unwanted growth, but it should not conceal the concrete or be heaped high enough to spill across it. Keep a visible strip of the edge so inspections remain possible. Choose plant placement with mature size in mind; woody stems and expanding roots can press against a narrow border as the planting matures. For beds with retaining features or changes in grade, review retaining wall ideas for Denver landscapes and common retaining wall materials as separate planning considerations.
Before removing established plants or roots near a settled section, pause and consider what they may be holding in place. Pulling a large root mass can disturb the soil or expose a void. Instead, clear loose growth from the surface, take a photo, and note whether the plant is directly against the concrete or simply overhanging it. For recurring weeds in the same joint, check whether the opening is changing. Routine growth can be handled carefully, while a gap that is widening or collecting soil and water is a reason to assess the edging itself.
Use a string trimmer with enough distance to avoid repeatedly striking the top or face. If the border is narrow, a hand tool or careful hand trimming may offer better control. After mowing, scan for fresh chips or scuffs, especially at corners and transitions where equipment is more likely to make contact. Keeping tools, mulch, and soil from obscuring the edge also makes the next seasonal inspection quicker.
How do settlement and freeze-thaw changes show up?
Settlement often appears as a localized low, tilt, gap, or change in how adjoining sections meet. Freeze-thaw weather can contribute to movement when moisture is present, but a single inspection cannot establish the cause; track the change and look for related drainage or soil shifts.
Compare the edging with stable reference points such as a walkway, patio, or the line of the bed. A sudden step at a joint, a section that rocks, or a gap that grows after wet or cold periods deserves closer attention. Check for soil loss below the edge and for water collecting at the low side. These observations help separate a surface blemish from a section that no longer sits evenly.
Denver Metro Area weather can move from warm, sunny conditions to snow and freezing temperatures over the course of a season. Moisture that enters small openings may freeze, expand, and contribute to gradual change. This does not mean every crack will worsen, nor does it identify the cause of a particular defect. Use the National Weather Service forecast to plan inspections around current local conditions, and inspect again after major freeze-thaw periods or spring runoff.
During cold months, avoid using sharp metal tools to chip ice from the edge. Do not use heavy equipment or repeated impacts to clear snow right against the concrete. When conditions permit, remove leaves and debris that trap moisture at joints, and keep downspout outlets from discharging directly onto a vulnerable section.
A small, stable crack with no shift may be observed and documented. A widening opening, a section that has lifted or sunk, or recurring loss of soil should not be dismissed as seasonal appearance alone. Avoid filling a moving gap before understanding why it is changing; a surface treatment may hide the evidence while leaving the movement untouched.
After a freeze-thaw period, look at the whole border rather than focusing only on the crack that first caught your eye. Compare corners, joints, and the transitions where edging meets a walk or patio. If a section has changed, check whether the soil beside it is firm, washed out, or unusually wet. A change that appears in multiple areas may point to a broader site condition, while an isolated shift may be limited to one spot. These clues help frame the next step but do not replace an on-site assessment when movement continues.
Use safe timing for winter checks. Do not step onto icy slopes or kneel beside an unstable edge just to get a closer photograph. Wait until the ground is safe, then clear only loose leaves and debris by hand. Avoid heavy shoveling directly against the concrete and keep snow storage from repeatedly loading one small section. A dated photo taken after conditions improve can still be compared with earlier records.
Which seasonal checks make upkeep easier?
A short inspection at seasonal transitions helps you notice changes while conditions and recent weather are easy to remember. Use the same route and record a few consistent details rather than trying to inspect every surface feature in depth each time.
| Season or timing | What to inspect | Practical response |
|---|---|---|
| Early spring | Low areas, washed-out soil, new gaps, and sections that shifted after winter | Photograph changes, clear loose debris, and trace runoff before making repairs |
| Late spring and summer | Weeds, irrigation overspray, root pressure, and mower contact | Hand-pull small weeds, adjust obvious sprinkler overspray, and trim with care |
| Early fall | Drainage paths, exposed soil, mulch depth, and visible cracks | Keep the edge visible and address persistent water flow before winter |
| Winter or after a freeze-thaw period | New separation, lifting, rocking, and ice or debris accumulation | Avoid impacts and sharp ice removal; document changes when safe to inspect |
Use the table as a repeatable checklist, not a rigid schedule. A bed beneath a downspout may need attention after a heavy storm, while a sheltered border might show little change for months. The important habit is to revisit the same sections and note when a condition first appeared.
For a useful record, divide a long border into manageable sections, such as the front bed, side yard, and patio edge. Give each area a simple label in your notes and photograph it from a consistent angle. Record whether the concrete looks level, whether the soil line has changed, and whether water was present during the check. If you see a crack, note whether it crosses the top, follows an edge, or appears at a joint. These details make later comparisons more reliable than a general note that the edging looks different.
Also note nearby work or changes that could affect the area. New planting, a relocated sprinkler, a downspout adjustment, excavation for another project, or a shifted walkway can change soil and water conditions. Recording the timing does not prove a cause, but it gives you and a contractor useful context. If the same spot looks stable through several checks, keep the record and continue routine observation rather than disturbing the section without a reason.
When watering, observe whether spray reaches the concrete for long periods or leaves a puddle at its base. Redirecting a sprinkler head can help with overspray, but do not reduce needed irrigation to conceal a drainage problem. If water still gathers after the source is corrected, look for a low spot or a broader grading concern.
Keep notes factual and brief. For example: “North patio corner, photo taken after overnight rain, shallow water at the low end, soil still in place.” That is more useful than guessing that the concrete has failed. On a later visit, repeat the same observation and compare the images. If the puddle disappears when the downspout is redirected, note that change too. A record of what was observed and what was adjusted helps prevent repeating steps that did not address the condition.
Seasonal care can also be combined with ordinary yard tasks. During spring bed cleanup, uncover the visible edge and look for soil loss. During summer mowing, check for fresh contact marks. In fall, remove leaves that collect at joints and make sure mulch has not been piled over the top. After winter weather, wait for safe conditions and check for new gaps or changes in height. Short, timely checks are easier to maintain than a single long inspection after a problem has become obvious.
When is professional concrete landscape edging maintenance Denver appropriate?
Ask a qualified professional to assess the edging when it moves, loses support, repeatedly washes out, or connects to a larger drainage or hardscape issue. A review is also sensible when the condition is changing and its cause is unclear, or when repairs could affect adjacent concrete, walls, or planting beds.
Useful signs to discuss include a section that rocks under light contact, a sharp height difference between connected sections, an opening that continues to widen, or soil repeatedly disappearing from underneath. Mention whether the issue appeared after a storm, irrigation change, nearby digging, or winter weather. Share dated photos and explain what has already been tried.
Before work begins, ask what the proposed repair addresses, whether the source of movement or water has been identified, and how adjoining surfaces and plants will be protected. Ask how the finished edge will meet existing paths, patios, or retaining features. A clear explanation should distinguish visible surface repair from work that addresses support, alignment, or drainage.
It is helpful to describe the result you need from the border. For example, the edging may need to keep lawn from spreading into a bed, hold a clear line beside a path, or coordinate with a change in grade. Explain which sections concern you most and whether the issue affects access, mowing, or water flow. That practical context allows the discussion to focus on function as well as appearance.
Ask how site conditions will be checked before a repair is selected. Soil that has washed away, roots pressing against a section, and water repeatedly collecting in one location call for different considerations. Also clarify how the work area will be left when complete, including any disturbed soil or plants. Do not proceed on the assumption that every visible gap needs the same treatment; the condition of the surrounding area should inform the plan.
Edging may be part of a larger landscape plan rather than a standalone repair. If a change in grade, walkway, or patio affects the same area, coordinate those elements so work on one does not undermine another. The Faros construction services overview describes the company’s residential and outdoor work, and its Denver retaining wall planning guide may help when a sloped bed borders a wall.
For an initial conversation, organize the information in a simple order: where the section is, what changed, when you first noticed it, and what happens to water nearby. Point out whether the condition affects a path, planting bed, lawn edge, or adjacent structure. Share photographs from more than one date if you have them. This gives a contractor a clearer starting point than a general request to “fix the edging,” and it helps keep attention on the site condition rather than a guess about the cause.
Ask what is included in the recommended work and what remains outside its scope. If the border meets a patio, retaining feature, or walkway, clarify how those neighboring elements will be protected and how the repaired section will transition into them. Confirm how the work area will be accessed and whether plants or irrigation components need to be moved. The answers should help you understand the sequence and the intended result before work begins.
Ask Faros about an edging or landscape project
Frequently asked questions
These answers cover common upkeep questions, but movement or repeated water problems should be judged in the context of the full site.
How often should concrete landscape edging be inspected?
Inspect it at least during seasonal transitions and after noticeable runoff or freeze-thaw periods. Check more often if a downspout, sprinkler, or sloped area sends water near the edge.
Should I fill a crack as soon as I see it?
Not automatically. First note its location, width, and whether the adjoining concrete is level and stable. A crack that is widening, accompanied by movement, or linked to soil loss should be assessed before a surface repair hides the change.
Can weeds damage concrete landscape edging?
Weeds can make inspection difficult, and established roots may add pressure around an existing opening. Remove small growth carefully, avoid levering against the concrete, and keep the soil line visible so changes are easier to spot.
What should I do if water pools beside the edging?
Look for the source, such as sprinkler overspray, a downspout outlet, or a low area in the bed. Correct a clear source when appropriate, then observe the area again; recurring pooling or soil washout may call for a broader drainage assessment.
Can I repair a settled section myself?
Minor cleanup and careful observation are reasonable homeowner tasks, but a rocking, lifted, or sunken section may have a support or drainage issue that surface filling will not solve. A professional assessment is appropriate when movement continues or adjacent features are affected.
Author: Ricardo Alfaro
Plan a concrete landscape edging assessment
Consistent observation, careful weed control, and attention to water movement make it easier to spot changes in concrete landscape edging and choose a sensible next step for your property.