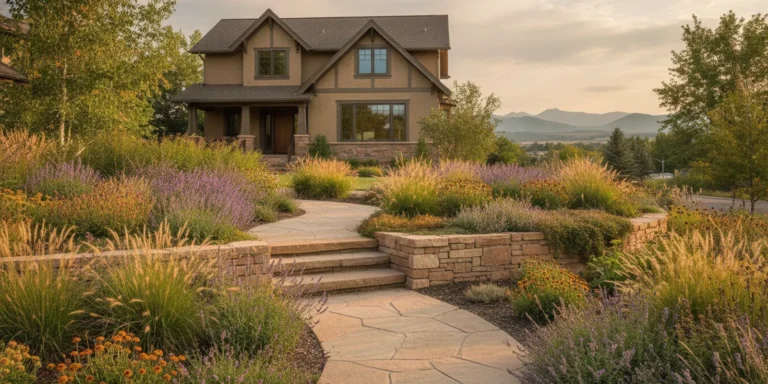

A successful landscape contractor Lakewood CO project starts with the ground itself: where water moves, how slopes meet the home, and how people will use the yard. When grading, drainage, retaining features, planting, and irrigation are planned together, the finished landscape is more comfortable to use and easier to maintain.
Talk with Faros about your landscape project
For homeowners in the Denver Metro Area, the most useful first step is to look at the whole property rather than selecting plants or patio materials in isolation. A path, wall, planting bed, and lawn each affect the others. This guide walks through the questions to settle early, a practical order for the work, and ways to coordinate details before construction starts. Faros Construction Services provides hardscape and landscape contracting, alongside related outdoor construction. See the hardscape and landscape contracting information for an overview of that work.
What should a landscape contractor Lakewood CO plan address first?
Begin with the property’s existing conditions and the way you want to use it. A useful plan connects elevations, water movement, access, outdoor activities, and planting needs before settling on individual finishes.
Walk the yard after a rain if possible, and note low spots, water paths, slippery areas, and places where soil washes away. Record where runoff comes from, where it appears to go, and whether it collects near the house, walks, or neighboring edges. Do not assume a dry-weather visit tells the whole story. Also note sunny and shaded areas, exposed corners, existing trees, utility locations, doors, and the routes people already take across the property.
Then make a short list of priorities. A family that wants a level place for a table may need a different layout from someone focused on a garden, a fire feature, or an easier route between the back door and a side gate. Rank the functions so the plan can reserve space for the most important ones first. For broader ideas on bringing separate outdoor features together, review outdoor living space planning.
- Mark the home’s doors, windows, steps, and frequently used entrances.
- Identify slopes, visibly eroded areas, standing water, and existing retaining features.
- Note trees and established plants you hope to keep, along with areas that need clear access.
- List the activities the yard should support, such as dining, gardening, play, or quiet seating.
- Set priorities for privacy, shade, low-maintenance planting, and circulation.
This first review helps reveal conflicts. For instance, a proposed patio may occupy a natural drainage route, or a new wall may narrow the path needed to reach a garden. A site plan can account for these relationships before materials and details are chosen.
How should grading and drainage work together?
Grading shapes the ground, while drainage provides a planned route for water. They should be considered as one system so runoff does not create new trouble at the home, on a path, or at a neighboring property.
Start by understanding existing slopes and the direction water naturally travels. The finished plan should direct surface water away from structures and toward an appropriate outlet, while respecting property lines and local requirements. The exact approach depends on the site. It may involve reshaping soil, directing water across a planted area, or integrating drainage components with hardscape. A contractor should explain how water will move after the work, not simply describe where a low spot will be filled.
Pay special attention to transitions. The area beside a foundation, a patio edge, a stair landing, and the bottom of a slope can each collect runoff if the elevations do not connect cleanly. A small change in height can affect door clearance, step count, or where water flows. Drainage should be considered before setting patio elevations and retaining-wall locations, not added as an afterthought.
Ask the project team to identify the intended water path on a site plan or during a walk-through. Useful questions include: Where does roof runoff go? What happens during a heavy rain? Will water cross a walkway? How will the plan handle soil around the house after construction? What maintenance will any drainage components need? Clear answers make it easier to understand the landscape as a working system.
Do not direct runoff toward a neighbor or assume that a drain can discharge anywhere. Local rules and site conditions may affect the solution. If the project touches public drainage, utilities, or a complex slope, ask which reviews or qualified professionals are needed before work begins.
A simple site walk can make this conversation more concrete. Point out where water appears during a storm, where snow tends to accumulate, and any spots that remain wet after nearby areas dry. Note whether a downspout currently releases near a path or planting bed. Share these observations rather than prescribing a fix: the contractor can assess the conditions and explain which options suit the property. If you are unsure whether a change is permitted, confirm the relevant local requirements before directing water or altering a grade.
When does a retaining feature belong in the plan?
A retaining feature can help manage a change in elevation, define a usable area, or create a transition between parts of a yard. Its placement and construction need to work with the slope, soil, drainage, and intended use.
First ask whether the grade change needs a wall at all. A gentler slope, terraced planting, or a different patio location may suit some properties. Where a wall is appropriate, consider how it will connect to stairs, paths, planting beds, fences, and nearby structures. The top and bottom of the feature should feel intentional, with enough room for access and maintenance.
Water management behind and around a retaining feature matters. Water held in soil can place pressure on a wall, while runoff over the top can erode the surface below. The design should explain how water is collected or directed, what material supports the area, and how the wall meets the existing grade. Larger or more complex walls may have permitting, engineering, or other local review requirements. Confirm these before construction rather than treating them as a final detail.
Material selection should suit the project’s appearance and conditions. Concrete, segmental units, and natural stone can each create a different visual character, but the material alone does not determine performance. The base, drainage, wall geometry, and installation details all matter. Explore retaining wall planning considerations and retaining wall design ideas as you define the role of a wall in the wider landscape.
A good plan also considers the view from the house and the yard. A wall that solves a grade change can become a visual edge, a seat-height boundary, or a backdrop for planting. These uses should be planned without compromising safe access or obscuring drainage and maintenance needs.
Before approving a wall location, consider how people will reach both sides for upkeep. A narrow strip between the wall and a fence may be difficult to maintain. Planting too close to the top can complicate access or affect the intended use of the upper area. At the bottom, leave room for water to move as designed and for the surface to meet the wall neatly. These small layout questions are easier to resolve on paper than after construction.
Review your outdoor layout with Faros
How can planting fit the site’s conditions?
Plant selection should respond to the actual site, not just a general regional label. Sun, shade, wind exposure, soil, slope, available water, and the mature size of plants all affect whether a planting plan will thrive.
Observe the yard over the course of a day. A spot that appears sunny in the morning may be shaded later by the house or mature trees. Exposed corners can dry quickly, while sheltered areas may hold moisture. Check whether the planting area is level, sloped, or affected by runoff. These details help determine where plants belong and how beds should be shaped.
In the Denver Metro Area, the broad USDA hardiness designation is Zone 6a, with an approximate minimum-temperature range of -10°F to -5°F. Some colder, elevated, or exposed microclimates can behave more like Zone 5b. A hardiness zone is one planning reference, not a guarantee for an individual site. Match plant choices to the specific exposure and conditions, and check reliable local guidance for plants that need extra protection.
Think about mature size before planting close to a walkway, patio, wall, window, or utility. Leave room for roots and branches to develop, and avoid placing plants where routine pruning will be difficult. Layering low, medium, and taller plants can create depth, while repeated forms and colors help the garden feel connected. On a slope, planting can also help cover soil, but it should support rather than replace a suitable erosion and drainage plan.
For each bed, note the purpose of the planting: shade, screening, seasonal interest, habitat, or a soft edge beside hardscape. Group plants with similar water and sun needs where practical. A plan that groups compatible plants can make irrigation more manageable and reduces the temptation to water every part of the yard the same way. For a simple entrance or outdoor transition, see these porch design ideas and consider how nearby planting frames the route.
How should irrigation be coordinated with planting and hardscape?
Irrigation should match the planting layout and be coordinated with patios, walls, paths, and utility routes before the final surfaces are installed. Planning these elements together helps avoid blocked coverage, inconvenient repairs, and unnecessary watering.
Begin by identifying which areas need regular watering and which plants can share a watering zone. A sunny bed, shaded border, lawn, and container area may have different needs. The layout should account for plant type and exposure rather than treating the entire yard as one uniform space. Ask how the system will be adjusted as plants establish and as seasonal conditions change.
Map irrigation lines and controls in relation to walls, steps, patio edges, and future planting. Where a line crosses a hardscape area, plan the route and access before the surface is built. Keep components accessible for inspection and service. Sprinkler coverage should avoid unnecessarily wetting walls, windows, and frequently used walking surfaces. Drip systems may suit some beds, but their fit depends on plant selection and the site plan.
Discuss water management as a connected topic. Irrigation should not create persistent wet spots near structures or send runoff across a walkway. A thoughtful plan also identifies who will operate and maintain the system, how to adjust it, and what to check after installation. If the yard has significant changes in elevation, ask how the irrigation layout accounts for those differences.
Planting and irrigation are easier to coordinate when the bed plan is settled early. If plants are moved after lines are installed, coverage may no longer match the intended layout. Likewise, a wall or new patio can change where water flows and where equipment can be reached. Keep the latest site plan available to the people responsible for each part of the work.
Plan for establishment as well as the mature landscape. Newly installed plants may need closer attention while roots settle in, while established plants can have different seasonal needs. Ask for care guidance that covers watering, pruning, and any protection needed for the chosen varieties. Clarify which tasks are part of the project handoff and which are ongoing homeowner responsibilities. A realistic care plan makes it easier to maintain the intended look and helps reveal whether the proposed planting level suits the time you can give it.
What is a practical sequence for a coordinated landscape project?
A clear sequence moves from site assessment and design to approvals, ground work, hardscape installation, planting, and final review. The order can vary, but decisions about elevation, drainage, and built features should be settled before finish planting begins.
- Assess the site and priorities. Record existing slopes, water paths, access points, utilities, sunlight, and features to preserve. Agree on the main ways the space should function.
- Develop an integrated layout. Locate patios, walls, steps, paths, planting beds, and irrigation routes on one coordinated plan. Check how each element affects the others.
- Confirm approvals and responsibilities. Ask what permits, utility checks, or specialist reviews apply. Clarify who will coordinate each trade and what decisions must be made before work starts.
- Complete site preparation and grading. Protect features that will remain, establish planned elevations, and prepare the site for the drainage and hardscape work.
- Install drainage and structural features. Coordinate drainage routes with retaining work, steps, and other built elements. Check key transitions before covering them.
- Build hardscape and set access routes. Install the planned patio, paths, and stairs with attention to grade, drainage, and connection to the house.
- Install irrigation and planting. Coordinate lines with the finished layout, then plant in the prepared beds and protect new plants during remaining work.
- Review the completed site. Walk the routes, observe water movement where practical, check controls and access, and confirm care instructions for new materials and plants.
This order limits avoidable conflicts, but it is not a universal construction schedule. Weather, approvals, access, site conditions, and the scope of work can change the sequence. Ask the contractor to identify dependencies, explain which decisions need approval early, and describe how the site will be protected between phases.
For example, a patio adjacent to a retaining wall may require both features to be laid out together so the finished elevations align. Irrigation routes may need to be installed before a walkway is closed in. Planting may be delayed until heavier equipment is no longer moving through the beds. A written sequence gives everyone a shared reference and makes changes easier to discuss.
Discuss your Lakewood landscape plan
How can homeowners compare landscape project approaches?
Compare proposals by looking at what each approach includes, how it handles site conditions, and how the parts fit together. A clear scope helps distinguish a coordinated plan from a list of unrelated installations.
| Planning approach | What it addresses | Best suited to | Questions to ask |
|---|---|---|---|
| Grading and drainage first | Elevation changes, water paths, and surface transitions | Yards with pooling, erosion, or noticeable slopes | Where will runoff go, and how will the plan protect structures and access? |
| Hardscape-led layout | Patios, retaining features, steps, and routes through the yard | Projects where outdoor use and grade changes drive the design | How do wall, patio, and path elevations work together? |
| Planting-led refresh | Garden beds, plant selection, and irrigation needs | Sites with stable grades and limited changes to built features | Do plant choices match sun, soil, exposure, and water needs? |
| Integrated landscape plan | Grading, drainage, hardscape, planting, and irrigation coordination | Projects that combine several outdoor elements or phases | Who coordinates each phase, and what decisions must be settled first? |
When reviewing a proposal, look for clear descriptions of site preparation, intended elevations, drainage, materials, planting scope, irrigation coordination, and project responsibilities. Ask what is included, what requires a separate decision, and how unexpected site conditions will be discussed. Make sure the plan identifies relevant approvals and any work that needs a specialist review.
It can also help to look for examples of related work and ask how the contractor approaches communication, site protection, and the final walk-through. Faros describes an owner-led construction process and a range of residential outdoor services. You can review Faros construction services, learn about decks, pergolas, and porches, or explore stone patio planning for related outdoor elements.
A local directory can be one starting point for identifying landscape contractors, but a listing alone does not establish whether a firm suits a particular project. The Better Business Bureau’s Lakewood landscape contractor directory provides a local directory; homeowners should still review each firm’s qualifications, scope, references, and project approach directly.
Frequently asked questions
These answers cover common planning questions for landscape projects in Lakewood and the Denver Metro Area. The right details depend on the property, project scope, and applicable local requirements.
Should drainage be planned before a patio is installed?
Yes. Establish elevations and water routes before installing a patio, since the finished surface can change how runoff moves. Confirm how the patio connects to the house, paths, planting beds, and any existing drainage features.
Does every sloped yard need a retaining wall?
No. Depending on the grade and intended use, a slope may work with reshaping, terraced planting, or another layout. A qualified review can help determine whether a wall is suitable and what drainage or approval requirements apply.
When should irrigation be laid out?
Plan irrigation alongside the planting beds and hardscape layout, before finished surfaces restrict access to routes. The system should reflect the different water needs and exposures of the plants, with controls and components that remain accessible.
What information should I gather before contacting a contractor?
Write down your goals, areas of concern, features to keep, and any known drainage or access issues. Photos of the yard and a rough sketch can help explain how you use the space. A site assessment can then clarify the conditions and decisions that need further review.
How can I check whether a landscape contractor is a fit?
Ask about relevant experience, project scope, approvals, coordination, communication, and how the completed work will be reviewed. Request clear written details and verify any qualifications or references that matter for the work being considered.
Author: Ricardo Alfaro
Plan your Lakewood outdoor project with Faros
When grading, water movement, built features, planting, and irrigation are considered together, homeowners can make informed decisions about a landscape that fits the site and how they want to use it. Ricardo Alfaro and the Faros Construction Services team serve homeowners across the Denver Metro Area.